CentOS 8.4 Released – What’s New In It?

CentOS 8.4 is Out

So, here’s the CentOS 8.4! After the commencement of CentOS in the year 2008, people have enjoyed the service amazingly. On June 3, 2021, CentOS version 8.4 got released to preserve the awesomeness it is been reputed for many years. Now, we have got the latest version of the CentOS 8 in our hands.

So, the people using CentOS 8.4 are all awarded with stability, efficiency as well as reliability. In this article, we will go into details that are imparted into CentOS 8.4.

Fresh and new features of CentOS 8.4:

1. Your desktop background:

  • The GUI version of CentOS 8’S GNOME Shell rebased to version 3.28.
  • The GNOME session, as well as the GNOME display manager, use the Wayland like the default display server.

Wayland has the following features:

  • Stronger security model
  • Improved multi-monitor handling
  • Improved user interface (UI) scaling
  • The desktop controlling the window handling directly.

2. The networking arena:

The networking part of the CentOS 8.4 has been spruced with the following changes:

  • CentOS is now distributed with the TCP networking stack version 4.16, which provides higher performances, better scalability as well as more stability.
  • The networking stack is being upgraded to upstream version 4.18.
  • Iptables is now replaced with the nftables framework due to the default network packet filtering facility.
  • The nftables framework is the designated successor to the iptablesip6tables, ebtables as well as arptables tools. It also provides a single framework for both IPv4 as well as IPV6 protocols.
  • The firewall daemon now uses the nftables because of its default backend.
  • It supports IPVLAN virtual network drivers which enable the network connectivity for multiple containers.
  • NetworkManager supports the single root I/O virtualization (SR-IOV). NetworkManager allows configuring some attributes of the VFs like MAC address, VLAN, spoof checking settings, and allowing bitrates.

3. Software Management:

The YUM package manager is based on the DNF technology and provides support for the modular content, increased performance, and also a well-designed stable API for the integration with tooling. Installing the software is ensured by the new version of the YUM tool, which is based on the DNF technology (YUM v4). The previous version i.e. CentOS 7 used YUM v3 and mentioned enhancements had been made on YUM v4:

  • Increased performance
  • Support for the modular content
  • Well-designed stable API for the integration with tooling.

YUM v4 has compatibility with YUM v3 when using from the command line, editing, or creating configuration files. Because of this, you can use the yum command and its specific options in the same way as you use on CentOS 8. Another thing is that CentOS 8.4 is distributed with RPM 4.14 which is actually different from RPM 4.11 along with much more enhancements.

Some of the most notable features of RPM 4.14 includes:

  • Debuginfo packages installation in parallel.
  • Support for the weak dependencies.
  • Support for the rich or boolean dependencies.
  • Support for the packaging files which are above 4 GB in size.
  • Support for the file triggers.

Other most notable changes are:

  • Stricter spec parser
  • A simplified signature that checks the output in non-verbose mode
  • Additions and subtractions in macros.

4. Languages, web servers, and databases:

You will have the programming languages in your new Cent OS 8.4 such as:

  • Python 3.6 and its limited support for Python 2.7. None of the versions of Python is installed by default.
  • Dynamic programming languages such as new Node.js, PHP 7.2, Ruby 2.5, Perl 5.26, SWIG 3.0 are available.
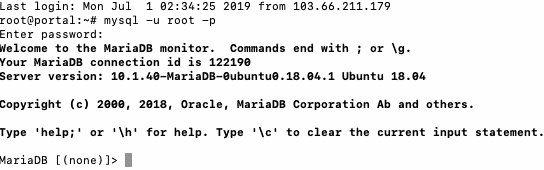
  • The database servers are distributed with CentOS/ RHEL 8.4 such as Maria DB 10.3, MySQL 8.0, Postgre SQL 10, Postgre SQL 9.6 and Redis 5.
  • The web servers such as Apache HTTP server 2.4 and the Nginx 1.14. The squid has also been updated to version 4.4 and also a new proxy caching server such as Varnish Cache 6.0 is included.

5. Virtualization:

Now, you need to encounter the following changes if we concern about virtualization.

  • CentOS 8.4 is now distributed with qemu-kvm 2.12 with – Q35 guest machine types support, UEFI guest boot support, vCPU hot plug and hot unplug, NUMA tuning and pinning in the guest as well as guest I/0 threading.
  • The SEV (Secure Encrypted Virtualization) feature for the AMD EPYC host machines that use KVM hypervisor.
  • The EMU emulator introducing the sandboxing feature. The QEMU sandboxing provides configurable limitations to make the virtual machines much more secure.
  • The KVM virtualization supports the user-mode instruction prevention (UMIP) feature that can help in preventing the user-space applications from accessing the system-wide settings.
  • The KVM virtualization also supports the 5-level paging feature that increases the physical and virtual address space which the host and guest systems can use.
  • NVIDIA vGPU is also now compatible with the VNC console.
  • Ceph storage is also supported by the KVM virtualization on many CPU architectures that are supported by Red Hat.
  • Q35, a modern PCI Express-based machine type is also supported by RHEL 8.4 virtualization. The entire virtual machines created in RHEL 8.4 are set to use Q35 PC machine type by default.
  • The nested virtualization is available on IBM Power 9.
  • The KVM virtualization is also used in CentOS 8.4 Hyper-V virtual machines.

6. Installation and Image creation:

CentOS 8.4 uses the Anaconda installer that supports the LUKS2 disk encryption format. The LUKS2 disk encryption format provides better features, let us have an instance, as it extends the capabilities of the on-disk format and gives flexible ways of storing metadata. Additionally, Anaconda has been extended to handle the features related to application streams. It includes modules, streams as well as profiles. The kickstart scripts can now enable the module and stream combinations, install the module profiles as well as install the modular packages.

7. Security Details:

In CentOS 8.4, now the tighter security features have been added to the brand new release as following:

  • CentOS supports Open SSL 1.1.1 and TLS 1.3. It also enables you to secure customer’s data with the latest standards for crypto protection.
  • CentOS comes with system-wise cryptographic policies that help you with cryptographic compliance management. You don’t need to modify and tune the specific applications.
  • Open SSH has been rebased to the 7.8p 1 version having no support for SSH version 1 protocol, Blowfish/CAST/RC4 ciphers, hmac-ripemd160 message authentication code.

8. Kernel and OS:

  • CentOS 8.4 is also based on Fedora 28 and upstream Kernel 4.18. Let us know what is available on this Kernel:
  • ARM 52-bit physical addressing 64-bit ARM architectures. So, this provides a larger address space compared to the prior 48-bit physical addressing.
  • The I/O memory management unit (IOMMU) code in the Linux kernel has been updated for supporting the 5-level page tables.
  • Spectre V2 mitigation default changed from IBRS to Retpolines. For the use cases, where complete Spectre V2 mitigation is desired.

9. Supported CPU architects:

  • So, the supported CPU architects are:
  • AMD and Intel 64-bit architectures.
  • The 64-bit ARM architecture.
  • IBM power systems
  • IBM Z

10. Infrastructure services:

Now, the CUPS logs are handled by journald. Earlier, in CentOS 7, the CUPS logs were stored in the particular files within /var/log/cups directory. This is now has changed in CentOS 8 as all types of CUPS logs are centrally logged in the systemjmd journald daemon together along with logs from the other programs. You just need to use journalctl -u cups to access them.

11. New BIND features:

The BIND features include:

    • So, the new quotas have been added here to limit the queries which are sent by recursive resolvers to the authoritative servers that experience the denial of service attacks.
    • The nslookup utility looks up both IPv6 as well as IPv4 addresses by default.
    • The named service checks whether other name server processes are running before any startup.
    • On loading a signed zone, it checks whether a Resource Record Signature’s (RSIG) inception time is in the future and if it is so, it regenerates the RRSIG on an immediate basis.
    • The zone transfers use smaller message sizes to improve message compression, which also reduces network usage.
    • A new method has been added which is of provisioning secondary servers that are known as Catalog zones.
    • The domain name system cookies are also now sent by the named service as well as the dig utility.
    • The Response Rate Limiting feature can also help with the mitigation of DNS amplification attacks.
    • The performance of the response policy zone (RPZ) has also been enhanced.

12. Cockpit web console:

The Cockpit has become a part of Red Hat Enterprise Linux default repositories. You will even get your web console installed automatically in the GUI version of CentOS 8.4 released. You would feel no more hassle as the firewall ports needed by the console are automatically open.

      • The Cockpit includes a Firewall section where the users can either enable or disable the firewall and add, remove and alter the firewall rules.
      • The Cockpit is also compatible with mobile browsers. This simply means that the users can manage the systems using CentOS/RHEL 8.4 web console from the mobile device.
      • The virtual machine can be now managed with the help of the web console.

Related Articles:

Condemned Features:

So, we are going to discuss the features that have been deprecated but their support is set to be continued until the end of the life of upstream RHEL 8.4.
The features are as following:

1. Under File Systems and storage:

This includes:

      • NFSv3 disabled over the UDP.
      • The elevator kernel command line parameter that is used to set the disk scheduler for all the devices is now condemned.

2. Under Networking:

The networking scripts are also belittled in RHEL 8.4. As the basic installation delivers the new version of the ifup and ifdown scripts that call the NetworkManager service via the nmci tool. So, to use ifup and ifdown commands, the Network Manager is required to be in running mode.

3. Under Security:

      • Digital Signature Algorithm has been considered deprecated.
      • TLS 1.0 and TLS 1.1 are also considered as deprecated.
      • SSL2 Client Hello has also been deprecated in the Network Security Services (NSS) library.

4. Under virtualization:

virt-manager has also been considered deprecated. The cockpit is intended to become its replacement in the subsequent release.

So, we can view the major changes to be done on the new CentOS 8.4 release.

Event Recap: TechSparks 2019 Highlights

whmcs global services at techsparks

It is been around 3 days since we have returned from Bengaluru after attending the Techsparks 2019 event. We have been back with full-fledged ideas for our business and to our customers as well.

We have visited every corner of the Tech Sparks event and found some awesome future technology details that will actually change the tech journey of India. We have listened to the conversations with business leaders as well as investors. Additionally, experts and leaders in the fintech, logistics, foodtech, content, e-sports, mobility, agritech and healthcare had left no stone unturned into the innovative inventions in the industries that are hovered to shape the future.

It is of course not possible to share everything in a single post about what happened in the event. You can check out here.

What we have delivered in the Techsparks event is mostly to connect people with WHMCS. As there are entrepreneurs present in the Techsparks event who do not know well about WHMCS and we have well-introduced WHMCS to them. Furthermore, we have guided them on how we can help them in starting up a web hosting business to make their online success and serve their customers well with WHMCS.

tech-img-929x1024
We got a chance to meet our Indian Client – Team Serverwala

Overall we have delivered the best and we are looking to attend more such events in the near future.

Catch Us Live at TechSparks 2019 in Bengaluru!

TechSparks 2019 Begulauru

We are delighted to announce that we will be attending the TechSparks 2019 event on Oct 11-12, 2019 at Taj Yeshwantpur, Bengaluru. Techsparks is the platform where the startups, growing business leaders, executives, investors, policymakers as well as other media houses assemble to discuss, generate ideas and engagements which form and carve the technology, innovation as well as entrepreneurship in India. This platform has become the summit for reliable and innovative technology as well as entrepreneurship. We are thrilled to be a part of this event and ready to experience the energy being invested by the big corporate leaders.

With over 20+ speakers from the topmost companies like Paytm, Ola, Byju, Flipkart and Xiaomi, and over 100+ sponsors, this event is going to gather the best of the best at a single place. This event would be discussing and focussing on the India economy in terms of technology and its future. Catch us live at Techsparks 2019 at stall number B8, Bengaluru among the exhibitors of top companies such as Walmart, Pepperfry.

Come and attend the Techsparks 2019 and grab the opportunity to connect well with us and win your business solutions. We will be giving an outlook on our plans and vision till 2025.

Also, subscribe to our blog to pick on the highlights of this event which we will share in the future.

See you there!

ClientX WHMCS Client Area theme V2.1.0 Released

ClientX V2.1.0

WGS ClientX WHMCS Client Area Template, which has engaged thousands of users for its super attractive client area with a user-friendly experience. We are here to inform you that we have recently released a new version i.e. ClientX V2.1.0. The new update has brought in the compatibility with the latest WHMCS 7.8 version with some design improvements.

Let us have a few highlights that are added as well as improvised to this release.

What New in ClientX V2.1.0?

  • We have made ClientX V2.1.0 compatible with WHMCS 7.8.
  • We have created a better design and fixed the entire design fixes.
  • We have also improved the SSL page.

Download this new version from WGS Client Area and send us your feedback and share your views in the comments. You also can get the full details about ClientX on WHMCS Marketplace.


Related Article:

WGS Account Statement Module V2.0.8 Released

Account Statement Module V2.0.8

We have recently released a new version of our Account Statement WHMCS Module i.e. Account Statement Module V2.0.8 with better compatibility with WHMCS 7.8.

Let us have a few highlights that are added as well as improvised to this release.

What new we have introduced?

  1. The WGS Account Statement Module V2.0.8 is now compatible with WHMCS 7.8 TO 7.8.1.
  2. We have now added the invoice PDF footer section text area in the Account statement module setting to manage the footer section text.

What have we fixed?

  1. We’ve fixed the “Statementdd” text issue displaying in the template 2 PDF of the account statement.
  2. We’ve fixed the logo overlapping with the client address in the account statement PDF.
  3. We’ve fixed invalid start and end dates (i.e. 1-1-1970) displayed on the account statement PDF.
  4. We’ve fixed the bank details text truncation issue on PDF template 2.
  5. We’ve fixed the start date and end date input’s drop-down date picker that wasn’t showing on the client area page.

Download this new version today from our WHMCS Client Area and send us your feedback and share your views in the comments.

Here are the steps to Upgrade Account Statement Module to V 2.0.8.

More About Account Statement

This module aids with all aspects of your account transactions, billing, and collections. The module is designed to suit the account statement needs of hosting firms as well as any business that manages online billing transactions using the WHMCS cms. This module allows a user to automate online billing account statements, which may be used for bank statements, cash daybooks, and so on. This module distributes all statements to users on their anniversary date every month. The Account Statement module provides a quick, easy, and eco-friendly method to obtain your statements. It is an electronic version of your account statements that you may view conveniently using the WHMCS Billing System.


WGS PayPal Tokenization WHMCS Payment Module V1.0.6 Released

WGC_Account-Statement

WGS has released a new version 1.0.6. of their PayPal Tokenization WHMCS Payment module. This release has made the module fully compatible with the latest WHMCS 7.8 version.

With this upgrade, our PayPal Tokenization WHMCS Payment Module has become the standalone updated module with WHMCS 7.8 in the WHMCS marketplace. So the users who are looking to purchase the new upgraded Paypal Tokenization Payment Gateway Module can visit here to purchase.

Download this fresh version today from WGS Client Area and send us your feedback and share your views in comments.

Step-by-Step Guide for migrating cPanel to DirectAdmin

Step-by-Step Guide for migrating cPanel to DirectAdmin

Due to the recent new pricing scheme for cPanel, customers’ businesses have been impacted destructively. Therefore, customers have to go through a wide range of choices and some of them decided to migrate cPanel to DirectAdmin.

DirectAdmin is the web hosting control panel software, which lets you administer your website as well as hosting options with the help of the graphical and web-based interface. With this, you can manage an unlimited number of websites as well as email accounts using a DirectAdmin control panel. It automates the task so that the web servers can be shared easily and provide a way for the website owners to set up as well as manage their websites in a fast way.


BUY BEST WHMCS THEMES


In general, DirectAdmin allows you to:
  1. Create and manage email addresses, FTP user accounts
  2. Managing DNS
  3. Observing statistics
  4. Managing the FrontPage extensions
  5. Creating and managing subdomains
  6. Uploading and managing the file with the help of File Manager
  7. Managing MySQL Databases
  8. Backing up and restoring the site files and the account data
  9. Setting up error pages
  10. Setting up directory password protection
  11. Installing SSL certificates, setting up cron jobs as well as advanced tools.

You can easily establish and manage hundreds of websites. Also, DirectAdmin costs are very low and has been considered as one of the most popular web hosting control panels. It consists of every feature which you will need to set up your website on the hosting platform.

Now, the question arises.


Amazing! Now You Can:  Install WHMCS on cPanel in a Few Simple Steps


How do we migrate data from cPanel to DirectAdmin?

Migration is generally a bit risky as it involves live websites. Even a single mistake can cause so many website errors as well as data loss. We always take care of every step along with the proper planning.  So, in total, there are two ways to carry out cPanel migration.

Following is a step-to-step guide for migrating cPanel to DirectAdmin.

First Case: This case is applicable when we have root(WHM) access to the SSH shell and we can migrate cPanel via the command line.

Let us have a checklist for this:

  1. Being sure that the hardware on the destination server is greater if not equals to the source server hardware specifications. You are also free to select different configurations from either Dedicated servers or Cloud VPS.
  2. Being sure to include the DirectAdmin license in the order.
  3. Being sure that you have the same amount of IPV4 addresses on your destination server as the source server.

Now, follow the steps below:

Step 1: Downloading the conversion tool

Initially, you need to download the cPanel to the DirectAdmin conversion tool.

Run the command line:

wget https://www.pusathosting.com/file/da.cpanel.import.9.4.tar.gz

Step 2: Creating paths

This tool will require a path (import and export one) which it will use for the conversion. What we will do is create the import and export directories.

mkdir import export

Step 3: Copying the files to “import directory”

What we will do is copy the user backups from cPanel to the import directory.

You can easily create the backups within the cPanel GUI or with the help of the following command:

/scripts/pkgacct USERNAME

This tool will convert the backups created by the following:
  • the ‘/scripts/pkgacct’ script
  • cPanel’s ‘Full Backup’ GUI tool

You need to run the following command on the source server with cPanel where you would be replacing [email protected] with the user as well as the IP address of the new DirectAdmin server.

rsync -av /home/cpmove-USER.tar.gz [email protected]:/import/

You know the name of the backup file is cpmove-USER.tar.gz and this is different for every account.

Step 4: Matching configuration

Now, you need to edit the defaults.conf so to match the DirectAdmin destination server. Here, you must only need to change the IP as well as the nameserver fields.

Step 5: Executing module

Now, you need to proceed to execute the module with the help of the command below and follow the on-screen instructions.

perl da.cpanel.import.pl

Step 6: Moving converted backups

After the completion of converting backups, you need to move the new files from the “export” directory to any DA/home/RESELLER/user_backups directory.

So, we will be using user “admin” as an example.

mv ./export/admin.tar.gz /home/admin/user_backups/

Step 7: Restoring the backups

So, we will now be restoring the backups in the DirectAdmin GUI.

With the help of the “Manage User Backups” tool within the reseller level.

a.) Choose the directory

cPanel to DirectAdmin

b.) Choose the option “Stored in the backup”

cPanel to DirectAdmin

c.) Select the backup files

cPanel to DirectAdmin

So, this is one way to complete the migration from cPanel to DirectAdmin.


How to Install DirectAdmin on CentOS 7?


Second Case: So, the next case is when we do not have any access to SSH shell and have to migrate the cPanel manually i.e. without any tool.

Step 1: Packaging your account

If you do have root access to the server via SSH (like if you have any VPS), you can do this simply by following the command.

/scripts/pkgacct username

This command will place the cpmove-username.tar.gz file into the /home directory where it can be downloaded via FTP/SCP.

For those who only have user-level cPanel access, you need to log in to your cPanel account. You will see a Wizard icon named Backup under the file section.

cPanel to DirectAdmin

So, when you click on it, you will be prompted to

1. Backup

2. Full Backup

3. Provide email

cPanel to DirectAdmin

When you have completed backup packaging, you will receive an email notification. The generated file will be placed in your home directory. So, you have to download this .tar.gz file onto your desktop.

Step 2: Preparing to upload

For those of you who are windows users, you have to download such as 7-Zip to unpack the tar.gz file. Now, you need to create a folder to place the file in and unpack it. The resulting files will be the entire data from your cPanel account (which also includes your mail in MailDir format). Now, you will find the homedir.tar and pull it out of the folder and then extract it.

cPanel to DirectAdmin

Once extracted, you will see several folders that were in your home directory. In the tmp folder, you may find the statistics such as webalizer that can be opened right from your desktop. Moreover, the files you want to concentrate on, are present in /public_html.

If you use any add-on domains, then you need to move them from the public_html folder. Once you have done all this, you can then compress the public_html folder content as a .zip file. You need to do the same for each one of the add-on domains. But, remember to not delete the uncompressed copies.

Step 3: Moving files to DirectAdmin:

Next, you will log in into your DirectAdmin account.

In case if you have any add-on domains or subdomains, click on the Domain setup.

cPanel to DirectAdmin

After adding the domains as well as subdomains you do have, you can then click on the Files in the top menu bar. Now, you need to click on the ‘domains’ folder. You will see a list of each of your primary domains. For every domain, you would have to click into them until you reach public_html.

cPanel to DirectAdmin

Now, you can select the entire files in the folder and delete them. Once you have removed it, you can click on the ‘Upload files into the current directory’ button near the bottom. Therefore, on the same page, you can select the zip file you created for the domain and upload it.

cPanel to DirectAdmin

Once you upload it, you can click on the ‘extract’ link in the following row. By doing this, you will get a preview of the compressed archive’s contents. Now, as you can see my test zip, with being an OSX, there is a couple of extra files like _MACOSX and .dstore which can be deleted after the extraction. You can also see that when it is extracted, it will create a public_html folder. So, go for extracting the file.

cPanel to DirectAdmin

Once it is extracted, and if the home files directories unpacked in the accurate location then you should not worry about moving anything. If your compressed file extracted into the new folder like another public_html folder, you will click on that folder. Moreover, on the top right, you have to select all the files and click on “Add to Clipboard”.

Permissions

Now, go one folder back upside and click on the ‘MoveClipboard Files here’ after which you have to click on “Empty Clipboard”. So, here, you will be able to delete the extra public_html folder and the .zip file which was originally uploaded. Now, you need to repeat this step for every domain you have. You will see subdomains as a folder under the original’s domain’s name.  Therefore, if you have sub.testsite.com, it will appear as a folder named as /sub under /domains/testsite.com/public_html.

If you run a WordPress blog, you will have a good chance that your new DirectAdmin account won’t share the same username as your cPanel account. For the same reason, you would like to edit your wp-config.php file to change prefixed username_database/usr to a new username before _. You must also note the password in wp-config.php.

Step 4: Preparing your database:

Go to your extracted cPanel backup folder, you will see a MySQL folder. You will find SQL dumps of each of your database that includes horde or roundcube webmail databases.

mysql

Now, you need to login back to the DirectAdmin and click on the domain to find “MySQL Management” and click on the specific link. From here, you will click on ‘Create new database’.

Create New Database

You will see that the DA username is different from the cPanel username. For the password field, you need to make sure that you use the same password which your script was already using for the database. Now, you need to repeat this step for every database you have.

Note for the shell users:

If you are able to login to your account via SSH, then you can simply upload the .sql files via FTP/SCP to your home folder and from there, you can enter the following command to import your database.

mysql -utestuser_dbuser -p testuser_databasename < sql_file.sql

For your every SQL file, you can compress them as SQL files. Now, you can return to the MySQL setup screen and click on phpMyAdmin in the top left corner.

Login Page

Here, you need to enter the username and password for the database which you are trying to upload. Once it is inside, click on the database you want to upload on the left. Now, you can click on the import tab and select your compressed sql file and click on the go. If everything goes well, you will see a success message on the screen which is followed by the database, showing a table count next to it.

To upload another database for a different database, user needs to click on the exit icon near the logo to be convinced for another username and repeat the process.

phpMyAdmin

So, this is another way to migrate cPanel to DirectAdmin and that is, manually.


cPanel Price Hike! Best 15 cPanel Alternatives to Choose in 2023


Conclusion:

In short, DirectAdmin is the cheapest control panel and is very simple and user-friendly. So, migrate your cPanel to DirectAdmin today with WGS and without experiencing any website downtime.

How to Install and Configure the CA Signed Certificate on ESXi Host?

How To Install And Configure The CA Signed Certificate On ESXi Host?

After generating the custom CA “Signed certificate” as mentioned in our previous blog, you need to install and configure the CA Signed Certificate on ESXi Host.


Custom WHMCS Theme & Module Development Services


Consider these Steps

Here is how to do it:

Step 1. After the generation of the certificate, you need to log in to the vCenter Server.

CA Signed Certificate

Step 2. Initially, you need to put the host into Maintenance Mode to install CA Signed Certificate

CA Signed Certificate

Note: If the ESXi 6.0 connects to VC 6.0 after replacing its cert with this KB, the host certs would be replaced by VMCA signed certs. Firstly, VC 6.0 needs to switch to custom certificate mode. For more information, see Understanding Certificate Mode Switches.

Step 4. In order to set certificate mode in the vCenter web client, you need to select the vCenter server that manages the hosts and click on Settings. Click on the advancement settings, and edit it.

CA Signed Certificate

In the filter box, enter the cert mgmt to display the certificate management keys to proceed.

Step 5. You can also change the value of vpxd.cert mgmt.mode to custom if you intend to manage your own certificates, and to thumbprint, if you temporarily want to use thumbprint mode, and then click the OK button.

install CA Signed Certificate

Once you have done VMCA mode, then you can click on the “OKAY” button and restart the vCenter server.


Installing CA Signed Certificate on ESXi Host

Please confirm that the ESXi Host should be in the maintenance mode on which you need to install the CA-signed certificate.

Now, you need to make a connection.

ESXi Host

Now connect the FTP Filezilla or WINSCP in order to proceed with installation

You have to upload the new “rui.crt” as well as “rui.key” file to (/etc/vmware/ssl).

rui.crt-in-Vmware

You need to navigate to “/etc/vmware/ssl” directory and copy SSL files to a backup location.

Now, you need to delete the existing “rui.crt” and “rui.key” from the directory (/etc/vmware/ssl).

You need to make the permissions of Rui.cert 644 and Rui.key 400.

After completing the previous task, you need to reboot the ESXi host. It may take it down for 2 minutes once the host is up and check the status of URL in the browser which should be green in color.

Once the CA Signed Certificate is installed, you need to exit the maintenance mode in the ESXi Host.

Best cPanel Alternatives in 2025

image (85)

In the world of web hosting control panels, cPanel has long been popular due to its user-friendly interface and powerful management capabilities. However, several excellent cPanel alternatives in the market offer unique features and functionalities to meet the diverse needs of web hosting providers and website owners.

These cPanel alternatives provide robust control panel solutions that empower users to efficiently manage their hosting environments, domains, databases, and other essential aspects of their online presence. This article will explore some of the best cPanel alternatives and delve into their standout features, ease of use, customization options, and overall performance.

These selections provide appealing options to meet your hosting needs, whether you’re looking for a less expensive solution, cutting-edge functionality, or a different user experience. Let’s examine the leading contenders for cPanel alternatives in more detail.


BUY BEST WHMCS THEMES


Let us Dive into the Best cPanel Alternatives:


1. Plesk

The debate between Plesk and cPanel has been ongoing in the realm of web hosting control panels. However, sometimes it’s worth exploring alternatives that can bring a fresh perspective and enhanced functionalities. Plesk is recommended as one of the best cPanel alternatives that offer a user-friendly interface encompassing all the essential categories within a website hosting control panel, easily accessible from the left side of the page.  

What sets Plesk apart is its remarkable resemblance to cPanel in terms of functionality. You’ll find standard features like configuring domain settings, managing files, user accounts, and email addresses. Plesk even goes the extra mile by providing robust site security and encryption options, matching cPanel’s offerings.  

Robust Features of Plesk  

  • User Friendly Interface: Plesk provides an intuitive and user-friendly interface that simplifies website and server management, making it accessible to users of all skill levels.  
  • Single Control Panel for All Websites: You can easily manage multiple websites from a single control panel. It allows you to create and configure domains, set up email accounts, manage files, and handle database operations effortlessly.  
  • Customization and Large Number of Tools: Plesk enables users to manage server settings, including managing services, configuring security measures, and monitoring system performance. It provides a comprehensive set of tools to ensure server stability and security.  
  • Backups and Restoration: Plesk simplifies the backup and restoration process, allowing users to create scheduled backups of their websites, databases, and configurations.  
  • Pricing: Plesk costs $9.16 per month for up to 10 domains or $13.75 per month if you need access to the developer tools.  

2. DirectAdmin

DirectAdmin is another cPanel alternative, a graphical and web-based web hosting control panel. This is specifically designed to make the administration of websites more accessible.     

DirectAdmin is also compatible with the different Red Hat, Red Hat Enterprise Linux, Fedora Core, CentOS, FreeBSD, Ubuntu, and Debian versions. With CentOS Linux, it is all distributed by default. It is also less expensive and more lightweight than either cPanel or Plesk, lessening the server load.     

DirectAdmin is one of the best choices you will find around. It is straightforward to use, and when you log in to it, you will observe that it displays the basic functionalities, and there, you can quickly go within the administrative area. 

Robust Features of DirectAdmin  

  • Multiple Support: DirectAdmin comes with support for running two PHP versions alongside each other. 
  • Automatic Deployment: It can easily manage automatic deployment services.  
  • 24/7 Support: DirectAdmin is the new gen in stabilizing the server for web hosting. They provide excellent support.  
  • Suppost for Mojor Databases: DirectAdmin supports popular databases like MySQL and PostgreSQL. Users can create and manage databases, set up users and permissions, and access phpMyAdmin for database administration.  
  • Pricing: The DirectAdmin standard licenses are available at $29 per month, $200 per year and $299 for own.   

Also Check: How to Install DirectAdmin On CentOS 7 ?


3. Webmin

Webmin is a free cPanel alternative offering extensive features and functionalities. It stands out as a feature-rich control panel that surpasses others in capability. Webmin allows users to perform essential modifications without any cost. Its built-in modules provide the ability to back up configuration files and configure Apache web servers effortlessly.   

Additionally, Webmin facilitates bandwidth monitoring, fail2ban configuration, user administration, cron job setup, secure SSH connections, and many other advanced tasks. Its comprehensive features make it a highly professional server management and administration choice.   

Webmin primarily caters to the Linux system administration field, which has garnered recognition for its efficiency and user-friendliness. If your server primarily hosts simple websites, Webmin can meet all your requirements and fulfil your needs. However, it is essential to note that some customers in the hosting industry, particularly those with limited experience, have raised concerns about certain drawbacks, such as a subpar user interface and missing features.  

Robust Features of Webmin   

  • Support for Multiple PHP Versions: The Webmin supports multiple PHP versions on the same server.   
  • Package Management: Administrators can use Webmin to install, update, and remove software packages on their Linux servers. It supports package managers like APT (Advanced Package Tool) and YUM (Yellowdog Updater Modified) for Debian and Red Hat-based distributions.   
  • File Management: Graphical file management makes editing, uploading, and downloading files a breeze. And you can change file permissions to restrict access.   
  • Security and Firewall Configuration: Email servers built on Exim, Dovecot, Postfix, or qmail are supported by default, and there’s a SpamAssassin package available for spam filtering.  
  • Pricing: Webmin is free but may lack certain features in other commercial cPanel alternatives.   

4. VestaCP

VestaCP is a user-friendly and efficient control panel that offers a range of features for managing web hosting. It provides a simple and smooth user interface, supporting various server functionalities like web, DNS, FTP, database, and email servers. One notable advantage is its backup feature, allowing users to create fast data backups.

The control panel also includes a graphical data display feature that monitors website and server changes. It generates colourful web traffic and site bandwidth graphs over specific time intervals. VestaCP offers two access levels, namely Admin and Client, providing different privileges to users.

Like cPanel, VestaCP supports installing and automatically renewing Let’s Encrypt SSL certificates for all domains, ensuring secure connections. It incorporates several security measures, such as firewalls and disabling the root user. However, it’s essential to configure these security features properly to avoid any potential vulnerabilities.

Robust Features of VestaCP

  • Multi-Language Support: Vesta CP supports multiple PHP versions.
  • Web-Based Interface: VestaCP provides an intuitive and user-friendly interface, making it easy for beginners and experienced users to navigate and manage their hosting environments.
  • Domain and Website Management: VestaCP allows users to create FTP accounts, granting secure file transfer capabilities to upload and manage website files.
  • DNS Management: VestaCP provides two access levels, Admin and Client, allowing hosting providers to offer management capabilities to their clients while retaining administrative control.
  • Pricing: Although it is free, it has support pricing. Its basic package includes 60 minutes of support credit. The premium package would consist of 5 hours of support credit. Next, the unlimited package includes 15 hours of support credit.

Final Thoughts

When seeking alternatives to cPanel, it’s important to consider control panels like DirectAdmin and VestaCP. These options offer robust features, user-friendly interfaces, and efficient management capabilities. DirectAdmin provides a comprehensive set of tools for website and server administration, while VestaCP offers a range of functionalities with a focus on simplicity and ease of use. Both control panels present viable alternatives to cPanel, ensuring efficient management of web hosting environments while catering to different user preferences.


Recommended Reading

How to generate custom CA Signed Certificate in ESXi Host?

How-To-Generate-Custom-CA-Signed-Certificate-In-ESXi

Recently, we encountered an interesting task for generating a custom CA Signed Certificate in ESXi Host 6. X. Our customers were struggling for so long but now we are quite happy and confident to release this article for our customers to sort out their issues.

Prior to it, our customers face a lot of issues in using the VM console via our VMware Module. In order to make it work, there is a need for CA certificates. This is the basic requirement of our module. You need to follow some steps to install “CA certificates” on the ESXi host so that our customers are able to use the VM console via our WHMCS VMware Module.

This article will guide you to reduce the risk of misconfiguration or common issues faced during the certificate implementation. You would be able to replace the ESXi SSL custom certificate.

So, when you add the ESXi host even in the case you have installed a custom CA certificate, then the Vcenter replaces their own SSL  by default. Therefore, this article will help you to shun this problem.

Let us check out the process:

There is a total of two ways to generate the custom CA Signed Certificate in ESXi Host.

a. The first one is you can create CA Certificate from your Windows Computer if you do have good Windows administrator knowledge.

b. For the second one, you need to go through the following video:

Check out the following requirements for the installation of the custom CA Certificate on your ESXi 6.x Host. Before attempting these steps ensure that:

  1. You must have Vcenter 6. x version.
  2. You have followed the steps in Creating a Microsoft Certificate Authority Template for SSL certificate creation in vSphere 6.0 (2112009).
  3. You have installed SSH Terminal  (Putty) on your system.
  4. You have an SFTP/SCP client (such as WinSCP) installed.

How to Secure Your Web Hosting Business- 12 Best Practices

Web Hosting Business

It is never too late to start How to Secure Your Web Hosting Business. As an entrepreneur, so many factors arise to be worried about.

The major question that comes to your mind while setting up any web hosting company is “How to secure my Web Hosting Business to avoid Security Breaches?”

Besides, all the online security risks start dwelling upon our minds, including the highly publicized breaches of the major companies. The multi-million dollar security leaks involve all the exposed credit card information, login credentials as well as other valuable data that are covered largely by the media.

Therefore you must know How to Secure Your Web Hosting Business as security standards are important to the well-being of any website, either large or small. The site owners are generally battered by the warnings of security risks with the sales pitches of different hosting providers. So, how do you separate the sales hype from real risks?

You are probably one of the hosting providers and offer their plans of which services range from shared hosting to dedicated server hosting. The hosting provider would take care of so many security measures to ensure the safe and secure delivery of the services.

It is quite important to educate yourself regarding the issue so that you can withstand the adverse situation.

Don’t worry it isn’t that difficult.


Security Measures for your Web Hosting Businesses

Let me guide you through it. You just have to take the enlisted security checks so that you would be knowing “Is your web hosting company fits best in security measures?”.

Web Hosting Security Best Practices  Maintain Backups of Your Users’ Website Timely

Generally, companies often overlook backups as a vital element of security. You must know one thing that backups do provide and require security. Backups should also be kept in a secure location away from the main server following the security steps.

What a secure backup provides, is a trusted repository for the latest copies of the system and the data that can be deployed to restore a known as well as a clean system to operation.

It is really important to undertake your company’s backup schedule along with the restore policies.

For example:
  1. How much are the frequent backups conducted like weekly, monthly, or daily?
  2. Do your support reps help users restore their site from backup files or do the backups intended for their use only?
  3. Can your team find and restore all the lost or corrupted files or do they have a complete replacement from a recent backup?
  4. Will your hosting service uses the most recent backup or can you request restores from further back in time and in that case, how far back in time you can go?

How to Secure a Website & Protect It from Hackers  Track Server Activities Via Network Monitoring

The next question which you should be ready with is “Does your hosting company monitor the internal network for intrusions as well as an unusual activity?”

Active monitoring can stop the server-to-server malware spread even before it gets to the server. You need to know some of the details on how your support team monitors the network whether the staff is dedicated to the behavior. A good network management team should be following best practices of network monitoring.


Secure Your Network With Best Server Management Services


Web Hosting Security  Keep an Eye on SSL, Firewall, and DDoS

First of all, What is DDoS?

DDoS (Distributed Denial of Service) attack occurs when you get an overwhelming amount of traffic to your site, showing it useless to visitors. In a DDoS attack, the attackers create a machine or network resource unavailable to its engaged users by disrupting the services of a host connected via the internet.

This attack is similar to a group of people crowding the entry door of a shop, making it difficult for authorized customers to enter, thus interfering with the trade. Now, preventions get started at the network edge with a good firewall. However, there have been limits to how well a firewall stops DDoS attacks.

  1. You need to again go through the company’s security plan and how much a firewall is capable to stop other intrusions.
  2. You must know-how would be inflation what your hosting company is providing.
  3. You also need to keep track of network monitoring folks so that your clients could not face any potential problems while working on the site.
  4. You must also provide SSL certificates. As a reputed web hosting company, it is your responsibility to provide SSL(Secure Sockets Layer) to ensure security to your clients.

The firewall protection system secures the perimeter and also delivers the first line of defense. It mainly uses highly adaptive as well as advanced inspection technology to safeguard your data, website, email as well as a web application by blocking unauthorized network access.

The protection system also ensures controlled connectivity between the servers that store your data and also the Internet via administration of the security policies devised by the experts.The DDoS protection system provides incomparable protection against DoS as well as DDoS attacks on the internet-facing infrastructures which include your websites, email as well as mission-critical web applications with the help of the refined state of the art technology that automatically triggers itself whenever the attack is launched.

In general, the DDoS mitigator’s filtering system blocks all the fake traffic and also ensures that legitimate traffic is only permitted up to the largest extent possible. These systems have protected already many websites from the large service outages caused by the concurrent attacks as much as 300+ Mbps in the past. This allows organizations to focus on their business.


How do you keep your website secure  Ransomware- The Threat to Web Hosting Industry

Ransomware is a type of malware that daunts the user to publish the victim’s data or block access to it until the ransom is paid. While some simple ransomware can easily lock the system in a way that is not difficult for a knowledgeable person to reverse, so advanced malware uses the technique known as cryptoviral distortion. It encrypts the victim’s files, and which makes them inaccessible, and appeals to a ransom payment to decrypt them.


Ransomware attacks are the main problem of web hosting firms


Web hosting companies get easily affected by Ransomware attacks and impact their business devastatingly. Generally, you do not only face data loss but it impacts the overall revenue of the company. Not only this, there would be a loss of production due to no access to the data. You would also lose a reputation in the market that drives your company to a much lower level.


Secure Web Hosting  Identify and Avoid Phishing Scams and Attacks

Phishing is generally the practice of fraudulence of sending emails asserting to be from reputable companies to activate the individuals to reveal personal information like passwords, credit cards, etc.

So, the number of cybercriminals has been increased in number and hack the shared web hosting servers so as to use the domains hosted on them in the wide phishing campaigns. Once the phishers break into the shared web hosting server, they can easily update their configuration so that the phishing pages are displayed from a specific subdirectory of every website hosted on the server.


How to Secure a Website   Use Antivirus and Malware Scanning and Removal Techniques

Here are a few key points that you should take care of while ensuring the security of your web hosting business.

  1. You must understand the entire protective actions that your hosting company would perform.
  2. You should also be informed whether the support team runs scans on the files in your account and whether you would be able to see the reports.
  3. Will your support plan helps in identifying as well as removing the malware if in case your account becomes infected?

Your company should provide a virus and malware antivirus scanner that monitors vulnerable scripts and plug-ins, detects adware, spyware as well as SPAM links. You should also undertake blacklist monitoring (to check the web trust) and must use powerful and easy-to-use malware removal tools. You must always go for the professional services which are expert in removing malware, viruses, spa,-scripts, phishing, unauthorized advertising from the hacked websites and further curb the web hosting from web-attacks as well as potential threats.


 web hosting security best practices   High Availability and Disaster Recovery

Mostly the hosting users look for a hosting company that will keep their site running with 99.9% uptime. This will go beyond file-level backups. So, your web hosting company must be answerable for the availability of a bare-metal image for the server. It is also a complete copy of a clean, functioning operating system for fast recovery from system failures.

The host network must have superfluous hardware to guard against the downtime induced by hardware failures. Firewalls must be configured to run in pairs with everyone ready to take over the full load in case the second one fails. The same concept has been implied to the servers. The hardware failover is another vital component of high-availability networks.

Now, load balancing is another high-availability feature. In this case, multiple servers are super ready to manage the entire server traffic. They do work with a similar copy of your website data which is stored on your network shared drive and hand off the traffic to each other so that a single server doesn’t become overburdened.


WHMCS Security – 7 Best Practices To Follow in 2023


Best Secure Hosting   Spam Protection

There is a vast majority of web hosting companies that batches form of email hosting with their web hosting packages.

First of all, you must know that spamming is not effective in most cases. The majority of the email users would have some sort of filter. In many cases, it is effective and other times, it is not. Spammers already have an idea about this and they operate under the assumption that their mails will get caught by filters and would be discarded. But as if you know that mail filtering service is 100% accurate and sending emails is free, then they use maximum numbers to their advantage. If you send 10,000 emails for a total price of $0 and if in case 10 users are defrauded, the spammers will certainly make something out of it.

Therefore, when a spammer finds a means to send an email via some type of email system, they never send lots of emails. But they send thousands, tens, or even hundreds of thousands or millions. They would only use this method until and unless they switch to another. In short, they are criminals to get money as well as resources from unsuspecting users. You can, in fact, play your part to prevent the distribution of spam.

Let’s talk about what you can do to get saved from SPAM:

  1. You can keep your website software up to date in case of scheduled automatic upgrades.
  2. You can keep all plugins as well as themes up to date.
  3. If you are using themes, make sure that they should be purchased from reputed web hosting theme providers.
  4. You can protect your passwords to FTP and email accounts and change them regularly.
  5. You can also scan your hosting website for malicious content.
  6. If anyhow you share your passwords with web developers, you must change them before and after they are given access.
  7. Try to use secure protocols for SMTP/POP/IMAP and FTP.
  8. Always remember to use strong passwords.
  9. Never use the same passwords across different accounts.
  10. Try to remove unnecessary websites from your hosting server.
  11. If you do need a contact form, make sure it has the verification process or captcha to prevent abuse.

If any user finds SPAM, make sure you report it to the network operators of the web hosting company, mainly in Australia. It is because most of the network operators present in Australia are quite responsive and shuts down the spam at the root whenever notified.


Web Hosting Security Best Practices   Ignore Unauthorized Access and User Permissions

Access means physical access to the machine along with the capability to log into the server. Physical access must be limited to trained technicians with security clearance.

Your web hosting company must use Secure Socket Shell (SSH) to log into the server to manage the operating system. For high security, use RSA keys which would be protected by some passphrase.

The next security step is to only whitelist the IPs which are permitted to access the server for the purpose of maintenance. This all can be modified via the control panel of the web hosting companies. You must also disable all logins from the user root. The malicious players will also commonly attempt to exploit the access point because the root user has full administrative privileges.


How to Secure a Website & Protect It from Hackers   Improper File Management

You must know that the entire access to the server is remote. There is no one that will reach the server to add, remove or move the website content files. In this case, you must use secure FTP (SFTP) with a secure and robust password for the file transfer as well as maintenance during following other FTP and SFTP best practices.


Web Hosting Security   Avoiding Periodic Change of Passwords of Applications and Logins

The major issue with server security can arise from not regularly updating or changing the credentials. The hosting company must have a strict password policy for the employees with the compulsory password changes at regular intervals and also when the equipment or personnel changes. You must have the same policies for your server access passwords. You can also establish as well as prosecute the policies for strong passwords. Those who want to can exploit weak passwords within hours.


How do you keep your website secure   Do Not Avoid Server Audit and Updating

In the ample arrangement of globally distributed servers, audit processes are needed to assure process replication as well as discipline.

  1. Are all your servers being revamped regularly?
  2. Are your backup scripts running all the time?
  3. Are offsite backups get rotated as per your choice?
  4. Are the accurate reference checks get performed on all personnel?
  5. Does the security equipment send out timely alerts?

Therefore, such questions are regularly verified in the process that indulges deep investigations, surveys, ethical hacking attempts as well as interviews, etc. It is also recommended to take care of if there is any package downgrade in the server.

This is  also advisable when server auditing to have a check on the list below:

  1. Performance checks of CPU, Disk I/O, Virtual Memory statistics, NFS statistics, vmstat reports, mpstat reports processors statistics.
  2. Get the compilers to turn off. Most of the rootkits come precompiled. It will prevent the shell users from compiling any IRC-related programs.
  3. Enable PHP open_basedir Protection. What this will do is prevent the users from opening files outside of their home directory with PHP.
  4. Include safe_mode for PHP 5. X and below. The safe mode will ensure that the owner of a PHP script matches the owner of any files where it is to be operated.
  5. If you enable suEXEC, then it will provide you support for Apache to run CGI Programs being the user ID of the account owner.
  6. You can move the mails to Maildir format.
  7. You can also prepare a list of the entire writable files as well as directories. This will reveal the locations where the attackers are capable to store files on your system.
  8. You must update the PHP pear as well as gem modules.
  9. You can also tackle down the currently infected files on files with the help of AUTOBOTS.

Secure Web Hosting  Server Space/Monitoring:

Sometimes, you would face failure in keeping proper track of the server space. Disk usage is the main concern of the server space with web hosting. In today’s new-gen technology, an effective server monitoring system is extremely needed to ensure maximum uptime. As of today, the company manages hundreds of servers with a wide number of servers running on every server. The web hosting companies that do not have a good monitoring system are considered worse. They do have larger downtimes and which also increases the risk of potential damage just because of the service disruptions.


Wrapping Things Up

Therefore, you can ask about the reviews of some hosting companies to your friends and contacts on social media. Make sure you would be able to relate their experiences and the customer service they received from different hosting companies. After properly analyzing the reviews of different web hosting companies, you would be able to select the right web hosting company that is cost-effective and provides fast and secure solutions to the clients.

WHMCS Global Services is proactively delivering top-level Networking Solutions to leading web hosting providers throughout the world.

With a strong networking team, we have the capability of providing 24/7 Networking and Software Support.  With us, you can concentrate on your key business goal i.e. Business Development, the rest you can leave to us. And this results in your web hosting company flourishing more in terms of performance and generating good revenue.

Besides this, WHMCS Global Services is a leading WHMCS development company. We deliver cutting-edge WHMCS development solutions to web hosting providers.

How to Install DirectAdmin on CentOS 7?

How to Install DirectAdmin on CentOS 7?

DirectAdmin is a highly regarded web hosting platform that simplifies the management of websites on servers. With its web-based control panel, users can effortlessly handle multiple email accounts, websites, and more. Hosting companies commonly offer shared hosting services by installing the user-friendly DirectAdmin control panel on their servers. Join us as we explore the step-by-step instructions, guiding you through each stage to effortlessly install DirectAdmin.

About DirectAdmin

DirectAdmin is a web hosting control panel that provides a user-friendly interface for managing websites, domains, email accounts, and other hosting-related tasks. It allows users to easily configure and control various aspects of their hosting environment.

DirectAdmin stands out due to its lightweight nature, fast performance, affordable licensing, and diverse range of features, contributing to its widespread popularity. In this guide, we will delve into the process of installing DirectAdmin on CentOS 7, enabling you to gain a deeper understanding of this professional installation procedure.

Pros and Cons of DirectAdmin

Pros of DirectAdmin

  • DirectAdmin offers a straightforward and intuitive interface, making navigating and managing their hosting accounts easy for users, especially beginners.
  • DirectAdmin is known for its stability and reliability. It has been in the market for a long time and has a strong track record of providing a stable environment for managing web hosting services.

Cons of DirectAdmin

  • There can still be a learning curve for individuals who are new to web hosting control panels.
  • While DirectAdmin offers customization options, there may be some limitations in terms of extending or modifying certain functionalities.

Best Custom WHMCS Development Services

About CentOS 7

CentOS is an acronym for Community Enterprise Operating System, which is a Linux distribution that was first released in March 2004. It is a popular open-source project that benefits from the contributions and support of a large community. CentOS is built upon the resource packages of Red Hat Enterprise Linux (RHEL), a commercial distribution that requires paid support contracts for usage. Red Hat, as the provider of RHEL, is obliged to make the source code available to comply with the licenses of the software components involved.

Pros and Cons of CentOS 7

Pros of CentOS 7

  • Offers a range of server-oriented features, including robust networking capabilities, server-grade hardware support, and optimized performance.
  • The availability of extensive documentation and community support can be advantageous when troubleshooting issues or seeking guidance.

Cons of CentOS 7

  • CentOS 7’s repositories may have a more limited selection of packages compared to some other Linux distributions.
  • CentOS 7 has a slower release cycle compared to some other Linux distributions.

Why CentOS 7 ?

CentOS 7 is a preferred choice for installing DirectAdmin due to its user-friendly nature and enhanced security features. It is a widely supported and popular version of CentOS, offering greater stability compared to other versions. Although CentOS 8 has been released, it currently faces certain challenges during the installation process. As a result, CentOS 7 remains the most reliable and compatible operating system for successfully installing DirectAdmin.


Requirements of DirectAdmin Installation

1. A Linux server running with CentOS 7</

2. SSH Root Access</

3. Running domain which, you want the point on Direct Admin for hostname for eg. server1.domain.com

4. Valid Client ID & Licence ID form Directadmin.

5. Install the following prerequisite packages: wget gcc gcc-c++ flex bison make bind bind-libs bind-utils openssl openssl-devel perl quota libaio libcom_err-devel libcurl-devel gd zlib-devel zip unzip libcap-devel cronie bzip2 cyrus-sasl-devel perl-ExtUtils-Embed autoconf automake libtool which patch mailx bzip2-devel lsof psmisc net-tools systemd-devel libdb-devel perl-DBI xfsprogs rsyslog logrotate crontabs –y


Let’s Start Step by Step DirectAdmin Installation on CentOS 7

  • Step 1: – To install DirectAdmin firstly we need to disable the firewall. Login as a root to run the follow ing command:
  • setenforce 0
  • sed -i ‘s/enforcing/disabled/g’ /etc/selinux/config
  • Step 2: – wget http://www.directadmin.com/setup.sh
  • Step 3: – Change the downloaded setup file permission: chmod 755 setup.sh
  • Step 4: – Run the command [root@centos ~]# ./setup.sh
  • Step 5: – Start the Installation wizard to install DirectAdmin on your server. It will prompt you to install prerequisite packages; select “Yes.”

Sure! Here’s an elaboration of the steps to install DirectAdmin on CentOS, based on the commands you provided:

Step 1: Disable the Firewall

To disable the firewall temporarily, follow these commands: 
sed -i ‘s/enforcing/disabled/g’ /etc/selinux/config 

Step 2: Download the DirectAdmin Setup Script

Use the wget command to download the DirectAdmin setup script:
wget https://www.directadmin.com/setup.sh

Step 3: Change the Permission of the Setup Script

Change the permission of the downloaded setup script to make it executable.

Step 4: Run the Setup Script

Execute the setup script using the following command: 
./setup.sh

Step 5: Install Prerequisite Packages

During the execution of the setup script, it will prompt you to install the prerequisite packages. Respond with “Yes” to proceed with the installation of the necessary packages. The script will automatically download and install the required dependencies.

The installation process will continue, and you’ll be presented with additional prompts and configuration options. It’s important to carefully follow the instructions and provide the necessary information during the installation process.

Steps to Install Pre-Install Packages (Y/N): Y

1. Please enter your client ID: Enter Client ID

2. Please enter your License ID: Enter your Licence ID

3. Enter your hostname (FQDN): server.domain.com

4. It must be a Fully Qualified Domain Name

Note: Do *not* use a domain you plan on using for the hostname: (don’t use domain.com. Use server.domain.com instead.)

  • Is this correct? (y,n): y
  • Is ens160 your network adaptor with the license IP (51.254.229.242)? (y,n) : y
  • Is this correct? (Must match license) (y,n): y
  • Would you like to search for the fastest download mirror? (y/n): y
  • Once the installation completed you will see the following output:
  • http://51.254.229.242:2222 (Use your own Server IP, not this one) and enter your Admin username and password when prompted.

Conclusion

That’s a general overview of how to install DirectAdmin on CentOS 7. However, please note that the installation steps may vary slightly depending on the specific version of DirectAdmin you’re using. It’s always recommended to refer to the official DirectAdmin documentation for detailed and up-to-date installation instructions.


Related Articles: –

Everything You Need to Know About the Latest cPanel Pricing Upgrade

The recent news of cPanel has crippled the world of web hosting providers. Due to the introduction of the new pricing scheme of cPanel, their customers’ businesses have been devastated impacted. So, the condition of the web hosting providers has been really freaking out at the moment. This announcement can cause many web hosts to lose their customers rapidly.

cPanel has totally changed its licensing structure and the way they price their products. They have announced their statement on 28th June 2019 that the entire licenses purchased or renewed from the day will now use their new pricing and licensing structure.

The users having monthly licenses will be under the same old structure only until the 1st of September, 2019 and it’s the time when they will be automatically converted to the account-based package which is most appropriate for the particular server.

In general, they are converting all of their customer’s monthly billing directly. When the yearly licenses come up for renewal, they will perform a one-time conversion to the account-based package i.e. either Admin, Pro, or Premier.


Talking about cPanel history and their new pricing:

If we talk about the history of cPanel, it has shown its services as well as pricing around a VPS or a Dedicated License with unlimited cPanel accounts because earlier the servers were not as powerful as today they are. We have also witnessed consistency in the innovation in the hardware sector as well as software optimization.

Likewise, with the growth of technology, cPanel has upgraded itself in many more ways. They have added more development, resources, as well as structure and also increases many development projects. They have adjusted these prices so that they can further innovatively invest in the product development, growth of the customer ecosystem and remain the leader in hosting automation.

Their main focus is to ease the common upgrade path from the shared customer to the private cloud customer. Its new structure has the ability to deploy lower-density customer instances without even purchasing a large multi-account license. It depicts the price of every license based on the number of accounts hosted on the server.

They have now basically transitioned all the customers to monthly billing. In fact, the cPanel Solo licenses will only be available for purchase through cPanel partners and no longer be available for purchase through the cPanel store.


Comparing Previous and New Plans

Earlier, the pricing was as follows:

  • $15 monthly for cPanel Solo
  • $20 monthly for cPanel and WHM VPS and $200 yearly.
  • $45 monthly for cPanel and WHM dedicated and $425 yearly.

This latest Cpanel pricing has now made a huge impact on the web hosting providers’ communities. These tiers have now been renamed to Admin, Pro, and Premium with $20/Mo, $30/Mo, and $45 /Mo respectively, and what has actually exasperated customers is the account limit enforced upon it. If we talk about the premium account tier, it is limited to up to 100 accounts. The additional account will cost you extra which is around $0. 20 per account.

Cloud Licenses: It is available for VPS and Cloud instances. This sits well to use in a supported virtual environment and is ideal for growing businesses.

Metal Licenses: It is available for dedicated servers. It has the ultimate amount of control and resources.


How does this Impact Web Hosting Providers?

5-Web-Hosting-Companies-To-Avoid-In-2018

Our digital marketing team has analyzed the market closely after the impact and found a lot of memes and stats that will somehow clear the current picture of web hosting providers.

AwesomeScreenshot-cpanel-alternatives-DirectAdmin-Explore-Google-Trends-2019-07-02-10-07-89-1024x357

Google Trends Stats Showing the Sudden Growth of the DirectAdmin keyword across the world.

AwesomeScreenshot-cpanel-alternatives-Explore-Google-Trends-2019-07-02-10-07-79-1024x365

Google Trends Stats Showing a Sudden Growth on the Keyword Cpanel Alternatives.

There are some web hosting providers who clearly show their disappointment towards this huge change:


This is how it impacts badly on the web hosting companies and upset them to the point that the cPanel craze might get crushed under the car for the hosting companies.

Now, it’s time to know about the possible cPanel Alternative.

  1. DirectAdmin
  2. Plesk
  3. Froxlor
  4. ZPanel
  5. Webmin
  6. VestaCP
  7. InterWorx

Therefore, the changes are actually very adverse to the industry as a whole. cPanel has the capability to re-consider these changes. So, let’s have an eye on their next step. You can have your opinions in the comment section below.

Stay tuned with us for further information regarding the cPanel Price Upgrades.

Related Articles:

How To Install Apache, MariaDB & PHP Ubuntu 18.04?

Install Apache

We will guide you step by step on how easily you can Install Apache & configure the server:-

How do I install and configure the Apache, MariaDB & PHP on a new server?. To install the Apache, MariaDB & PHP you must have server root access. Basically, you can perform the thing on VPS / Dedicated server only.


Custom WHMCS Theme & Module Development Services


Step 1: Install Apache2 HTTP Server on Ubuntu

Apache2 HTTP Server is the most popular & faster web server to use for hosting providers & web developers.
To install Apache2 HTTP on the Ubuntu server, run the commands below…

sudo apt update

sudo apt install apache2

Once Apache2 installed, run the below command to stop, start and enable Apache2 service.

sudo systemctl stop apache2.service
sudo systemctl start apache2.service
sudo systemctl enable apache2.service

You have installed Apache2. Now to test & verify the Apache2 is running successfully or not? open your browser and browse to the server hostname or IP address and you should see the Apache2 default test page as shown below

Install Apache
Install Apache

Step 2: Install MariaDB Database Server

MariaDB sports faster and safer replication with updates being up to 2x faster than with traditional MySQL Replication setups. To install the MariaDB run the below command:-

sudo apt-get install mariadb-server mariadb-client

After installing the successfully MariaDB, run the below commands to stop, start and enable the MariaDB service.

Below commands to be used 16.04 TLS

sudo systemctl stop mysql.service
sudo systemctl start mysql.service
sudo systemctl enable mysql.service
Install Apache

Below are commanded to be used 18.04 & 18.10 TLS

sudo systemctl stop mariadb.service
sudo systemctl start mariadb.service
sudo systemctl enable mariadb.service

With the above command, you have installed successfully MariaDB, But your database server is not yet secure. So you will need to secure it first. You can secure it with the following command:

sudo mysql_secure_installation

Once prompted, answer the questions below by following the guide.

  • Enter current password for root (enter for none): Just press the Enter
  • Set root password? [Y/n]: Y
  • New password: Enter password
  • Re-enter new password: Repeat password
  • Remove anonymous users? [Y/n]: Y
  • Disallow root login remotely? [Y/n]: Y
  • Remove test database and access to it? [Y/n]:  Y
  • Reload privilege tables now? [Y/n]:  Y

Restart MariaDB server, Now time to test the MariaDB installed successfully or not

sudo mysql -u root -p

Then type the password you created above to sign on… if successful, you should see MariaDB welcome message

Step 3: Install PHP 7.2

PHP 7.2 may not be available in Ubuntu default repositories… in order to install it, you will have to get it from third-party repositories.

Run the commands below to add the below third party repository to upgrade to PHP 7.2

sudo apt-get install software-properties-common
sudo add-apt-repository ppa:ondrej/php

Then update and upgrade to PHP 7.2

sudo apt update

Next, run the commands below to install PHP 7.2 and related modules.

sudo apt install php7.2 libapache2-mod-php7.2 php7.2-common php7.2-gmp php7.2-curl php7.2-intl php7.2-mbstring php7.2-xmlrpc php7.2-mysql php7.2-gd php7.2-xml php7.2-cli php7.2-zip

After installing PHP 7.2, run the commands below to open the PHP default config file for Apache2…

sudo nano /etc/php/7.2/apache2/php.ini

Then make the changes on the following lines below in the file and save. The value below is a great setting to apply in your environments.

Step 4: Restart Apache2

After installing PHP and related modules, all you have to do is restart Apache2 to reload PHP configurations…

To restart Apache2, run the commands below

sudo systemctl restart apache2.service

To test PHP 7.2 settings with Apache2, create a phpinfo.php file in the Apache2 root directory by running the commands below

sudo nano /var/www/html/phpinfo.php

Then type the content below and save the file.

<?php phpinfo( ); ?>

Save the file.. then browse to your server hostname followed by /phpinfo.php

http://localhost/phpinfo.php

You should see the PHP default test page…

Stay Ahead of Competitors with these Web Hosting Business Trends

image (86)

Becoming an entrepreneur today is far from easy, and the challenges can be overwhelming. This is particularly true when you establish a profitable venture in the web hosting industry. Sustaining and excelling in this business requires continuous effort and dedication.  

Individuals aiming to grow substantially in the highly competitive web hosting market must differentiate themselves from competitors and establish a strong presence. Building a unique identity becomes a daunting task in a world where competition is fierce and numerous. To accomplish this, adopting a professional approach and implementing strategies that set you apart from the crowd is crucial. In this blog post, we will explore critical Web Hosting Business Trends, backed by statistics and research, that will help your business stand out among your competitors.


Related Article: COVID- 19: Is It A Boon For Web Hosting Industry?


Market Analysis of Web Hosting Industry

According to AlliedMarketResearch, In 2019, the worldwide market for web hosting had a value of $57.46 billion. It is estimated that by 2027, the market will expand significantly, reaching a value of $183.05 billion, with a compound annual growth rate (CAGR) of 15.2% between 2020 and 2027.

The web hosting industry has experienced significant growth and transformation in recent years. With the increasing reliance on the internet and the proliferation of online businesses, web hosting services have become crucial for businesses and individuals alike. The market is highly competitive, with numerous players offering a wide range of hosting solutions, including shared hosting, virtual private servers (VPS), dedicated servers, cloud hosting, and managed hosting. 

One of the key drivers of market growth is the growing demand for website hosting services from small and medium-sized enterprises (SMEs). As more businesses recognize the importance of having an online presence, the need for reliable and affordable hosting solutions has soared. Additionally, the rise of e-commerce and the increasing number of websites and applications being launched globally have fueled the demand for hosting services. Moreover, advancements in technology, such as the adoption of cloud computing and the Internet of Things (IoT), have also contributed to the expansion of the web hosting market.


Related Article: Digital Marketing Tips to Boost Web Hosting Business


Reasons to Start a Web Hosting Business

1. Increasing Demand for Online Presence

The demand for websites and online presence continues to soar as more businesses and individuals recognize the importance of having a strong digital footprint. Establishing a web hosting business allows you to tap into this growing market and provide essential services to customers looking to establish their online presence.

2. Lucrative Market Opportunities

The web hosting industry is projected to witness substantial growth in the coming years, presenting significant opportunities for businesses to thrive. This growth is driven by the increasing adoption of cloud-based hosting services, e-commerce expansion, and the rise of small businesses.

3. High Revenue Potential

Web hosting services often provide a recurring revenue stream, as customers typically sign up for extended periods. With the right pricing strategies and quality service offerings, web hosting businesses can generate steady and predictable income. Furthermore, by upselling additional services like domain registration, SSL certificates, and website security, you can increase your revenue potential even further.

4. Diversification and Scalability

One of the advantages of a web hosting business is its ability to diversify its service offerings and scale according to customer demand. You can expand your services to include virtual private servers (VPS), dedicated hosting, managed WordPress hosting, or specialized hosting for specific industries. This versatility allows you to cater to different customer needs and generate additional revenue streams.


Related Article: How to Start a Web Reseller Hosting Business in 2025?


9 Web Hosting Business Trends to Skyrocket Your Sales in 2025

1. Managed Web Hosting

A comprehensive report by Allied Market Research indicates that the web hosting industry is experiencing growth due to the increasing number of small and medium-sized enterprises (SMEs) seeking to establish an online presence. These businesses often lack internal IT staff or technical expertise, leading them to rely on web hosting providers for managed solutions. The managed hosting providers offer a range of services, including email account setup and management, backup and security, website development, and graphic design, to assist SMEs in their online growth.

2. Cloud Hosting

Cloud hosting, which involves hosting websites on a server network rather than physical server, is expected to continue gaining popularity in 2025. This hosting method offers several advantages: scalability, reliability, and cost efficiency.

3. Security

The web hosting industry increasingly focuses on cybersecurity due to the rising frequency of cyberattacks targeting small business websites. Although major cyberattacks predominantly target large companies and services that store data for millions of users, SMBs are also increasingly becoming targets.

A 2022 SiteLock Website Security report reveals that WordPress sites are 39 times more likely to be infected with malware than non-CMS sites. Additionally, 9% of WordPress sites were found to have at least one vulnerability. Alarmingly, 48% of SMEs believe they are too small to be targeted, despite facing 228 million cyber threats per month. As a result, website owners must prioritize security when selecting a hosting provider, ensuring features such as SSL encryption and regular security upgrades.


Related Article: How to Secure Your Web Hosting Business?


4. Artificial Intelligence (AI)

The integration of artificial intelligence into web hosting is rapidly expanding. AI applications, coupled with predictive analytics and machine learning, are considered significant trends in the web hosting market, as noted in Technavio’s Web Hosting Market Research Report. This report emphasizes the benefits of using AI to enhance website security and performance. Web hosting providers can utilize advanced AI tools to provide automated alerts for detecting suspicious behavior and conduct in-depth traffic analysis to prevent performance issues. AI can also enable self-healing systems that proactively identify and mitigate potential problems. Consequently, AI is expected to play a crucial role in web hosting in 2025.

5. 5G

The deployment of 5G networks in 2025 is anticipated to impact web hosting substantially. The higher speed and lower latency of 5G will enable the implementation of new hosting technologies and solutions, such as edge computing.

6. Scalability

The significance of scalability in web hosting is predicted to increase in 2025 due to businesses’ continuous expansion and development. Choosing a hosting option that can accommodate future company growth is essential.

7. Environmental Sustainability

In 2025, the environmental impact of web hosting is expected to become a more critical factor. Web hosting companies that utilize renewable energy sources and adopt environmentally friendly policies and procedures are projected to gain popularity.

8. Personalization

In 2025, businesses will likely seek hosting providers that offer personalized solutions to meet their specific needs. Hosting companies are expected to respond to this growing demand for customized services by providing tailored solutions to enhance professionalism and meet individual requirements.

9. Declining Number of Data Centers

Data centers, crucial to the Internet’s infrastructure, experienced a decline in importance and investment. Factors like the shift towards cloud services and reduced need for self-built data centers contributed to this trend, impacting server management and job requirements.


Summing Up

To maintain a competitive edge in the rapidly evolving web hosting industry, it is crucial to adapt to emerging trends, deliver exceptional services, and understand customer needs. By embracing cloud-based hosting, prioritizing speed and performance, emphasizing security, and providing outstanding customer support, your web hosting business can establish itself as a professional and industry-leading service provider in 2025.


Recommended Reading


HostX V1.0.5 Released Now

WHMCS Template HostX V1.0.5 Released

After the immense success of ClientX, HostX has become our second highest selling product. So, to keep it moving at a constant pace, we’ve introduced some of the advanced features which are recommended by our customers. Clinging that in mind, we’ve added many new features in our new HostX V1.0.5.

Let’s find out the new features what we have released in this new v1.0.5.

All New Drag n Drop Page Builder

From the very beginning, since we released HostX, we constantly receive requests regarding HostX from our customers to make the solutions more modular in order to transport the sections from one specific page to another one.

So, keeping this thing in mind, we’ve eventually created the solution and that is, Drag n Drop Page Builder. Now, if a user keeps his vision to import any section from 1 page to the other one, then he can easily perform this.

we have created the blocks for each and every section and integrated them in WHMCS Template HostX Addon. So, a user can just drag the block and drop to the desired specific page wherever he wants to add that particular section.

We have also added an option to shuffle the sections within a specific page by just changing the orders via dragging and dropping the blocks.

Custom Blocks Section

To make the page builder more scalable, we’ve provided an option for our customers to create their own custom blocks and import them on any desired page.

WHMCS-WGS-HostX-2-1-1024x469

New Marketplace Page

We have got so many requests to add new marketplace pages, namely SSL certificates, website builder, site lock as well as Email Services. So, we’ve created them with a fresh and superb design.

Banner Contents Made Dynamic

Previously there was no option to change the contents dynamically from the HostX addon. The user had to change it statically through the code. But, we understood the precious time of our customers and made the banner contents fully dynamic from HostX WHMCS Template addon.

Apart for the new releases we have improvised many things in this version.

Content: We have made some content amendments that are related to grammatical errors, spelling issues etc…

SEO Manager: We have improvised the meta tags for some pages, another update is soon in plan which will brings many SEO Updates.

Cross Browser Compatibility: There were some issues in the Safari browser. We have improvised them in this update.

Optimized Product Loading Speed: Many users complained to us regarding the loading speed of the products on some dedicated server pages. Now we have totally improvised the code of the WHMCS Template HostX to make the product loading super fast.

There were few bugs that are fixed in V1.0.5

Banner Issues: We have fixed all the emerging banner issues relatively including minor issues in styling.

WHMCS 7.7 Compatibility Issues:

There were some conflictions coming due to the newly introduced Google Captcha in the WHMCS 7.7. So we have added a new check that will read the WHMCS version first before applying the Google Captcha.

Concludingly, we would like to invite you all in the comments section where you can recommend us any suggestion related to our future updates.

button-2

An Exclusive Interview with WHMCS Team!

WGS Interview with WHMCS Team

We have been waiting for some time to get connected to the official WHMCS team to Interview with the WHMCS Team, as we have a lot of queries relates to WHMCS in our mind. Since we all know that WHMCS is a very busy team so it’s been very hard for us to connect with them. Sadly we were not able to get answers from Matt- Founder of WHMCS due to his busy schedule, but his team has helped us to clear some of our doubts.


WGS TEAM: Hi Matt, our research shows that you are the founder of WHMCS. But by chance, if someone doesn’t know you well, could you please introduce yourself and shed some light on your career journey to date?

WHMCS TEAM: Before founding WHMCS, Matt operated his own hosting business. It was at this time a need was identified for a complete solution for hosting providers, to automate operations, support, and billing in a single package.
The software soon become more successful than the hosting operation, and so the decision to focus on developing WHMCS full-time was an easy one!

WGS TEAM: WHMCS has crossed 13 years in the industry, which seems like more than a decade. How did you shape the company in the initial stages? What kind of challenges did you face during your initial days? How did you overcome those problems and difficulties?

WHMCS TEAM: In the early days; development, marketing, sales, and support were all handled by Matt. It soon became apparent that more help was needed to handle customer inquiries, but finding and training staff to join the company was initially a challenge.

Fortunately, with perseverance and hard work, we brought on some talented individuals in the early days, and they remain with the company to this day!

WGS TEAM: Well we don’t know that you might be aware of us? We are actually WHMCS FREAKS 😉 Well, hard thing to digest. Anyways; How do you feel when third-party companies support WHMCS by offering custom WHMCS solutions like Modules, templates, etc.

WHMCS TEAM: One of the design considerations right from the early days was to make WHMCS modular so that it could be easily expanded by anyone who wanted to. It’s very pleasing to see this has developed into an unparalleled ecosystem in our market, and that others are able to make a living from it!

WGS TEAM: We have not seen any WHMCS meets or events happening in India, any future plans?

WHMCS TEAM: We’ve attended HostingCon India in previous years. Whilst there are no current plans to attend more events in the future, we are at Cloudfest and cPanel Conference every year!

WGS TEAM: What are your thoughts on moving towards the eCommerce industry?

WHMCS TEAM: Ecommerce is growing in all markets. The move to mobile is here to stay, so it was important to use to ensure WHMCS offered a native mobile-responsive experience, which we achieved a few years ago. The hosting space is undergoing rounds of consolidation at present, so our aim is to help our users become more profitable by selling value-added services complimenting the base website hosting.

Do you have any questions in your mind? Mention them in the comments so that we can compile them for the next interview round with the WHMCS team.


What is WHMCS and How is it used?


How To Design WHMCS Client Area for Web Hosting Business?

How to design WHMCS Client Area for Web Hosting business is one of the most searched queries on the Internet today. If you landed on this page while searching the solution for the same query then you have landed on the right page. But before jumping to a solution,  check out what are the crucial things to run a Design WHMCS Client Area business website.

BUY BEST WHMCS THEMES

Which business does not need a website? The answer to this question is way difficult because every business from A to Z requires a business website to earn more business online. According to Blue Corona – “Email, website, and social media are the top three marketing tools used by small businesses today from which 54% of the businesses use email, 51% have a website, and 48% use social media”.


Another study from Espresso shows that “75% of small business owners see internet marketing as an “effective” or “very effective” tool to attract new customers”.


So it clearly shows the needs of a website for a small business.

List of Services a Business Website Needs to Run?

  1. A website domain name
  2. Quality Web Hosting
  3. Business Website

Now when it comes to purchasing a Domain and Hosting, a business owner requires a hosting selling company who provides the best hosting services for his business website and Customize WHMCS Client Area.

We are in the web hosting industry since 1995. when there were only a few hosting options exist in the market like pair.com, AT&T, and a few others. At that time the hardware was so expensive and only a few companies could afford that. But when we talk about today there are  a plethora of web hosting companies that are providing hosting solutions at the best prices, thanks to the reseller hosting

Today, more than one million web hosting providers are running, with a key motive to provide the best web hosting solutions to their customers at the best price. The competition among the hosting companies rise at this level that some companies have started selling hosting plans at very cheap prices no matter how is the security level of their servers.


What Makes a Hosting Company Unique and The Best?

1. Hardware Quality

2. Security

3. Customer Support

4. Hosting Plans

5. Website UI/UX

In the modern world, UI/UX determines the level of any business and the same in the web hosting industry. Since 2002, we are working as a solution architect for web hosting businesses. And in this complete journey, we served many good clients with the best solutions that make them successful hosting providers in the industry.

Thanks to WHMCS, which comes under the picture in 2005 to help resellers manage their hosting admin tasks with ease. Initially, WHMCS actually offers invoicing and technical support for the hosting providers that let businesses customize WHMCS Client Area. But a product has to grow with the market needs, so as WHMCS. WHMCS has now become an all-in-one Web Host Manager Complete Solution.


Current WHMCS

Now WHMCS supports multiple industries with a prime motive to improvise hosting experience with full client management.


It has been estimated that WHMCS covers 90% of the websites that sell hosting solutions.


Here’s what WHMCS do:
  • Control panel operations
  • Accepting payments
  • Generating client invoices and estimates
  • Client account setup and suspension
  • Performing client support and social media functions.

Importance of WHMCS Client Area in Improving ROI:

The main section of the WHMCS which still needs a lot of improvements in its client area is one of the most outdated sections of this custom solution.

Sorry to say, but it is true.

Here are some samples of the default client area screenshots:

Being a hosting solution expert, we are creating this guide to make the WHMCS client area stand out in the current hosting industry.

1. Attractive UI/UX

The part that is missing in the default WHMCS client area is its UI/UX. As we all know the importance of design in improving the ROI of a business online so we can not ignore it all.


According to Andy Crestodina, Co-Founder / Chief Marketing Officer of Orbit Media, design plays an important role in improving conversions.


ROI

The current client area design of WHMCS is very basic and outdated.

Not only the design, but it misses many UX features that could help your clients to manage things with ease. We will talk about them later in this blog.

Whmcs UX features

To Customize WHMCS Client Area, we have launched multiple WHMCS client area themes that got a very good response from the market, especially HostX WHMCS Template


HostX WHMCS Template
Client Area Screen of our WHMCS Theme.


2. Active Products and Services

Your clients must know each and every product or service in an elaborated way on the dashboard itself just like our ClientX WHMCS Client Area theme lets you do so

Active Products and Services

Though it comes default in the WHMCS client area, it is very less visible and flexibility is far ahead.


3. Cross-Selling Products and Services

You need to show cross-selling products on the dashboard or internal client area pages, as you will open a chance for more sales.

You can sell custom addons and other valuable services that are more likely to sell with your default products.

Cross-Selling Products and Services

4. Orderform Template

This is the place of the client area which has the maximum bounce rates. We usually get customer requests for creating custom order form templates WHMCS. It seems like we have created around 3000+ WHMCS custom order forms being associated with WHMCS Global Services.

From all these requests the most common requests are to change the look and feel of the default WHMCS client area order form. Some said, to restructure it completely. The other common thing was to reduce the checkout steps.


How do we manage it?

So, keeping all these requests in mind we have created a WHMCS One Page Orderform solution for all WHMCS users, i.e. ClientX, which has a custom order form template to customize WHMCS Client Area.

The ClientX orderform template checkout process is now reduced to 3 steps with exceptional features to improve your conversions.

ClientX orderform template

We give your clients to manage their billing cycle right on the order form page, with an option to purchase addons with added custom options.


1. Technical Live Chat Support in Client Area

Live Chat Support in Client Area

The client area must have technical live chat support that can help your clients to sort out small issues in real-time, rather than generating tickets again and again.

2. Account Statement

Another feature that is missing in the default client area is the account statement, every client needs to generate a ticket for the account statements to the admin, which increases the load on the admin to work on these useless tickets.

So we would prefer to give the client an option to generate and download the custom account statements anytime.

3. Custom Header and Footer

Well, this is one of the most generated custom requests by WHMCS users. We daily get custom requests for this. We will not say that there is a need to have a similar header & footer in the client area as it is on the front-end website. But some consider it as important from a branding point of view. So, considering this we have added a unique option in one of our WHMCS Client Area Theme which allows users to add custom header and footer, or if they do not want they can add as many as custom menu options in the client area.

So with this, we sorted out the need for all kinds of users.

4. Client Area App

Do you need a mobile app for your hosting business?

This must be the first question you should ask yourself, before investing your funds to create a masterpiece mobile app for your hosting business.


How Can This App Be Useful for Your Business?

If we talk about today, no one has time to go to their browsers and then enter a URL of their hosting provider and sign in to access their products.

A simple mobile app can do it all for your users, they can view the front end as well as manage their client area in a mobile app without any hassle.

This can be a future feature for some of our products.

So, these are our suggestions or views about how you can customize and design your WHMCS client area to deliver the best conversions. Also, we will continue to add more and more upgrades in case we found something interesting to boost conversions. In case you would like to share your suggestions and views please share in the comments.

WHMCS 7 7 Released Now

whmcs 7.7 released

The release of official WHMCS 7 7 has been recently announced to the general availability.

What’s new in this update of?

This new update brings in some security updates. All the maintenance releases which contain the same security updates have also been published for the 7.5 and 7.6 version.

You can as well download WHMCS 7 7 from their download page.

  • Apps and integration center
  • Intelligent search improvements
  • Hiding of the inactive clients
  • Codeguard website backup
  • The new payment gateway such as GoCardless and BitPay
  • The file storage support (Amazon S3)
  • Drag and Drop dashboard widgets
  • PHP 7.3 support

What’s New in WHMCS 7 7?

https://vimeo.com/311868589
How to get this update?

One can easily update the version using the Automatic Update feature in the admin. You can do it while simply navigating to Utilities > Update so that you can start the update process.

But we suggest you to take a proper backup of all the database before proceeding with this feature, or you can get in touch with us. We have WHMCS developers who will make this update process streamline for you.

Introducing WGS VMware 2.0.3: The Latest Version of Our Updated VMware Module

VMware 2.0.3

We have recently released the updated version of our WGS VMware module. The new VMware 2.0.3 version comes up with improvements as follows:

  • Rather than adding a new hard disk, we’ve resized the existing hard disk.
  • We have reduced the existing VM fetching time while cloning the section of mapping as well as assigning the existing VM.

These are the things that we emerged after fixing the security issues in the previous version 2.0.2. We would suggest our customers to update the module asap, to download the new version, visit the WHMCS client area.

ClientX V 1.0.7 Update Available on WGS

ClientX V 1.0.7 Update Available on WGS

We have released a ClientX V 1.0.7 version of our WHMCS Client Area Template. The new update brings the much awaited RTL support to the theme, yes that is true.

Want to upgrade it now? Read these full theme upgrading instructions and upgrade it. Below mentioned are the details of this new upgrade.

New Features Added:
  • Fully RTL supported
  • Colored PDF invoices can be generated as well as printed.
Bugs Fixing:
  • We have fixed the login details issue on Login to cPanel/Login to webmail buttons.
  • The more button on the product category section is fixed.
  • Fixed the scroll issue on the left navigation
  • Text overlapped with active product services on the homepage.
Improvements :
  • Show active product service on the full screen on the homepage in the case of signal active service.
  • Stay connected!
  • To update the latest build, download the new version (ClientX V 1.0.7) from your WHMCS client area.

Related Articles:

About WHMCS Security Breach

About-Security-Breach

We feel that it’s important to inform all our customers about the current security situation of WGS.

Yes, we got hacked! Our server got hacked. We are writing to inform you that we were recently able to confirm that there was an unauthorized access to our database containing user profile information and our ticketing system. We have since blocked this unauthorized access and made additional changes to our technical infrastructure to prevent future incidents.

It’s a kind request to all our customers to not panic in this situation. We’ll be upgrading all our modules if required. For now please change all login information of your server or WHMCS admin details that were shared with us.

No doubt, it is our mistake that we’ve left some loopholes over our server which has caused all this trouble to all of us. We are running an investigation underway.

Why we were on a mission to strengthen hosting providers?

It is because our main motive is to provide custom modules or solutions that were not present in the default WHMCS. We are not competing with anyone as our main target is only being helpful to the companies that are using WHMCS. At last, improving customer experience for WHMCS.

The people that have hacked our servers are actually very smart. They just have done it to spoil our business reputation. We’ve given a lot to make our modules stand out differently. But we are aware of haters.

A big thanks to them so that we can improve and serve our clients better!!

Even the company like Facebook gets hacked. If they can get hacked, then we are not a very big giant here in comparison to them. But we are constantly improving and this incident has taught us a lot to us.

We are now rigorously working with our admin team to take over the loopholes to avoid any such issues. We need some time to sort out everything and make it much more secure. We’ll come back strong. Thanks for the co-operation and support!

Account Statement Module V 2.0.2 Update Available

Account-ststement-2.0.2

Good news for all WHMCS users!

We are introducing another update V 2.0.2 for all the account statement module users.

It was really difficult to maintain the record of paid/unpaid invoices along with the past billing transactions. Even in the default WHMCS, you cannot obtain the feature of generating or scheduling the account statements. The client unnecessarily raises the ticket to the admin to share their account statement. It was tough for the admin to go through every ticket. So, we have created the account statement module for all the WHMCS users.

What does new v 2.0.2 have?

This new update adds “Total outstanding” section in the account statement. This shows the overall outstanding balance for a specific user. The new update is ready to download in your client area.

ClientX – V 1.0.2 Update Available on WGS

ClientX WHMCS Theme V 1.0.2 Update Available

We would first like to thank all our users to give an overwhelming response to our ClientX and make it our fastest-selling product in a very short time frame. As we all know a new product never becomes successful without the feedback of its users. We took all the feedback seriously and implement them in our new update which is ClientX – V 1.0.2.

Version 1.0.2 is loaded with many new features, improvements, and bugs fixes.

New Features Added in ClientX – V 1.0.2

  • Added the option in admin to change the theme color.
  • Added the option to disable multi-language.
  • Added the option to disable add-ons, domains, or active products on the home page.

Improvements:

  • Revamped the Market Connect SSL pages.
  • Revamped the checkout page if a market-connect product was added than showing the product recommendation.
  • The template is compatible now with Standard Cart, Modern Cart, etc.
  • Removed second cart badge.
  • Custom CSS override file added.
  • Override header/footer feature added.

What we’ve fixed?

  • Fixed the box alignment on the homepage.
  • Fixed the more button on the domain page.
  • Fixed the promo code issue.

Existing users can go to the client area to download the new updated file.


Related Article:

WHMCS Security – 7 Best Practices To Follow in 2025

Security Adapts for WHMCS

You can easily manage your hosting business with the most powerful web hosting automation system i.e. WHMCS. But over the past few years, we’ve been getting so many complaints against the Security Adapts for WHMCS. There are so many hackers as well as intruders who are trying their best to exploit the WHMCS system.

You have a lot of data of your customers whose hosting plans are in the running state. All of their domains registered plus their server access indulges a lot of sensitive data. There is a big need to secure your WHMCS system. We monitored various security channels round the clock of our customer complaints. So, to prevent hacking, malware infection as well as vulnerability exploits, one needs to follow some WHMCS security best practices .


WGS VMware WHMCS Module


Let us Talk About the WHMCS Security 7 Best Practices:

1. Securing the Writable Directories

To prevent web-based access, we recommend moving all the writable directories to a non-public directory rather than keeping them in the public folder. The three directories which can be written are attachments, downloads as well as templates_c. So, you need to add new paths to these directories by updating the following lines in the configuration.php file.

$attachments_dir = “/home/username/attachments/”;
$downloads_dir = “/home/username/downloads/”;
$templates_compiledir = “/home/username/templates_c”;

2. Securing the “configuration.php” file

Here, you need to adjust the permissions for the “configuration.php” file which is in your WHMCS root directory. This is one of the files which you cannot recover without taking a backup of the file. You need to change the permission setting of this file to 400 which will help in avoiding accidentally editing, overwriting as well as deleting. It will eventually provide read-only access to the file and prevent anyone else from spoofing.

3. Move the Crons directory

Here, we recommend you move the crons folder to a non-public directory which is located above your web root to stop the web-based access. For the relocation, firstly, you need to choose a new location for your crons folder and secondly, uncomment the WHMCS path as well as provide the full path to your WHMCS installation. You need to add the following line to the configuration.php:

$crons_dir= ‘/home/username/whmcs_crons’;

4. Restricting access by IP

To add more privacy to your admin area, you can restrict access to a particular set of IPs. This can only be done by creating a file namely, .htaccess within your admin directory of WHMCS along with the following:

order deny, allow
allow from 12.34.5.67
allow from 98.76.54.32

deny from all

5. Changing WHMCS Admin Folder Name

If you customize the URL of your WHMCS admin area, then it will be tough for malicious hackers to attack it.

6. Restricting Database Privileges

You need to assign only the following database privileges and the rest you can disable.

  1. Delete
  2. Insert
  3. Select
  4. Update
  5. Lock Tables
During the installation as well as upgrading, you need the following privileges
  1. Alter
  2. Create
  3. Drop
  4. Index

7. Enable SSL

As a web hoster, who handles the entire customer data via billing application, need to take care of the most sensitive data passing between it and the end-users.Therefore, it is important to have a valid SSL certificate that will enable the use of HTTPS as well as encrypted communication.

Other WHMCS Security Measures

  1. Install Mod Security in Easy Apache: You can take additional steps and one of them is installing Mod security in Apache which will help in blocking SQL injection attacks.
  2. Install mod_geoip for apache: It is generally a custom module in Easy Apache. With the help of this module, you can block the countries you’ve never done business with.
  3. You need to secure your physical server. For this, you need access to the files via SSH/SFTP and relocate the SSH port.
  4. You need to block all the outbound ports which are not of your use.
  5. Make use of the certificates to connect the server and you must set really strong passwords for this.
  6. One more step is to backup your server and the database files of the server.

So, these are the steps with which you can make your WHMCS more secure.

References: https://docs.whmcs.com/Further_Security_Steps

https://whmcs.community/topic/215429-10-ways-to-make-your-whmcs-installation-more-secure/


Paid vs Free SSL Certificates: Which One Should You Pick in 2023?


WHMCS Gandi.Net Module Released over Marketplace

WHMCS Gandi.net Module

We are pleased to announce our new release of the Gandi.Net WHMCS Module. Now, the WHMCS users can sell, renew or transfer the domains via Gandi.Net. Make your customers get the best domain names along with the extensions just by registering or transferring their domains with WHMCS Gandi.Net Module.


Below are some of the highlighted key features of the module:

1. Register/Transfer/Renew/Cancel Domain:

Admin does not need to manually register a domain on Gandi.Net, with our module a domain will be automatically registered after the completion of the payment by the customer. Your customers can also transfer/renew and cancel a domain through the client area.

2. Updating Nameservers

Your customers can easily update the nameservers in case they have a plan to migrate their hosting from your website to another hosting provider.

3. Updating Contact Details

The customer has permission to manage their contact details while registering a domain.

4. Get the EPP code

Your customer can easily generate an EPP code if they want to relocate their domain from Gandi.net to a different domain registrar.

5. Enabling/Disabling the auto-renewal of the domain

Your customers can enable as well as disable the domain auto-renewal process in the client area.

6. Lock/Unlock Registrar

With the help of our module, the admin can lock or unlock the transfer of domains on the website to make it more secure.

7. Managing DNS records

With this module, your customers can manage the entire DNS records in the client area.

8. WHOIS privacy

Whenever your customer purchases a domain on the website, he/she has the ability to take the advantage of hiding their identity.

Overview of the Module

Don’t tie your clients down with dull domain extensions; instead, use our WHMCS Gandi.net (Oldest Domain Registrar with 700+ Domain Registrars) modules to provide them with the greatest domain extensions. With our plugin, you enable your clients to register/transfer domains with over 700+ domain extension options.
Our addon connects WHMCS with Gandi.net by automatically provisioning the domain following a successful purchase.

As they say, Begin with a domain name. Build your website with Gandi.

Redefine Your WHMCS Client Area with ClientX

Redefine your WHMCS client area with ClientX

In search of an exceptional template that will redefine your client area experience and eliminate your worries?

No need to worry!

“We are so excited to announce the release of the ClientX WHMCS Client Area Template.”

Simple yet elegant, the ClientX WHMCS Client Area Template is basically designed to provide your customers with a balanced user experience. WHMCS has a very basic client panel and there are so many themes available in the market which are unable to meet the need of the hosting businesses. So, we provide template which is really professional in its own terms, providing a full-width screen, RTL support along with many unique features that you can’t expect with any client area theme.

Redefine your WHMCS client area with ClientX

With the help of our template, you can allow your customers to upgrade as well as renew add-on services from the dashboard itself, without login in into the cPanel or Plesk Panel.


Now, you might be wondering what makes this theme the best and more unique than others. Lets discuss its unique features:

Redefine your WHMCS Client Area with ClientX

1. Social Login and Signup:

Our developers have integrated social logins as well as sign-up methods through Google and Facebook. So, it becomes easy for the users to log in as well as register with your website.

Redefine your WHMCS client area with ClientX

2. Multi-language With RTL Supported:

Our theme supports 20+ native languages as well as full RTL support for the ease of our customers.

Redefine your WHMCS client area with ClientX

3. Full-fledged support and updates for 1 year:

There is no limit to getting support as well as updates for 1 year if you want to continue with it.  In case you need to register for the suture updates, you can buy an additional 1-year upgrade service for just $19.

4. Responsiveness:

Our client’s template is 100% mobile-friendly. We are offering you a clean styled cross-device supportive as well as responsive design.

> Tested on all the leading brands mobile devices.

5. Changing the Color Scheme:

The user would enable himself to manage the color schemes as well as relevant buttons.

What Complementary Features You Can Receive With it?

1. Free CartX

Within the template, we provide you with a free CartX. This is imposing a new look on the order form template. We’ve redesigned the default client area dashboard and made it more user-friendly o our users with the Free CartX.

Redefine your WHMCS client area with ClientX

2. Complementary DomainX Search Page:

You will get the total redesigned domain search page with some more clarity. So, take your business online in a single package.

ClientX DomainX Search Page

3. Complementary InvoiceX Search Page:

Besides the default invoice in WHMCS, we’ve designed as well as integrated it. The user can have access to the entire invoices to know whether it is paid or not, along with many other options to search invoices on the active home page. Filter out the invoices as per the status and receive the notifications in the client panel.

ClientX Invoice Template

Get a Full Review Of ClientX WHMCS Template at WHMCS Marketplace

WGS Introduces the Revamped Website

rewamp-website-whmcsglobalservices

Summary: This article discloses everything about how WGS Introduced the Revamped Website

One human year equals at least four Internet years, and that’s how technology is advancing nowadays. To keep up the pace with the latest technology advancements, we have redesigned our website to give it a new look and feel with some technology updates as well. First impression counts and this is where our old website lacks. But in this new Revamped Website, we have not left any stone unturned with respect to the UI and UX of our users.

As we all know a website is the face of every business and if given proper supervision, then it can become the extension of sales. Therefore, we always strive through creating the right impression of our website on our customers. Eventually, Revamped Website has brought a refreshed look to its website with streamlined services. It will help in keeping the customer at the forefront of their shopping experience.


The new website will be available to the entire customers at the beginning of August, let’s check out what is new in the new version:

1s-home

Introducing the much-awaited Client X Template for WHMCS Client Area

clientx-8

We’ve introduced the ClientX WHMCS Client Area template which is designed to provide a smooth experience to your customers. They get a lot of stuff in their baskets such as social login, free updates and support for one year, complimentary DomainX search page, and complimentary InvoiceX page. It also indulges RTL and multilingual support, color alteration settings as well as full responsiveness. It will provide a professional feel to the entire WHMCS users.


Offering WHMCS Custom Development Solutions

With the increase in demand for custom solutions in WHMCS by our customers, we have launched out a custom development service. Users can contact us for any WHMCS custom development requirement and we will provide a free quote to them.

Offering a Ready to Use Hosting Selling Solution

Get a Ready To Use Web Hosting Selling Solution in 10 Working Days!

Yes, you heard that right. If you have an idea to start a web hosting business, then we are here to help you make the finest setup for selling hosting. We provide you with the best-Revamped Website layout as well as outstanding marketing services. Not only this, we provide top-selling automation modules which can easily empower your hosting business growth and deliver result-oriented solutions for your online business. The customers can easily get optimal tech support. We, at WGS, help you serve your customers with the best web hosting experience. Simplify your lives while getting an amazing web hosting startup with us.


How to Schedule Auto Account Statements in WHMCS?

How to schedule Client account statements in WHMCS

Auto Account Statements serve several important purposes as they provide a proper record of the customer’s transactions. The customer can further check for any unauthorized charges or errors.

In the absence of any module such as an account statement, the user generally worries about the paid/unpaid as well as the details of the past billing transactions.

There’s a missing feature in the default WHMCS as the ability to generate or schedule account statements. In the same case, the client starts raising tickets unnecessarily to the admin to share their account statement. Viewing it as a quite waste of time, it becomes difficult for the admin to serve several tickets.

Keeping in mind all of the above points, we have created an extraordinary account statement module for WHMCS users.

Our account statement WHMCS module provides a convenient, quick as well as an environmentally friendly way to get you the proper statements. You can easily access it through the WHMCS Billing system. So, it’s in your hands to increase the usability of WHMCS where a user can get the transaction statement in just a single click.


How the account statement module helps web hosting companies?

  1. It avoids the repetitive requests generated by the customers as this module allows them to download their account statement for the specific time frame via their account panel.
  2. Admin can have a choice to send bulk account statements to their customers of the specific time period.
  3. Admin has the ability to schedule auto account statements monthly, quarterly, annually, or some specific day via the mail to their customer. So, it helps in scheduling automated account statements for their users.
  4. With the help of our account statement module, you can have a fully customizable pdf file where you can change fonts, and paper size from the backend admin panel. You can even check whether you want to receive the details of the invoice with paid as well as unpaid transactions within the settings. So, generate past billing transactions wherever you are and at any time.

ACC4
button_view-module-here

WGS Cloudflare WHMCS Module Update is Now Available!

WGS Cloudflare-WHMCS-Official-Modules V 4.1.4 Released

Introducing our WGS WHMCS Cloudflare module with minor bug fixes as well as improvisation in the version as well as features.

As we all know that Cloudflare Official WHMCS is no more supported by Cloudflare. So keeping trust in that module is quite risky for you. Keeping that in mind we have updated our plugin with all new features and minor bugs fixes.

What is New in WGS Cloudflare WHMCS Module?

In our previous version, there were a few minor bugs left which we have completely fixed up in this release. The new version is launched with a regression testing process by our customers to make it available for you.

Minor Bug Fixes:

Analytics: The graphs do not contain the correct data. It seems that the Requests served graph actually shows the bandwidth data.
cloudflare-whmcs-module-analytics-settings
Crypto: When I try to enable HSTS (just the tick on and save) it runs into an error message: “Error(400): cfError(1047):Security header STS enable value must be set to true or false”
Caching: Modifying the “Browser cache expiration” value runs into an error message: “Error(400): cfError(1007):Invalid value for zone setting, browser_cache_ttl”
Missing Dropdown strings from language files (non translatable).

New Features Introduced in the Upgrade: 

DNSSEC: We’ve added a DNSSEC feature in our WHMCS module which will help in maintaining the security of your account in the Cloudfare. Our module provides the user friendly interface which allows your customer to manage the DNS records, DNSSEC from the client area itself.
CName Flatten: We have pretended CName flatten feature in the Cloudflare WHMCS module which make us to use the root domain while maintaining the DNS fault tolerance strategies across the multiple IP addresses.
Auto Updating nameservers on registrar: The manual updating of the nameservers has been totally replaced with the auto update of Cloudflare nameservers on domain registrars.
whmcs-cloudflare-auto-nameserver-updating-on-domain-registrar
Working with Product Addon: Users can resell Cloudflare Services with the existing product Addon rather than creating a specific product for the Cloudflare service.
Cloudflare-whmcs-addon
Managing Cloudflare from the client area: It allows the client to upgrade as well as downgrade the Cloudflare plans from the client area itself. Your customer can also manage all the Cloudflare settings in the client area without visiting the Cloudflare website.
cloudflare whmcs module client area settings

Cloudflare settings that user can Manage:
  • Cloudflare Analytics
  • DNS settings
  • Crypto settings
  • Cloudflare Firewall settings
  • Website speed optimization
  • Website Caching settings
  • Scrap shield settings
  • Plan upgrade and downgrade
  • Updating website’s IP address