After generating the custom CA “Signed certificate” as mentioned in our previous blog, you need to install and configure the CA Signed Certificate on ESXi Host.

Consider these Steps
Here is how to do it:
Step 1. After the generation of the certificate, you need to log in to the vCenter Server.
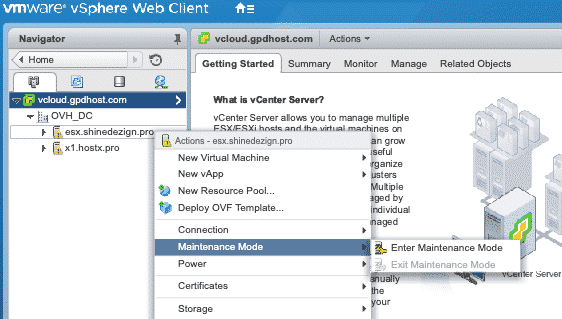
Step 2. Initially, you need to put the host into Maintenance Mode to install CA Signed Certificate

Note: If the ESXi 6.0 connects to VC 6.0 after replacing its cert with this KB, the host certs would be replaced by VMCA signed certs. Firstly, VC 6.0 needs to switch to custom certificate mode. For more information, see Understanding Certificate Mode Switches.
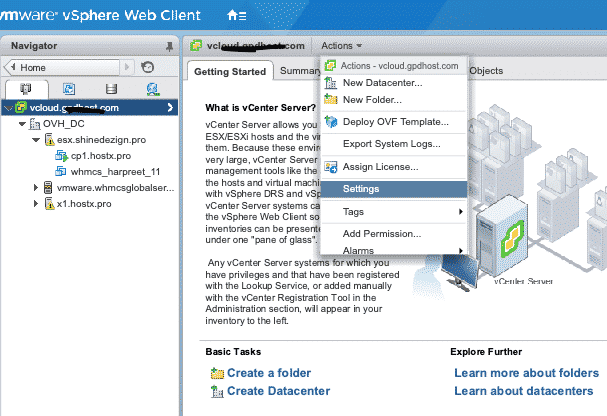
Step 4. In order to set certificate mode in the vCenter web client, you need to select the vCenter server that manages the hosts and click on Settings. Click on the advancement settings, and edit it.
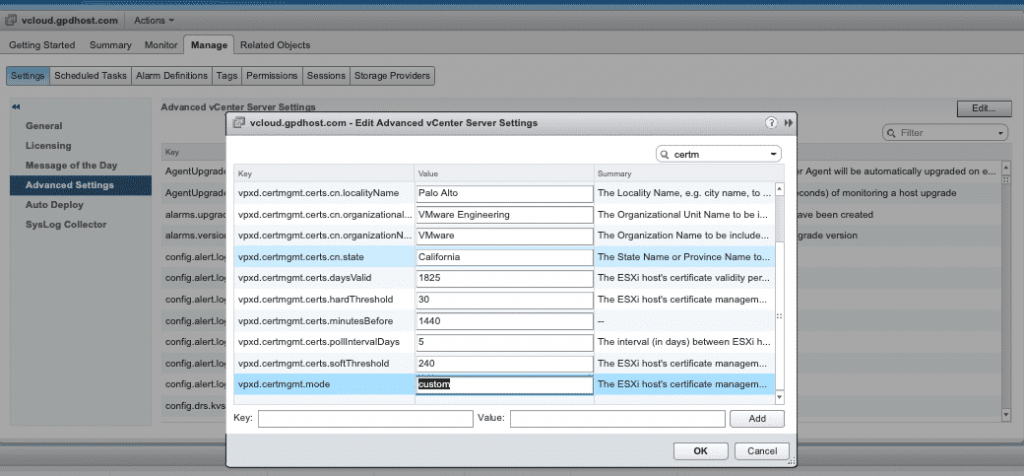
In the filter box, enter the cert mgmt to display the certificate management keys to proceed.
Step 5. You can also change the value of vpxd.cert mgmt.mode to custom if you intend to manage your own certificates, and to thumbprint, if you temporarily want to use thumbprint mode, and then click the OK button.
Once you have done VMCA mode, then you can click on the “OKAY” button and restart the vCenter server.
Installing CA Signed Certificate on ESXi Host
Please confirm that the ESXi Host should be in the maintenance mode on which you need to install the CA-signed certificate.
Now, you need to make a connection.
Now connect the FTP Filezilla or WINSCP in order to proceed with installation
You have to upload the new “rui.crt” as well as “rui.key” file to (/etc/vmware/ssl).

You need to navigate to “/etc/vmware/ssl” directory and copy SSL files to a backup location.
Now, you need to delete the existing “rui.crt” and “rui.key” from the directory (/etc/vmware/ssl).
You need to make the permissions of Rui.cert 644 and Rui.key 400.
After completing the previous task, you need to reboot the ESXi host. It may take it down for 2 minutes once the host is up and check the status of URL in the browser which should be green in color.
Once the CA Signed Certificate is installed, you need to exit the maintenance mode in the ESXi Host.