Canonical released Ubuntu 20.04 LTS (Focal Fossa) with a strong emphasis on security, stability, and high performance, making it the go-to Linux distribution for enterprise virtual infrastructure. However, building a production-ready Ubuntu 20 VM Template that integrates smoothly with VMware’s automation ecosystem can feel daunting, especially when dealing with networking quirks, cloud-init conflicts, and VMware Tools dependencies.
Note: Ubuntu 20.04 LTS End of Life Notice” mention that Ubuntu 20.04 LTS support ends April 2025 and link to Ubuntu 22.04 alternative, showing topical authority
This guide walks you through every stage of the process, from downloading the ISO to converting a fully configured virtual machine into a reusable template, and then dives deep into the common pitfalls admins encounter, with practical solutions drawn from the VMware and open-source communities.
What is a VM template?
A VM template is a master copy of a virtual machine (VM) that is used to create multiple identical VMs quickly and efficiently. It contains the operating system, applications, and configurations that are pre-installed and configured. By using a VM template, administrators can streamline the deployment process, ensure consistency across VMs, and save time when provisioning new virtual machines.
Why Use a VM Template Instead of Clone?
The difference between a template and a clone is worth understanding before beginning:
| What is It | Best Use for | |
| Template | Static, read-only golden image. Cannot be powered on. | Repeatable, consistent deployments at scale. |
| Clone | Exact, live copy of a running or paused VM including its current state. | One-off duplicates or test environments based on a
specific live state. |
Why VM Templates Matter?
Speed of Deployment: Spin up a new VM in minutes instead of hours. Templates eliminate repetitive OS installation and configuration steps.
Security Baselines: Bake security policies, SSH hardening, and package updates directly into the template so every clone starts from a hardened state.
Consistency at Scale: Every VM deployed from a template is identical, eliminating configuration drift and “snowflake server” syndrome.
Automation Ready: Templates are the prerequisite for infrastructure-as-code tools like Terraform, Ansible, and vRA to work reliably.
Resource Efficiency: Linked clones from templates share base disk blocks, saving significant storage in dev and test environments.
Reproducible Testing: QA and DevOps teams can always revert to a known-good state by deploying a fresh clone of the verified template.
Prerequisites
Before you begin, ensure all of the following are in place:
- A running VMware ESXi 6.7+ or vCenter 7.0+ host accessible via the web UI.
- The Ubuntu 20.04 LTS Server ISO downloaded from releases.ubuntu.com.
- Sufficient datastore space: minimum 20 GB disk, 2 vCPUs, 2 GB RAM for the template VM.
- Administrative credentials to the ESXi host or vCenter Server.
- A DHCP server on the VM’s port group (recommended for template builds; static IP causes cloud-init conflicts).
- Internet access from the VM (to pull packages during OS install).

-
-
-
-
Create Ubuntu 20.04 VM Template
Follow the steps below to create the Ubuntu 20.04 VM Template for VMware automation:
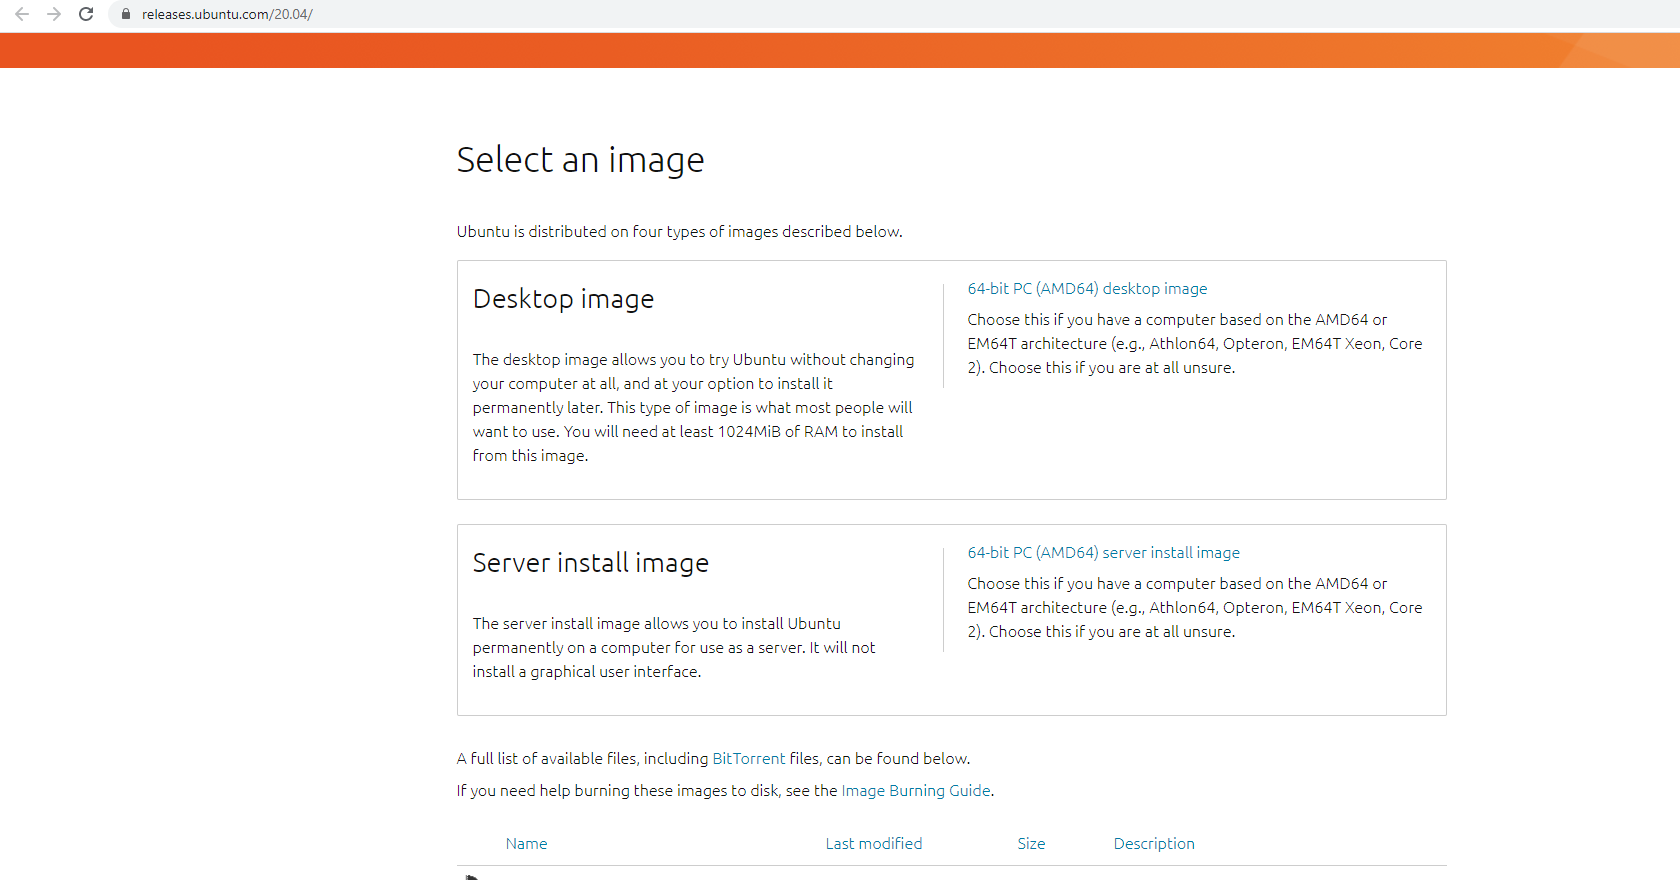
Step 1. Download The ISO File
1. Visit on the official website of Ubuntu. Click on the link below to download the Ubuntu 18.04 ISO
Link :-https://releases.ubuntu.com/20.04/

-
-
-
-
-
-
-
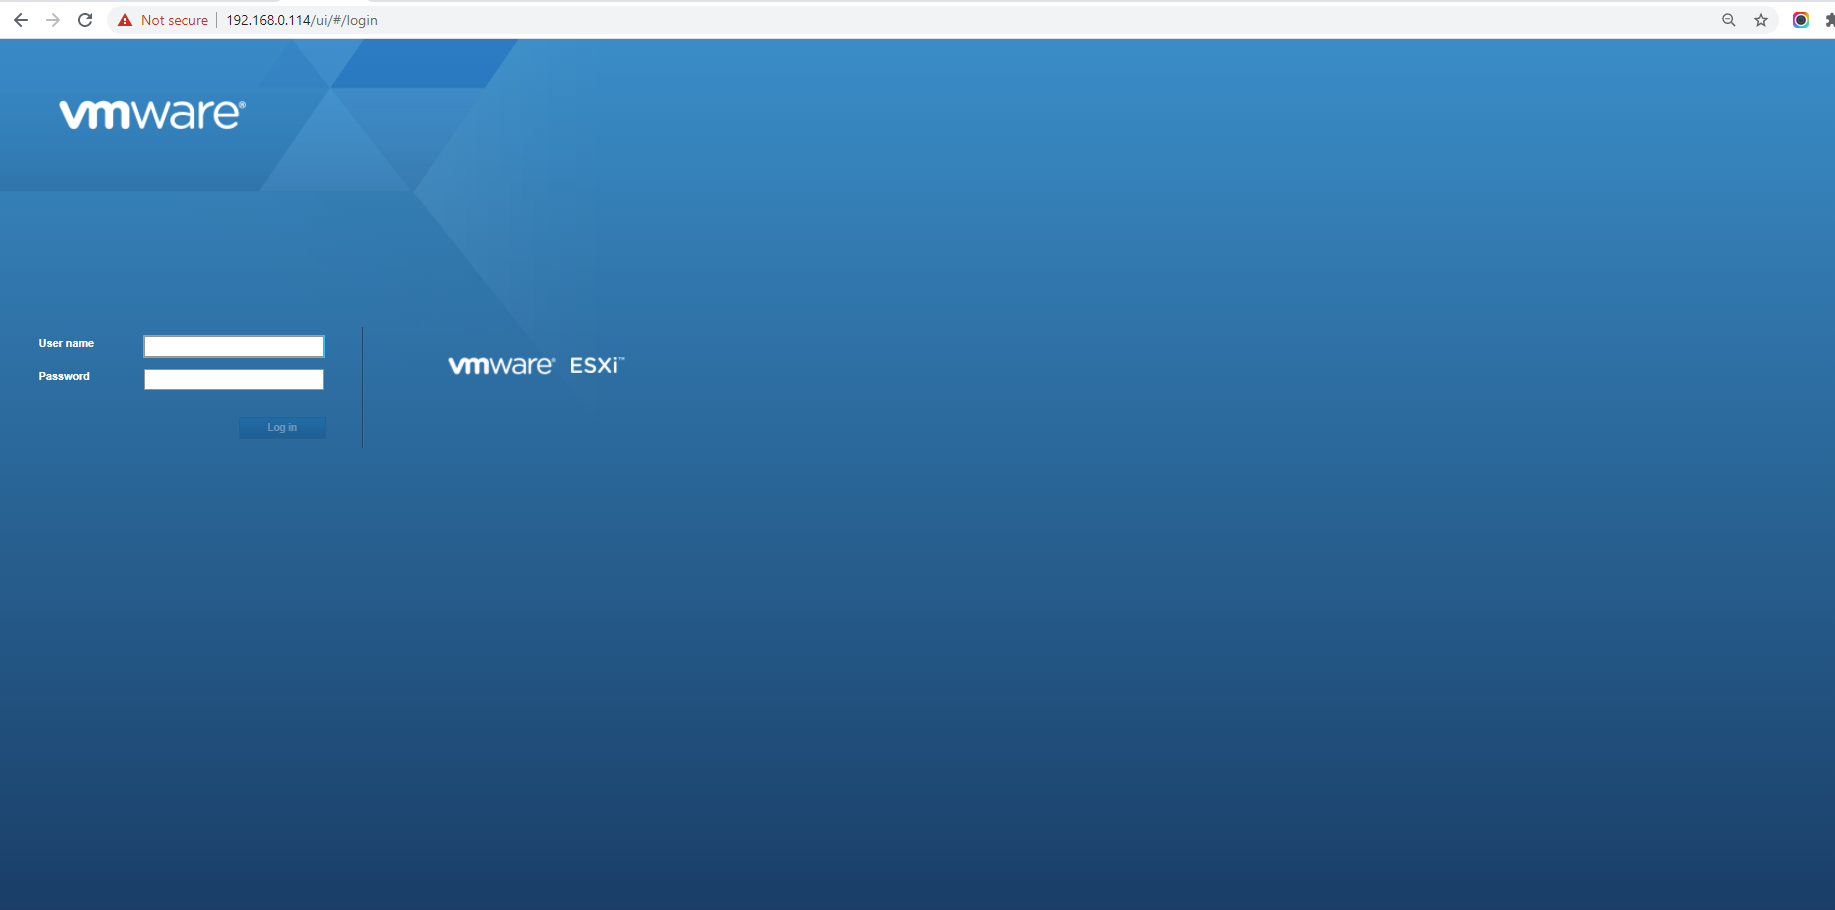
Step 2. Now, log in to your VMware ESXi

-
-
-
-
-
-
-
Step 3. Upload the ISO Image to VMware ESXi Datastore
1. Click on the Storage button, then select Datastore browser.

2. Click on the Create Directory and create the folder with the name of iso
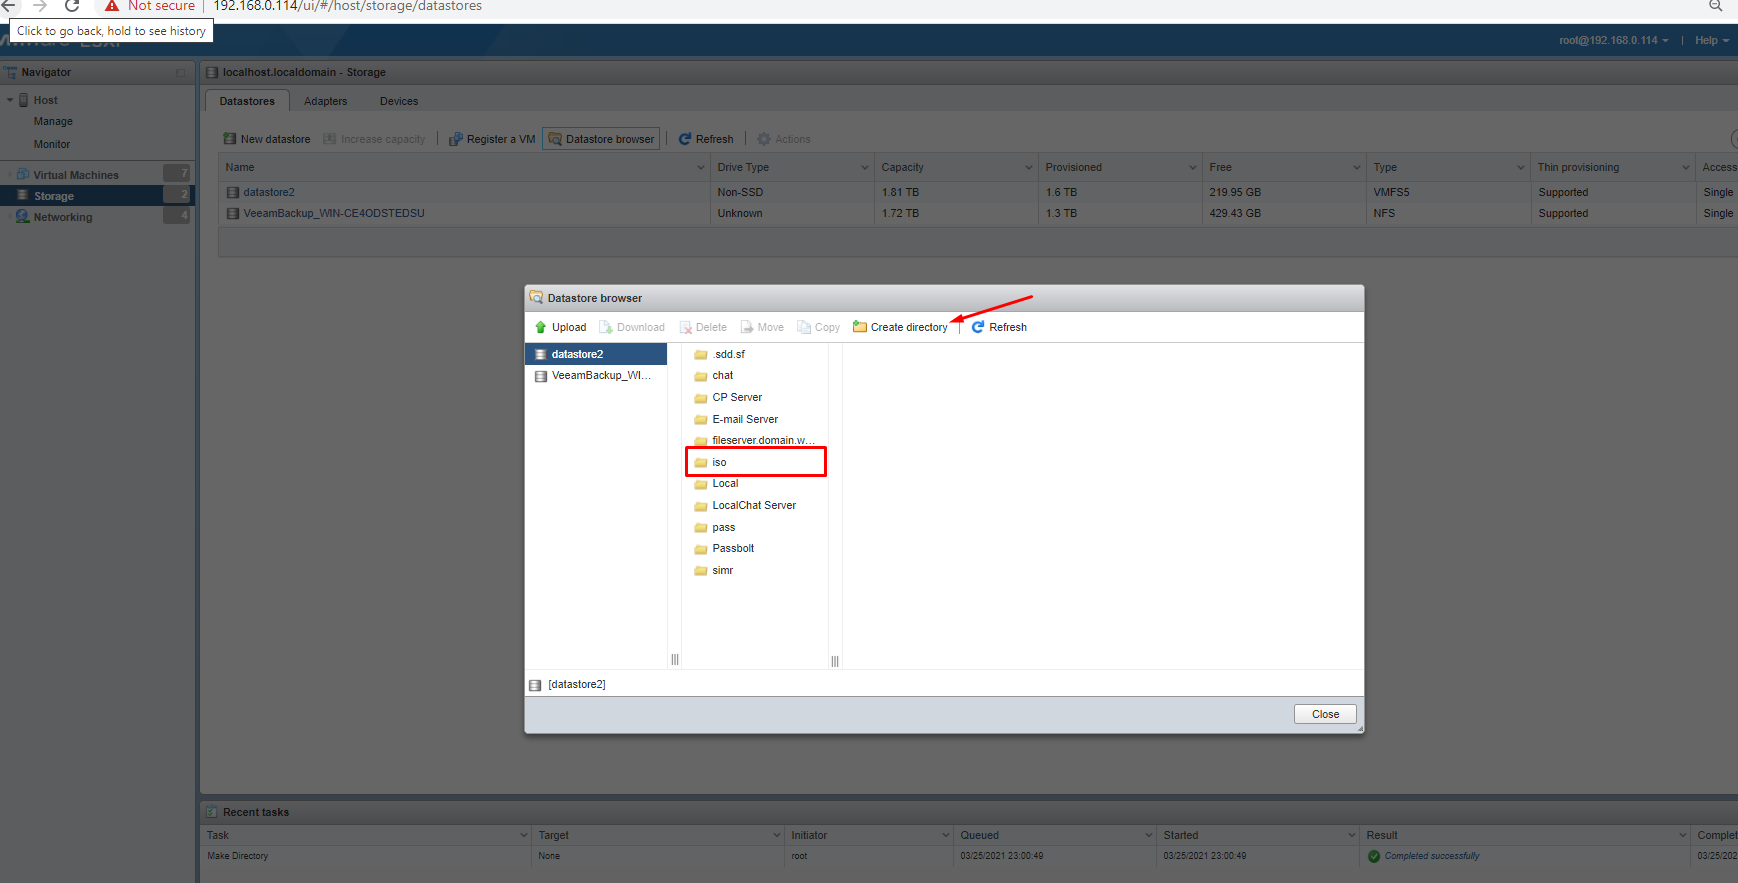

3. Hit the Upload button
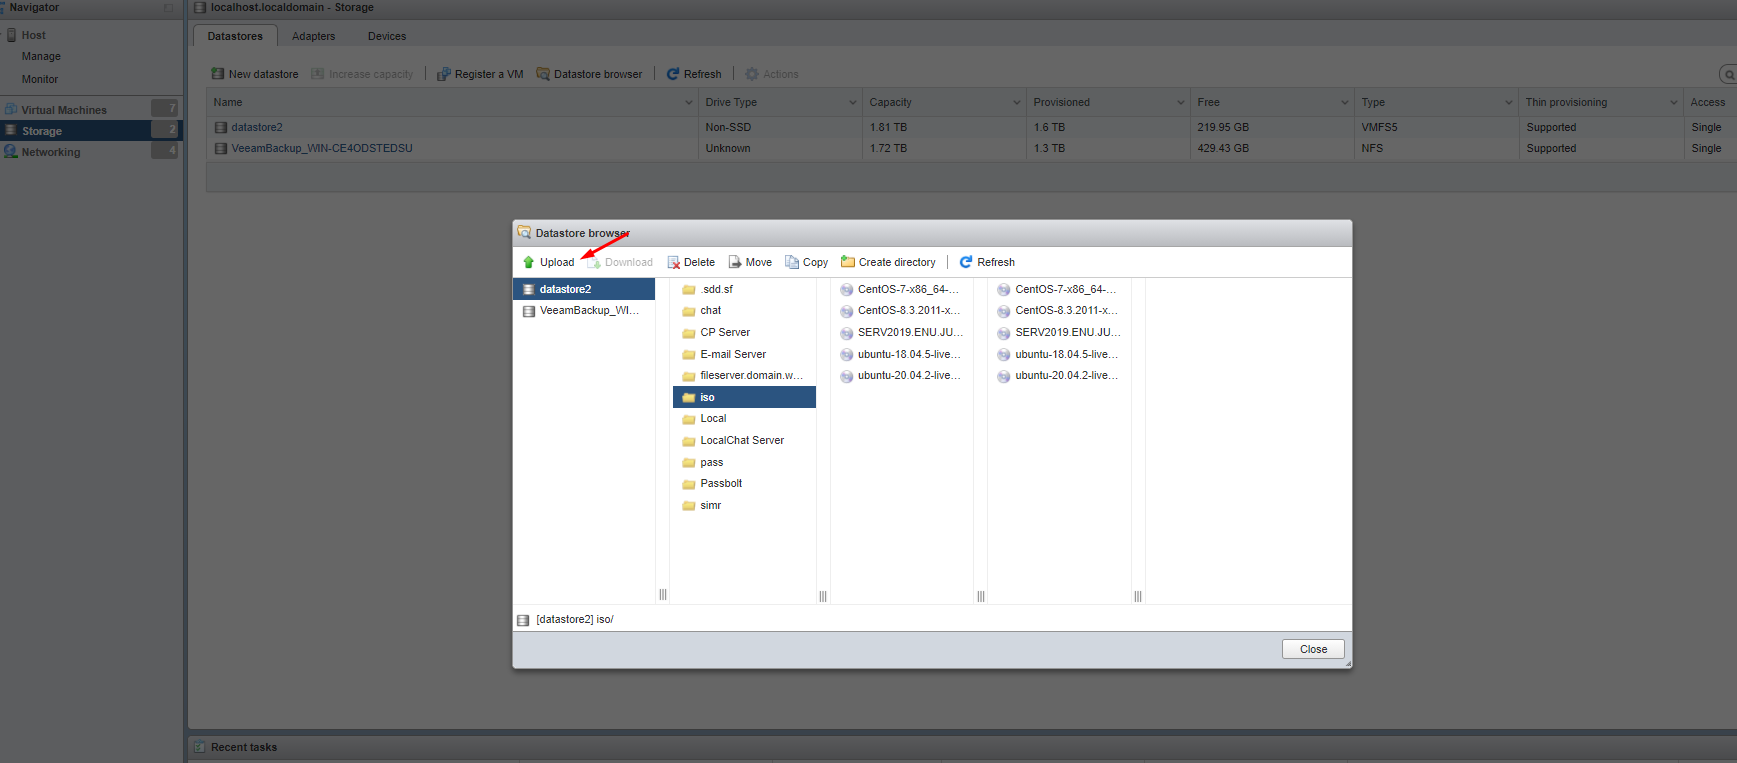

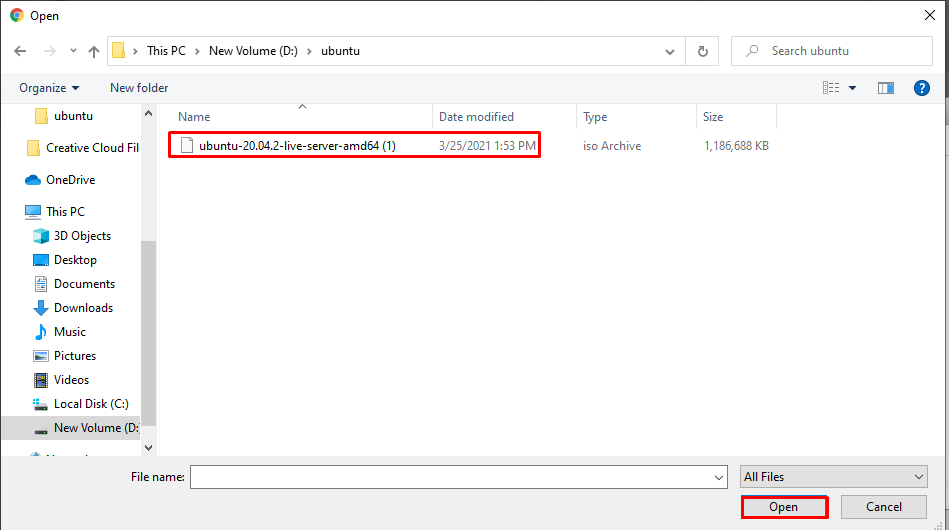
4. After that, choose the Ubuntu-20.04 ISO image from your local computer and click on the Open button.

-
-
-
-
-
-
-
Step 4. Create a VMware ESXi Virtual Machine for Ubuntu-20.04 Installation
1. Click on the Create / Register VM
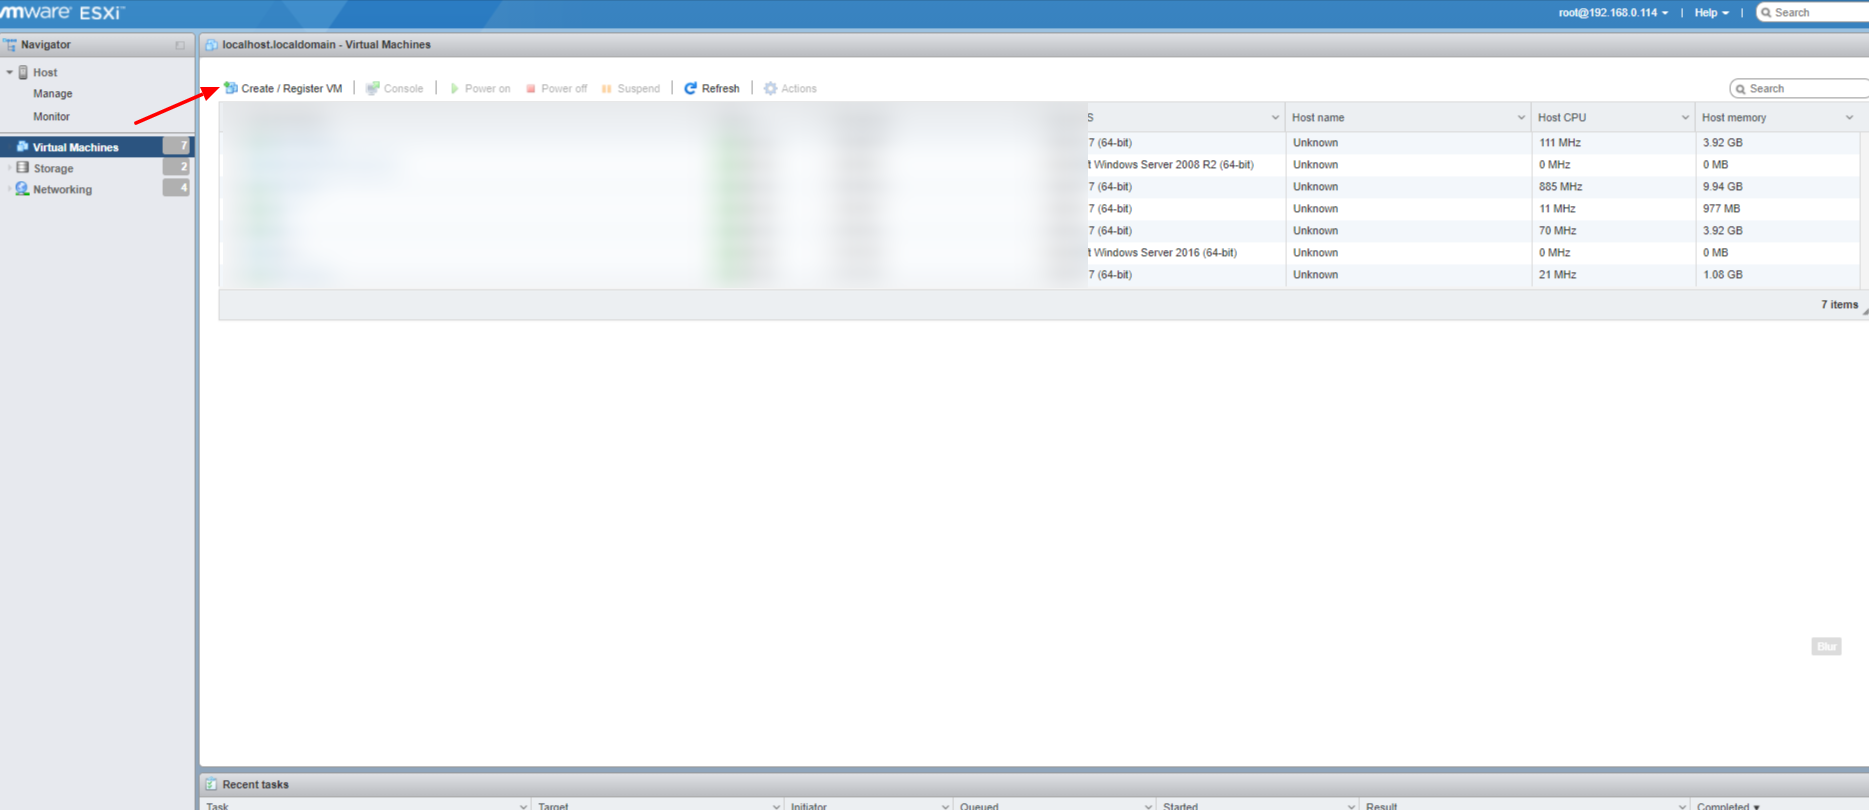

2. Then select the option to Create a new virtual machine and click on Next.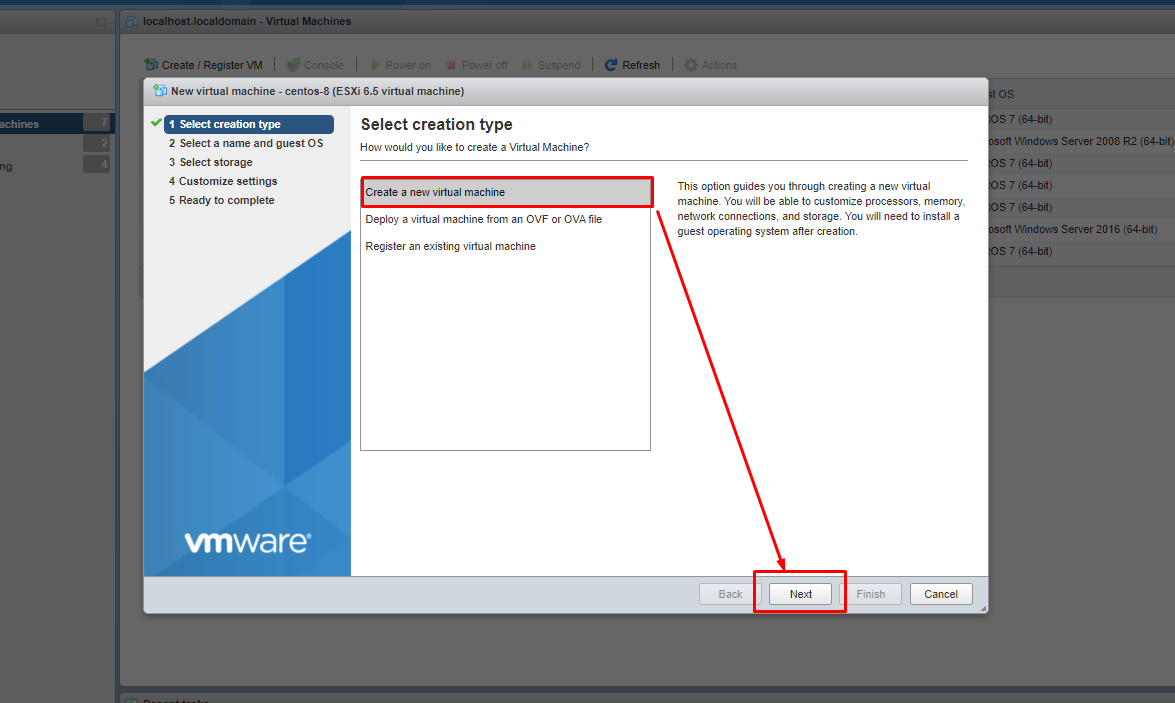

3. Enter VM name and select the Guest OS family to Linux and Guest OS version to Ubuntu Linux (64-bit). Then, click on Next.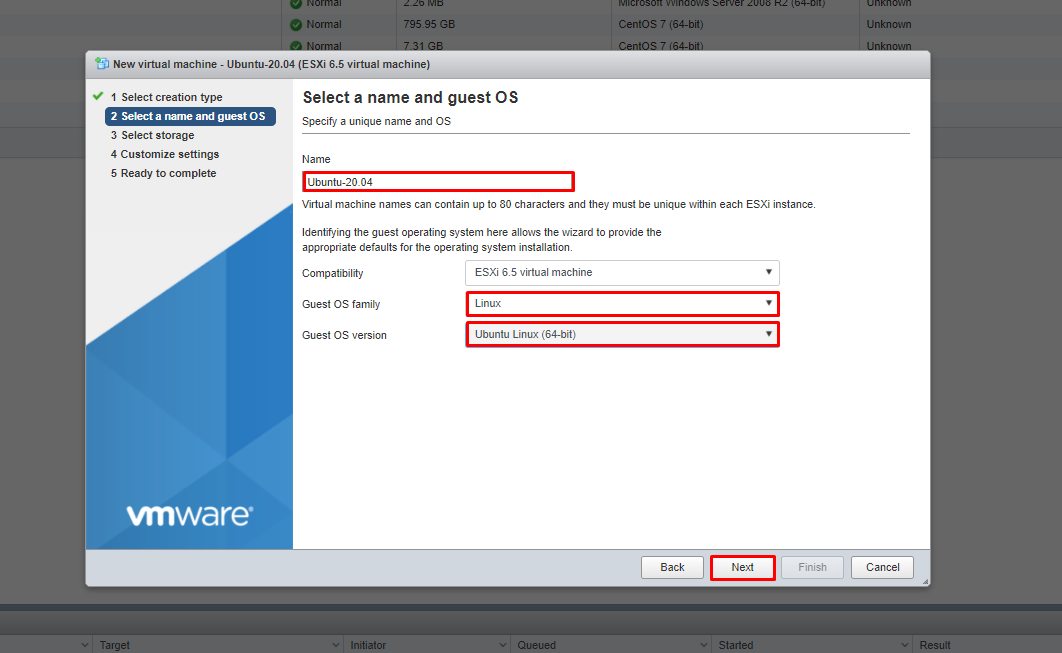

4. Select the datastore and click on Next.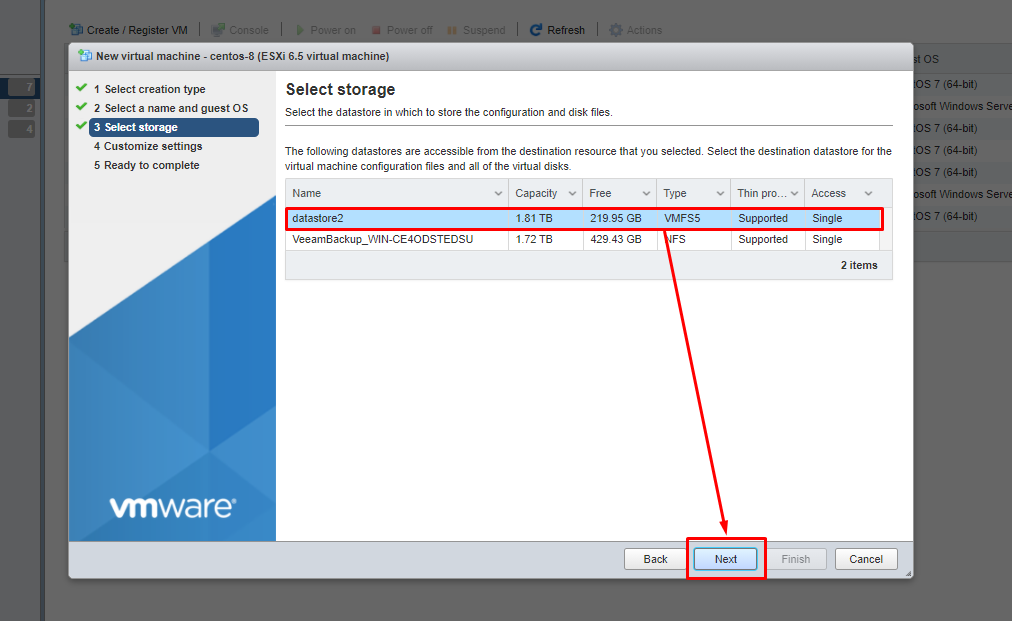

5. Configure the virtual machine hardware and click on CD/DVD Drive 1 and browse the Ubuntu-20.04 ISO file from the datastore. Click Next.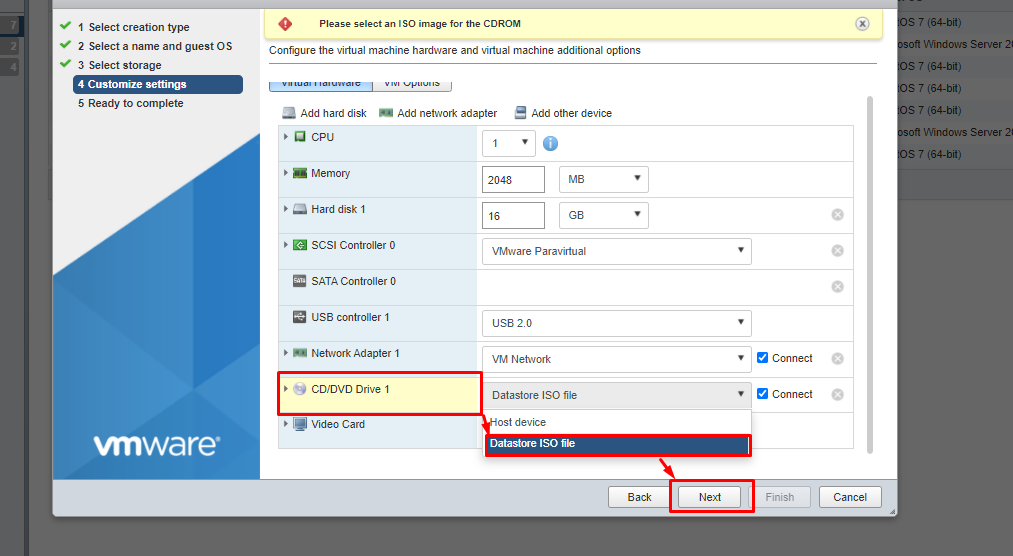

6. Then choose the ISO file.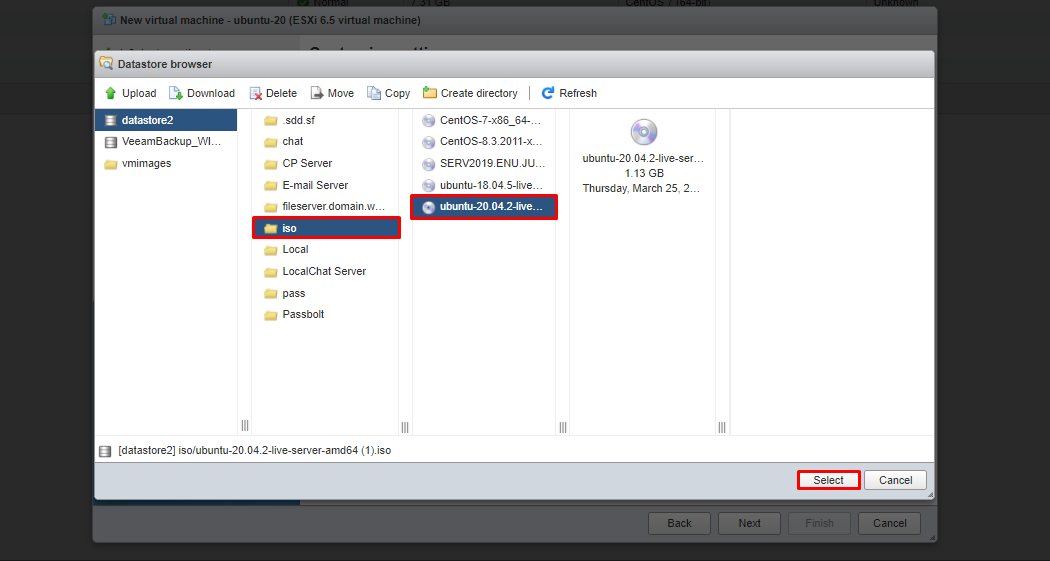

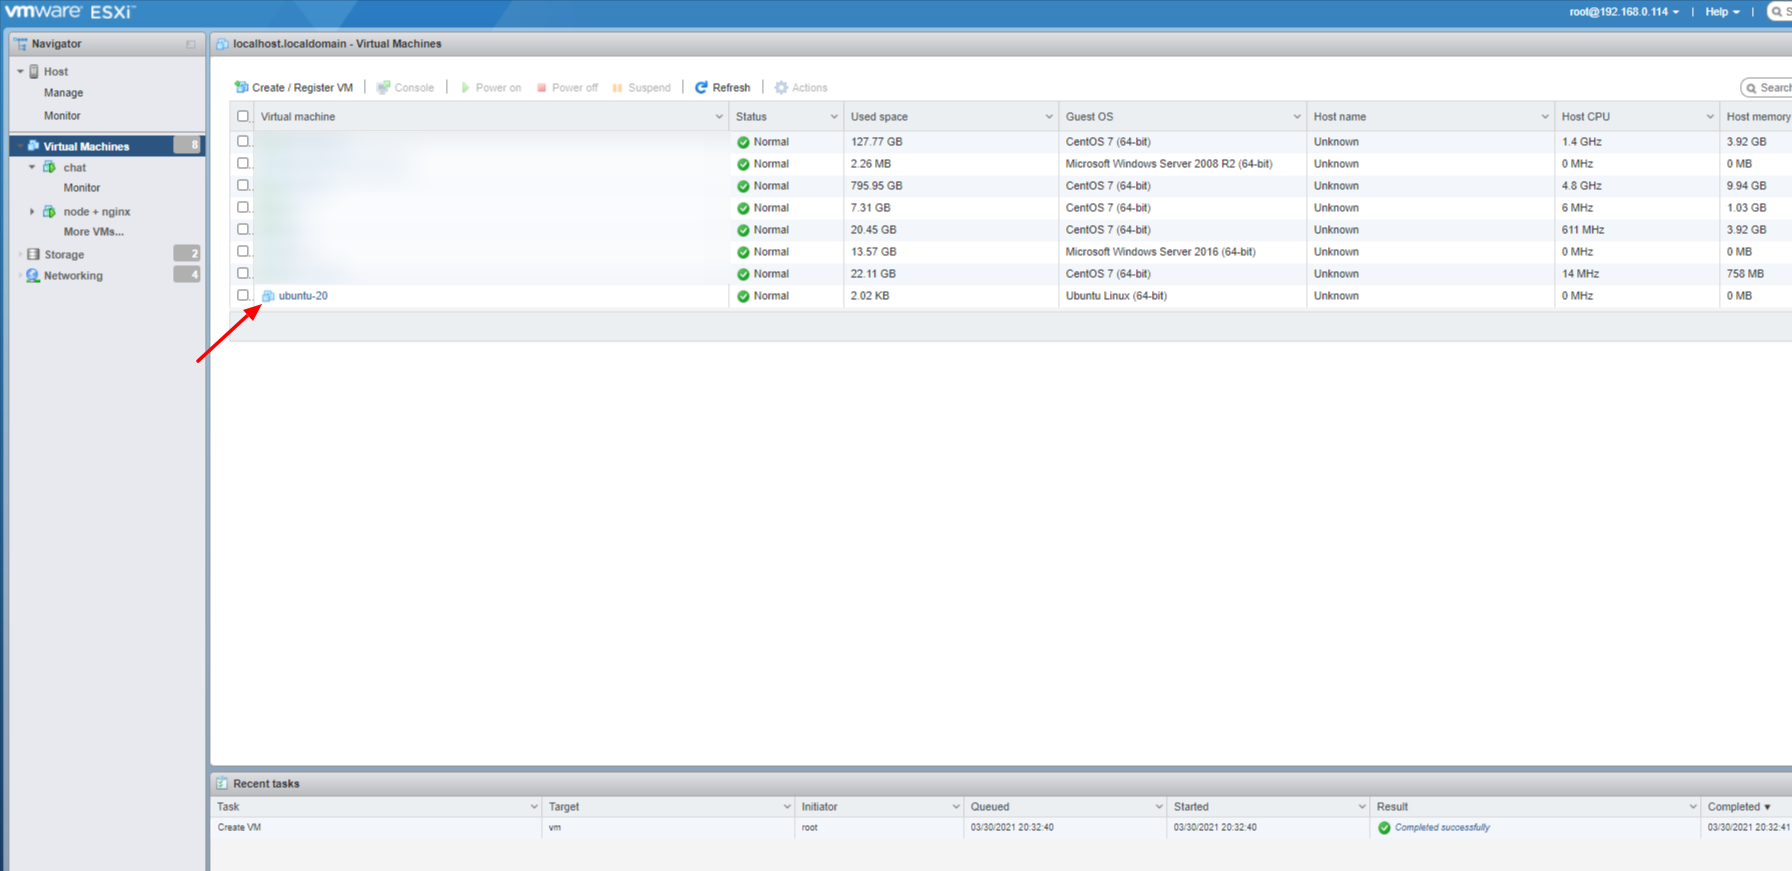
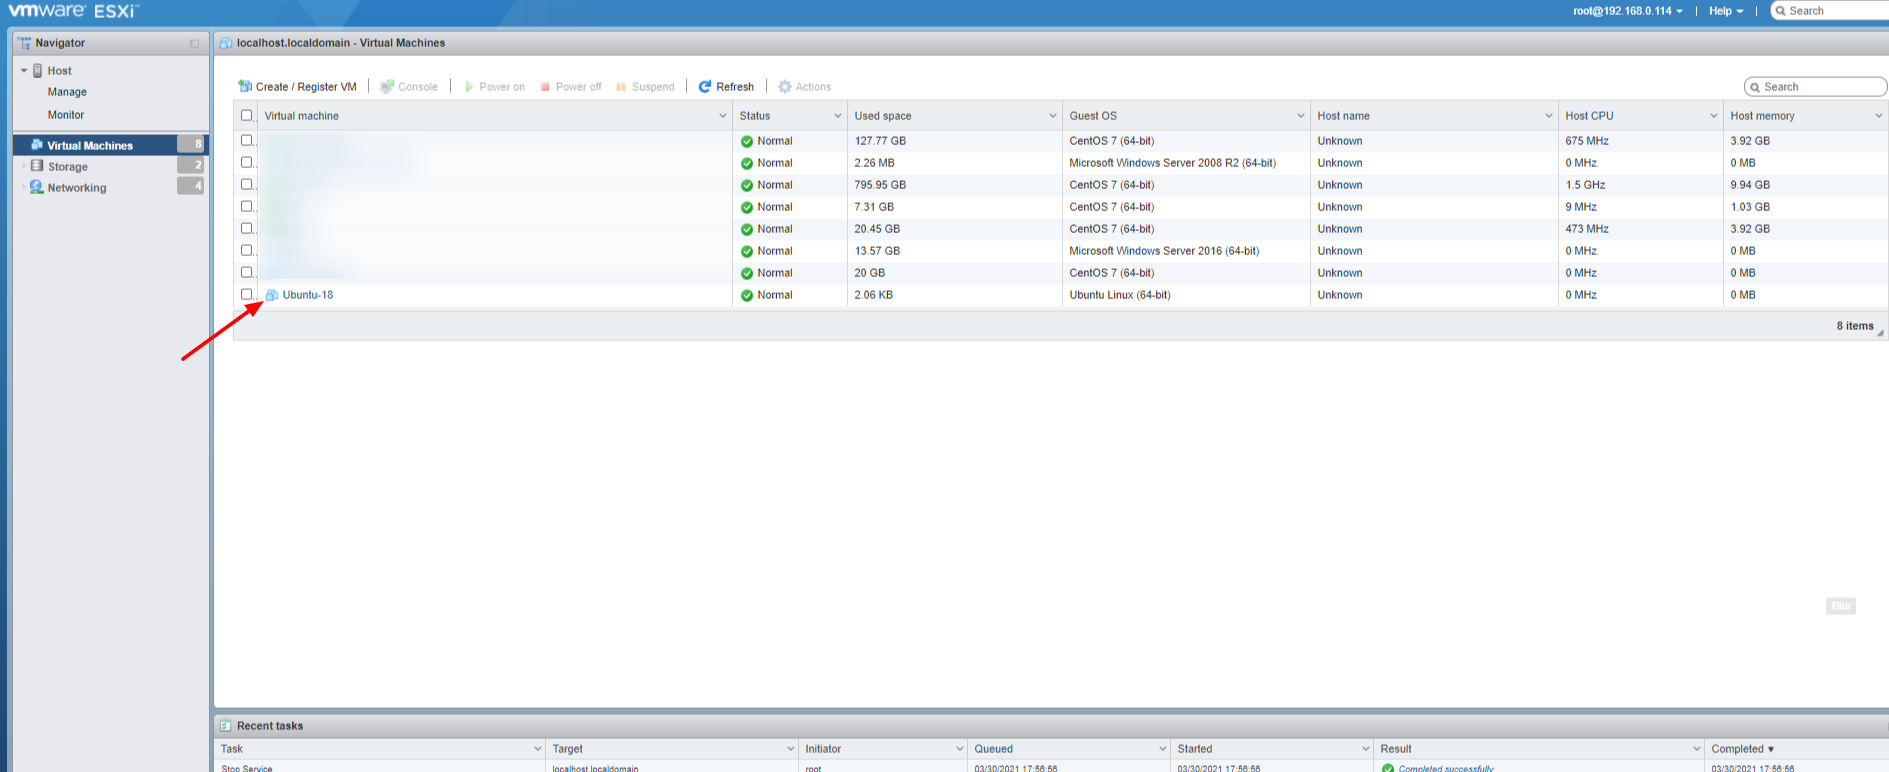
7. Once done with the above steps click on Next >> FinishNow the new VM should be created on your VMware-ESXI. Click on Virtual Machine

-
-
-
-
-
-
-
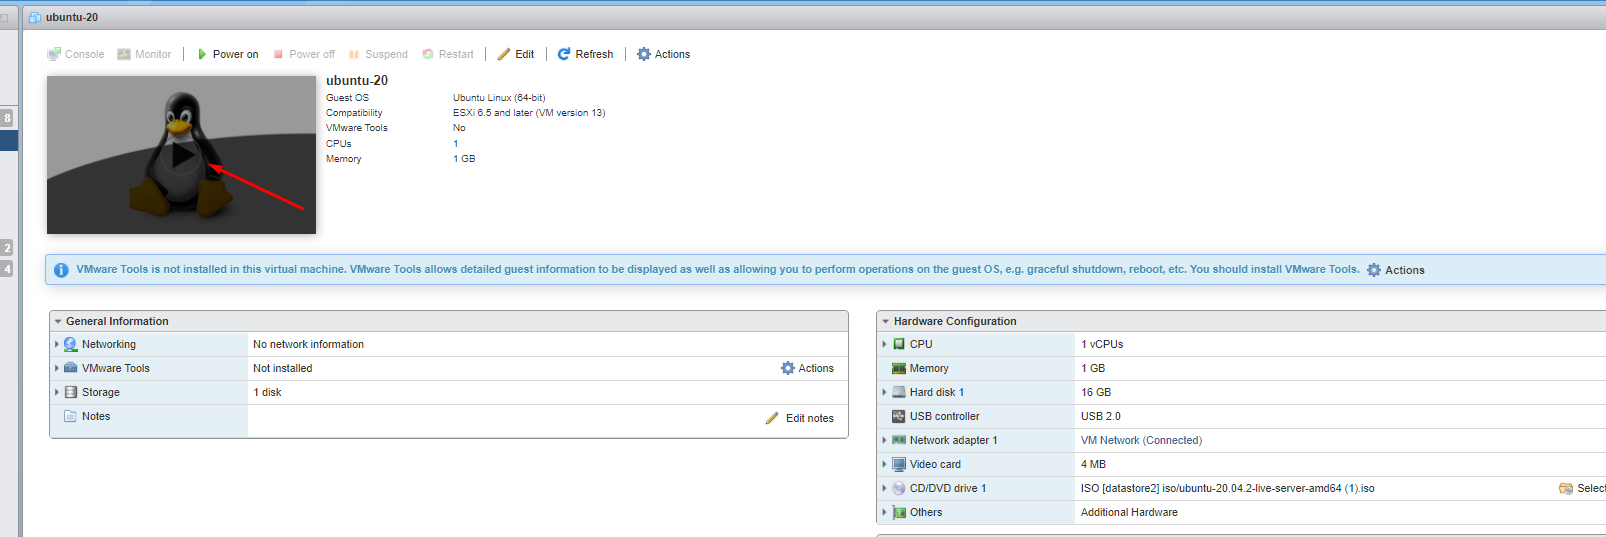
Step 5. Installation of Ubuntu-20.04 Operating System
1. For the installation of OS, click on the VM or Power On button

2. Now installation is initialized, then only select language and press Enter.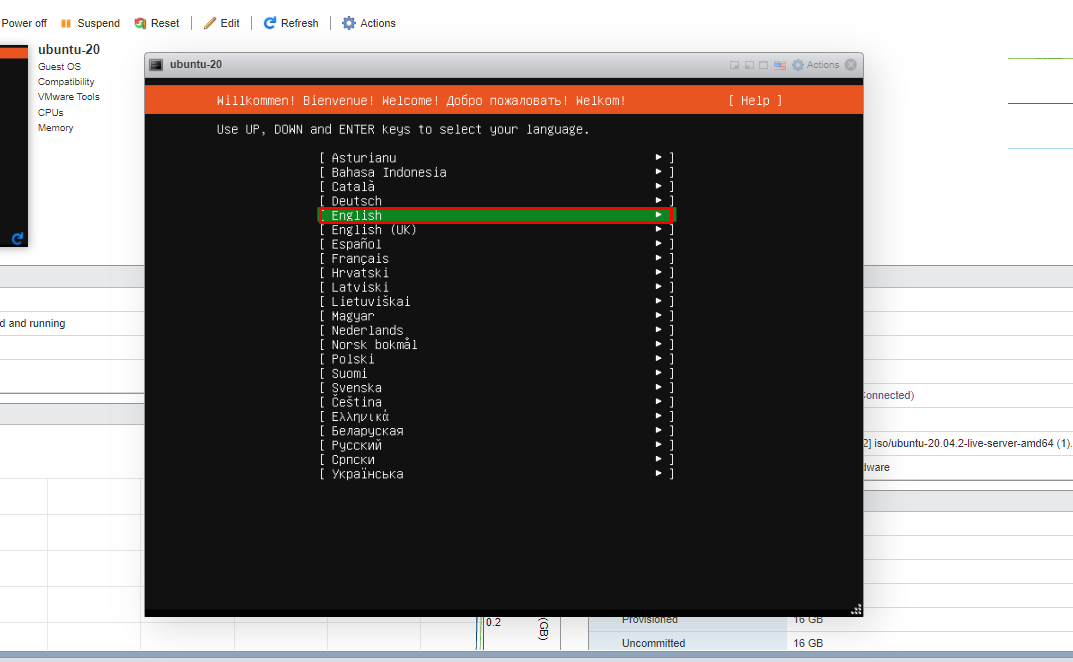

3. Press Enter on the interface ( ens160 ) to configure the IP address.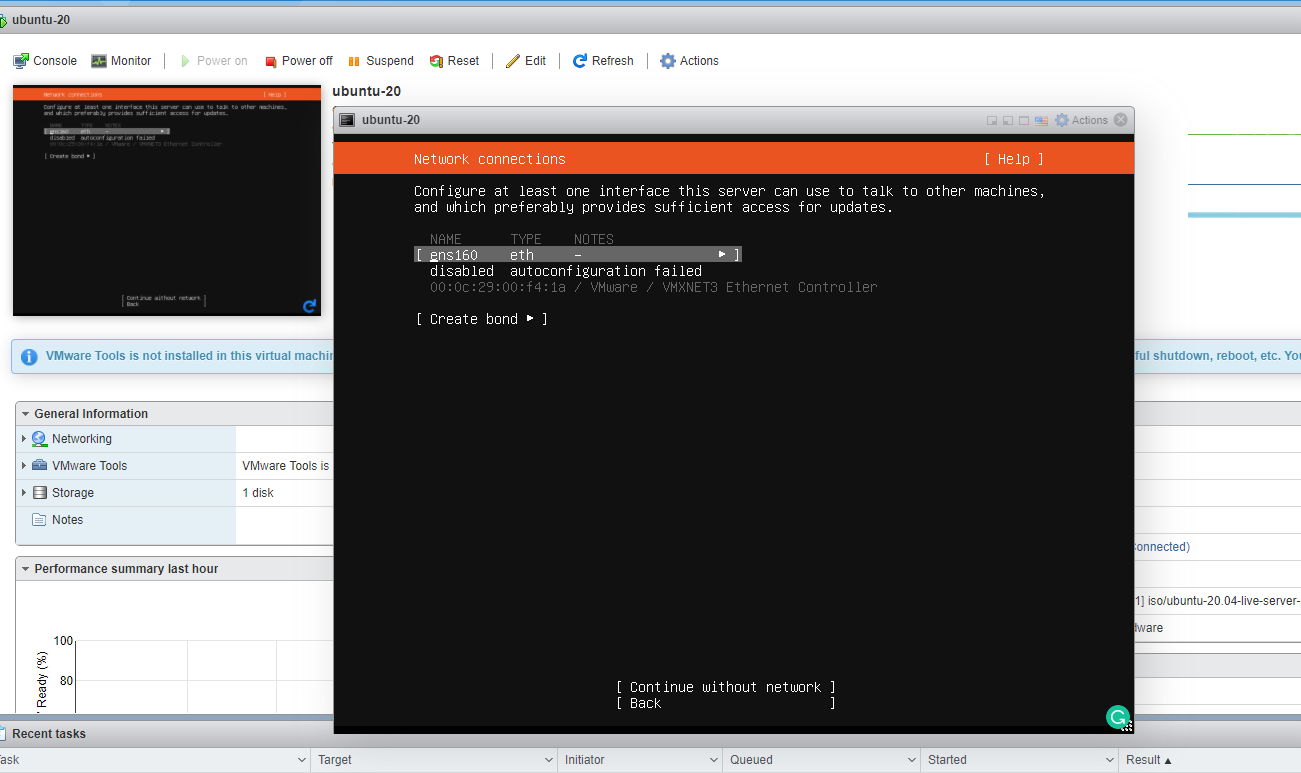

4. Then, click on the Edit IPv4 option.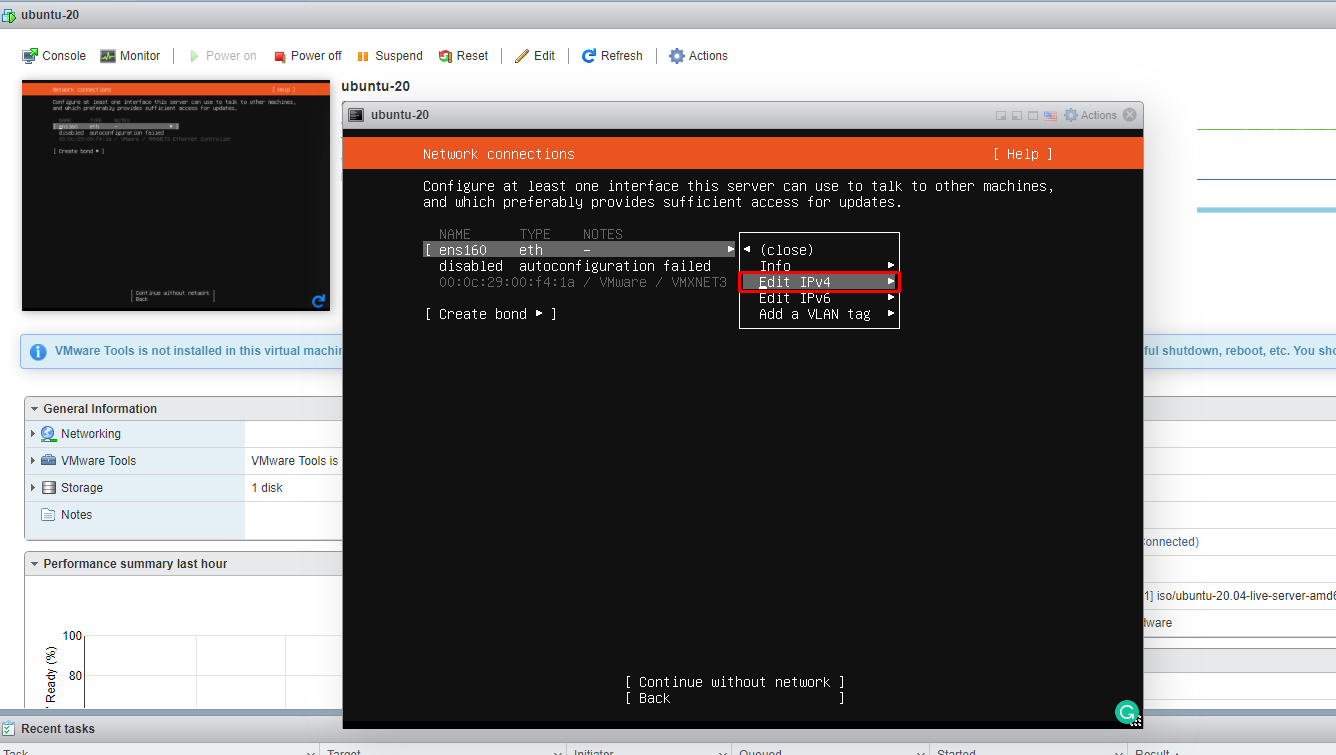

5. Choose the manual option under IPv4 Method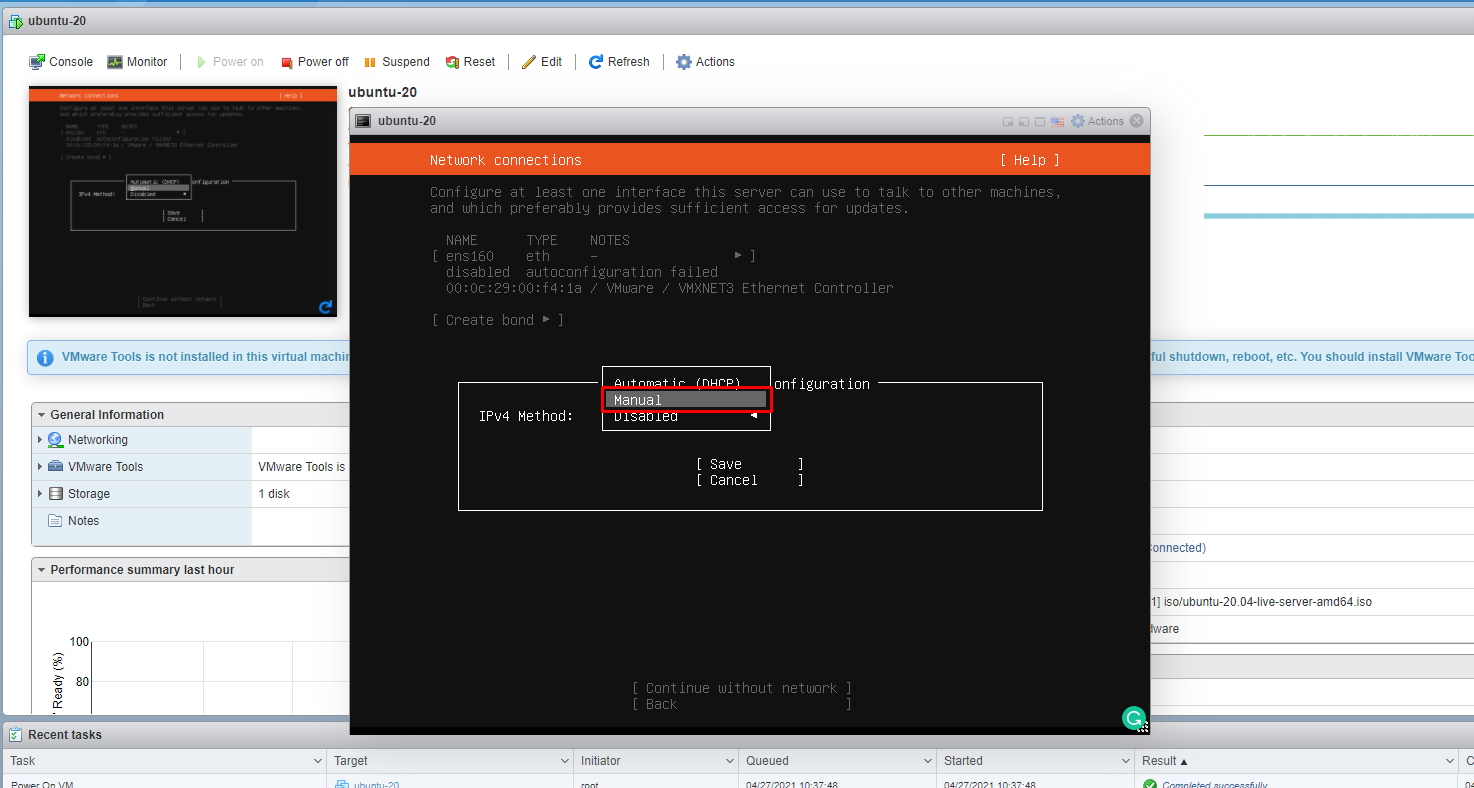

6. Now configure the IP addressing according to your network. Hit the Save button.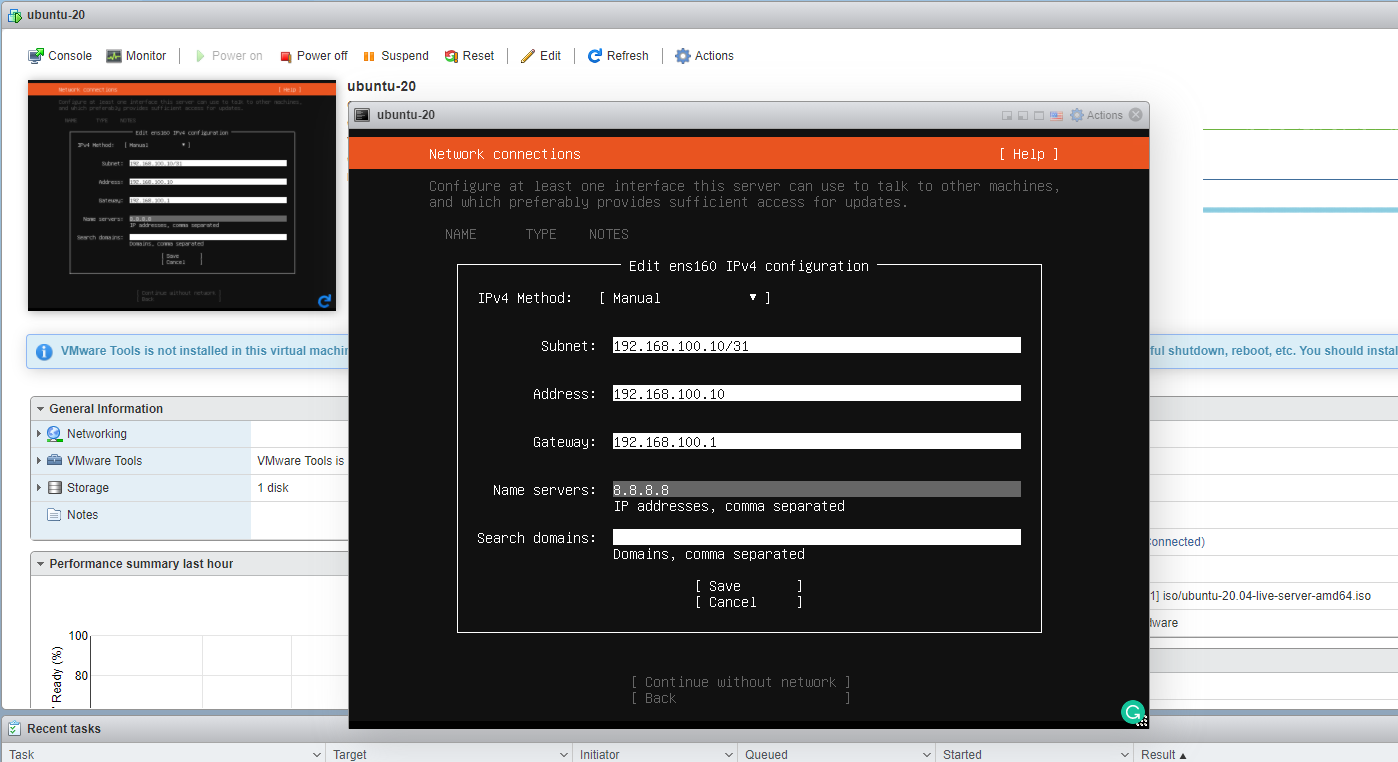

7. Enter the Continue button.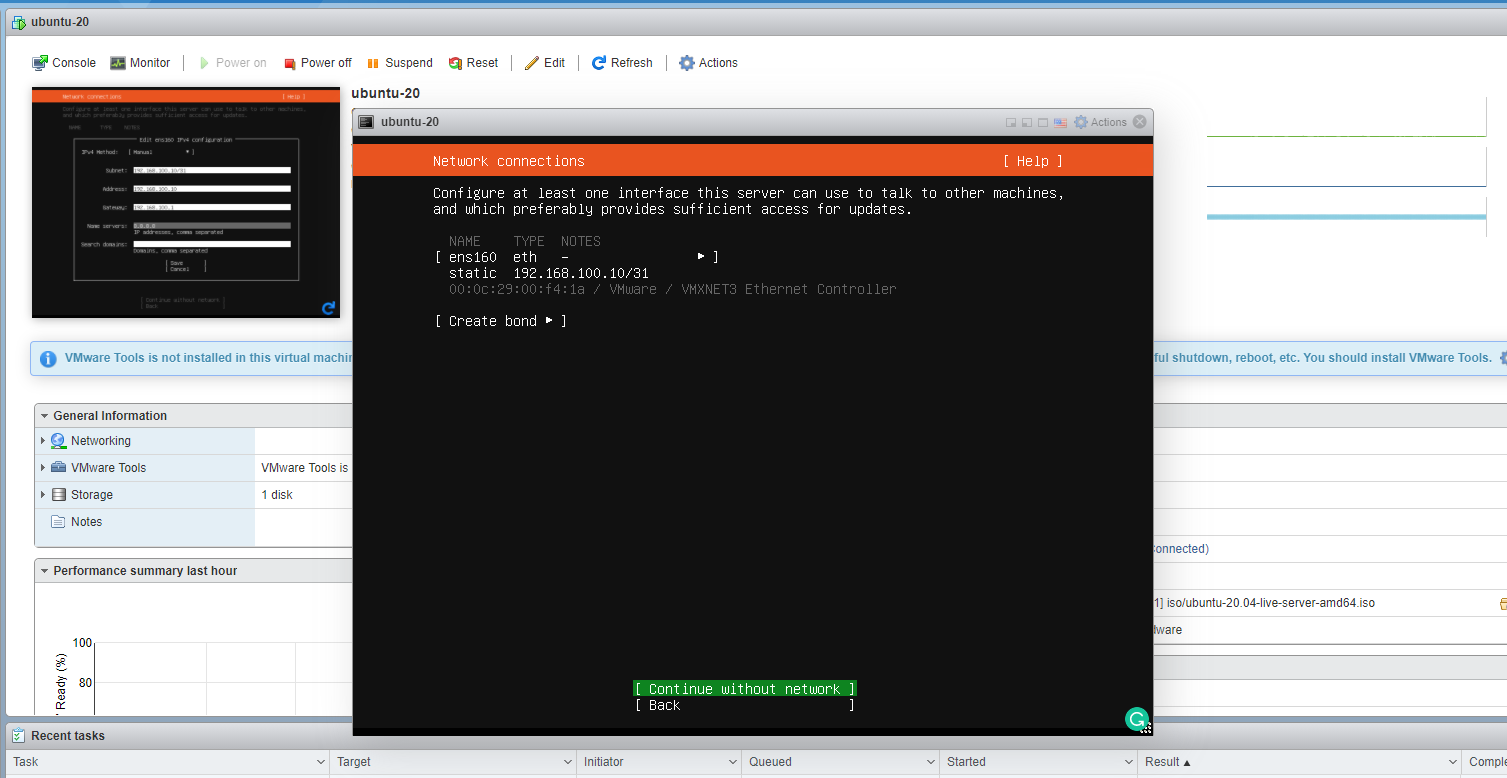

8. Now configure the Storage Configuration. Select the option Use an entire disk and
Click on Done

9. Again hit the Done button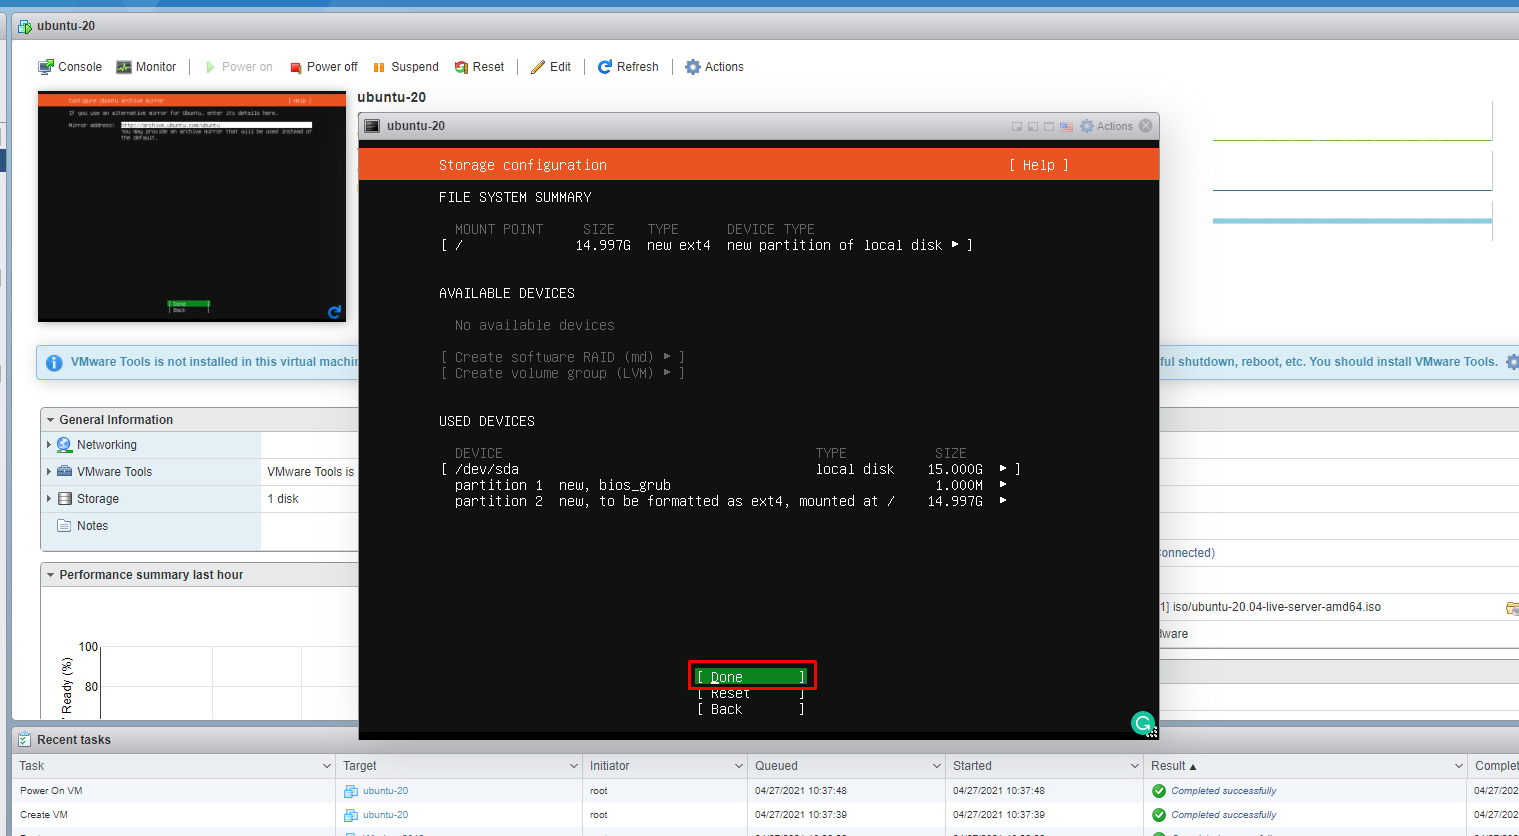

10. Select the username and password for Profile Setup and click the Done button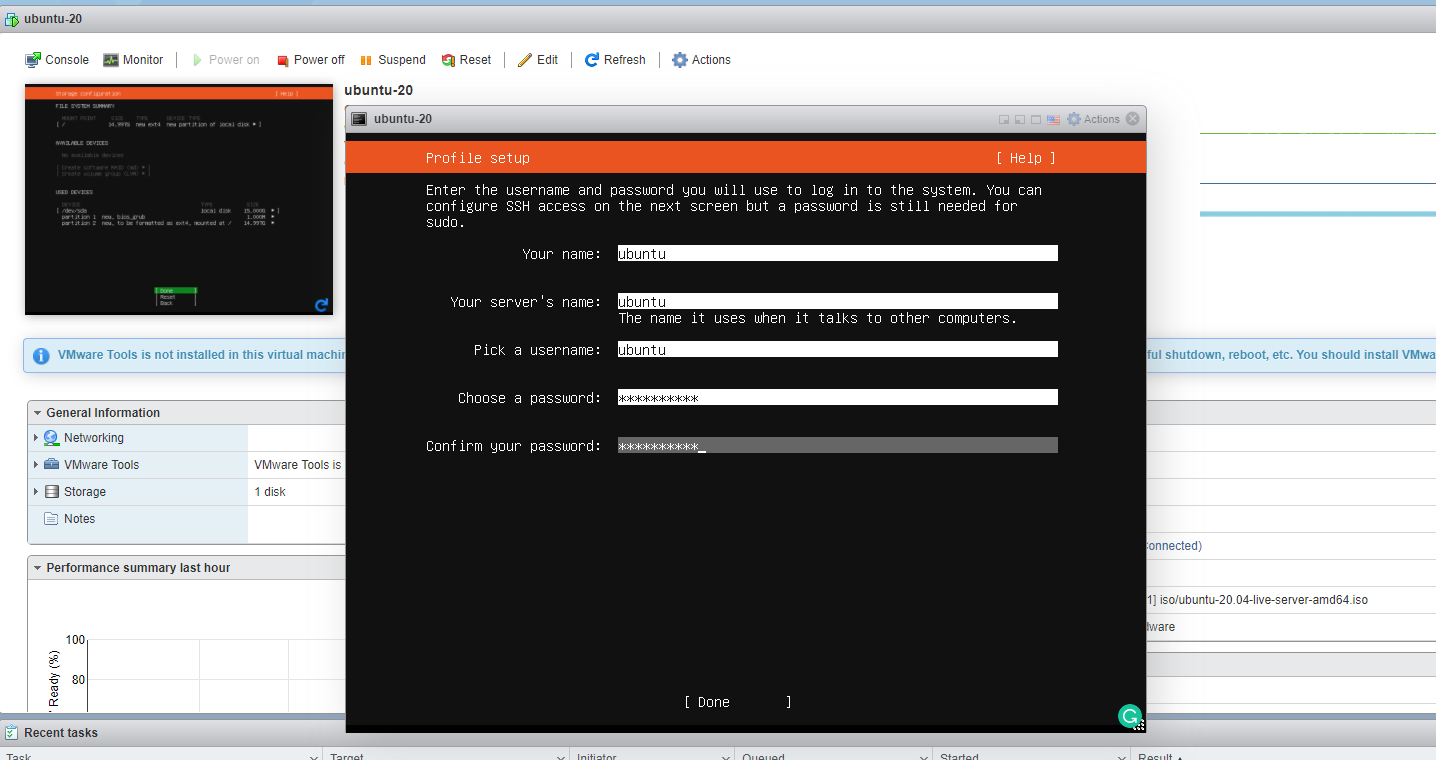

11. For SSH access, press the space button on the Install OpenSSH server and press Enter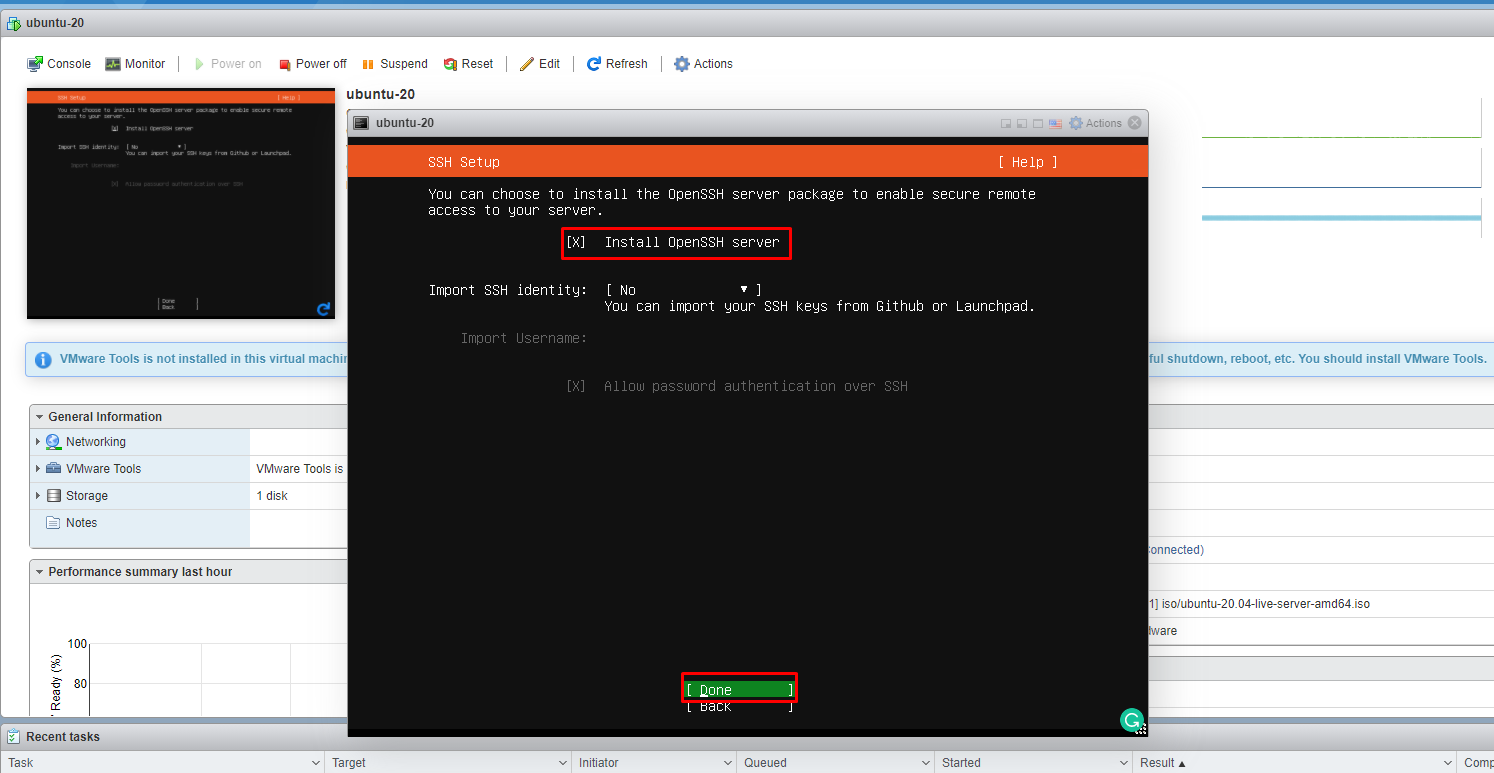

12. Now installation is complete, press the Reboot Now Button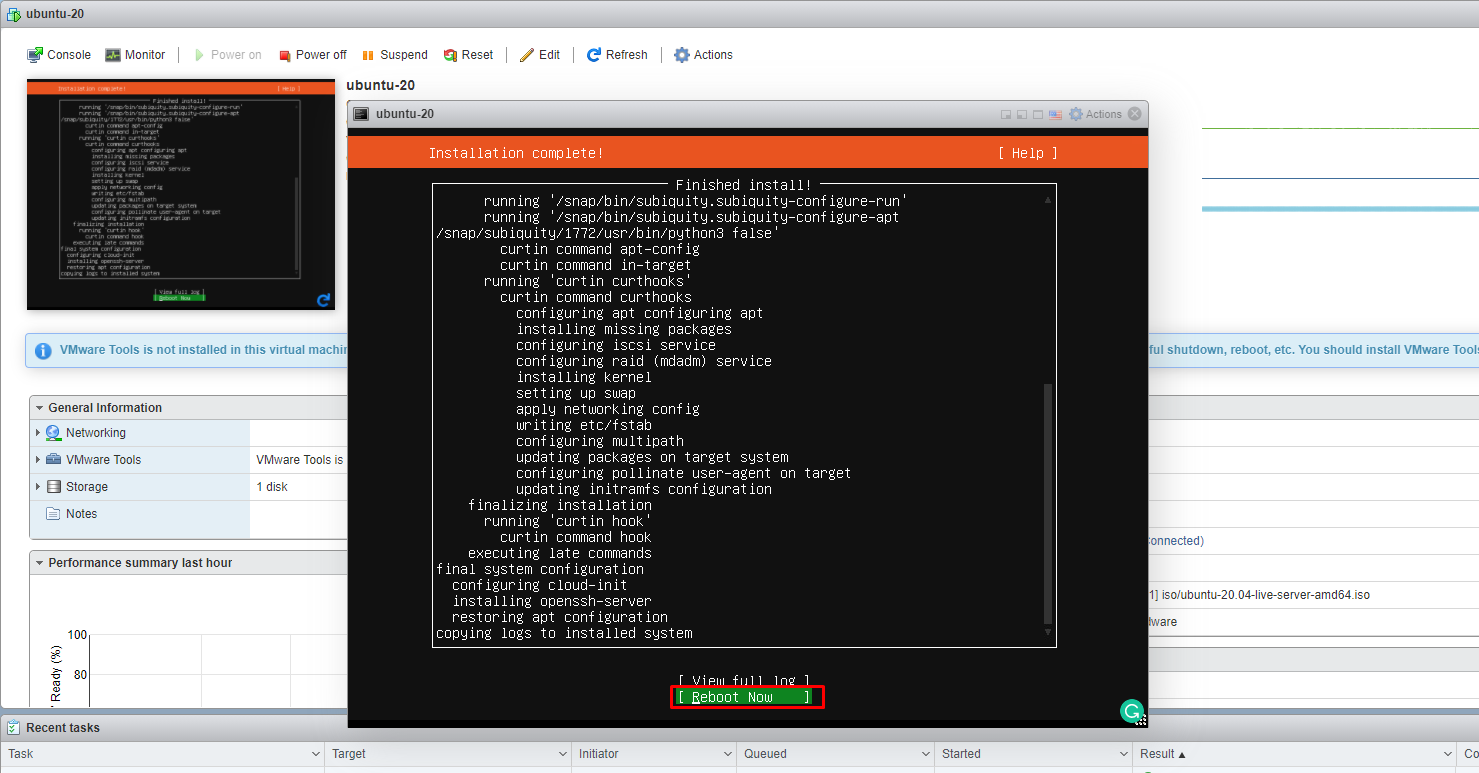

-
-
-
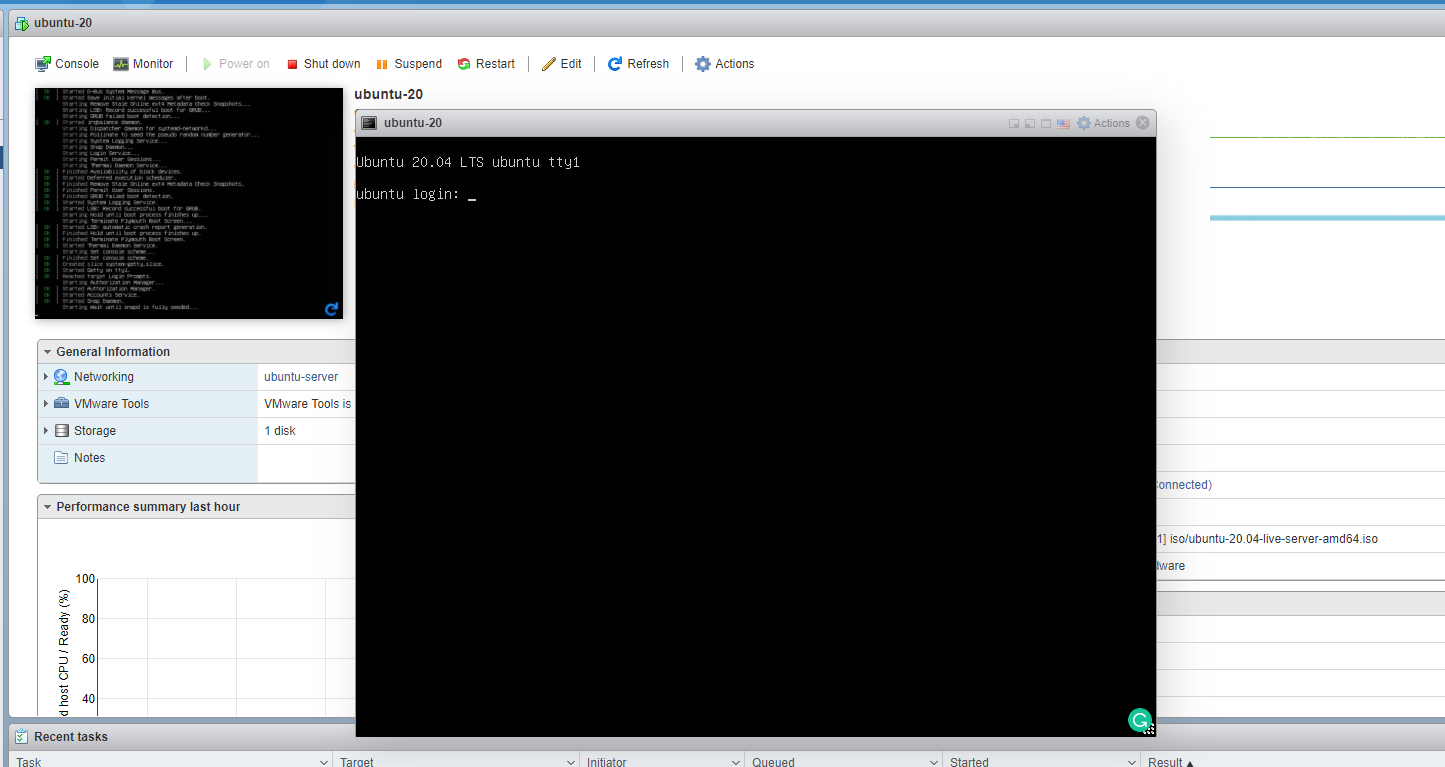
Note: After all the steps, the Virtual Machine is ready to boot Ubuntu-20.04 from the virtual hard drive. Here enter the username and password.
-
-
-
-
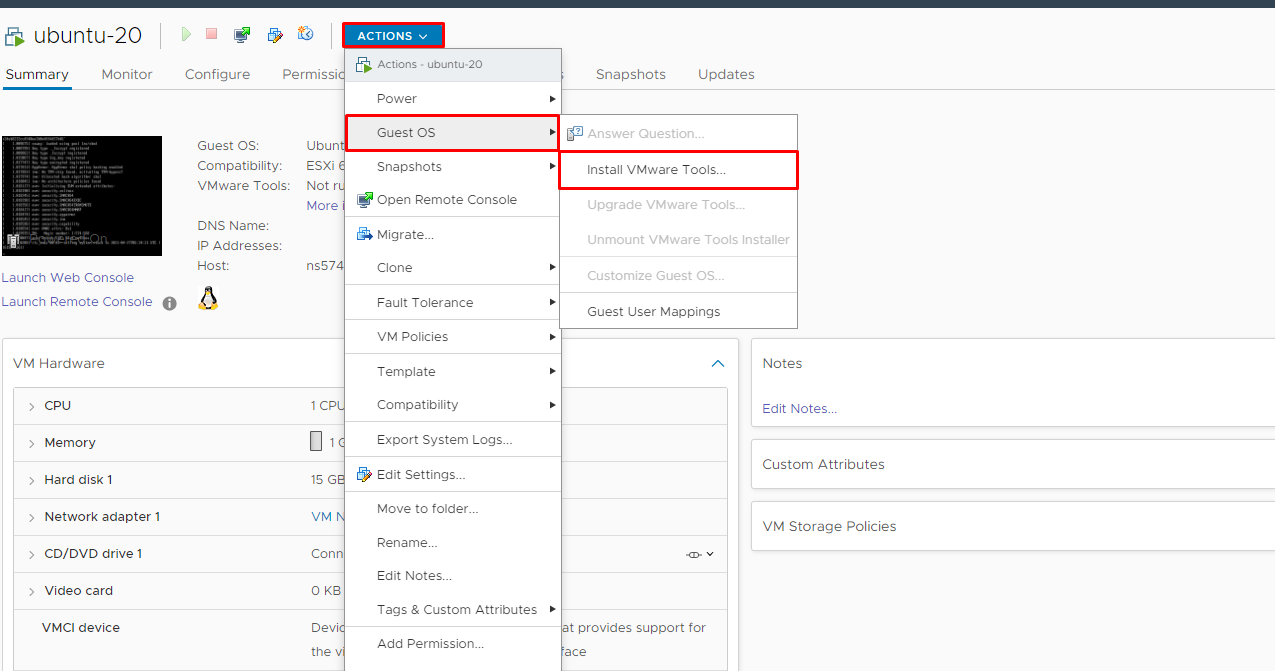
Step 6. Installation of VMware Tools on Ubuntu-20.04 VMware Virtual Machines
1. On VMware ESXI, click on the Action button > Guest OS > Install VMware Tools. After the Install VMware Tools option, CD-Drive is automatically connected with your OS.

2. Confirm the CD-Drive is connected properly. Run the below command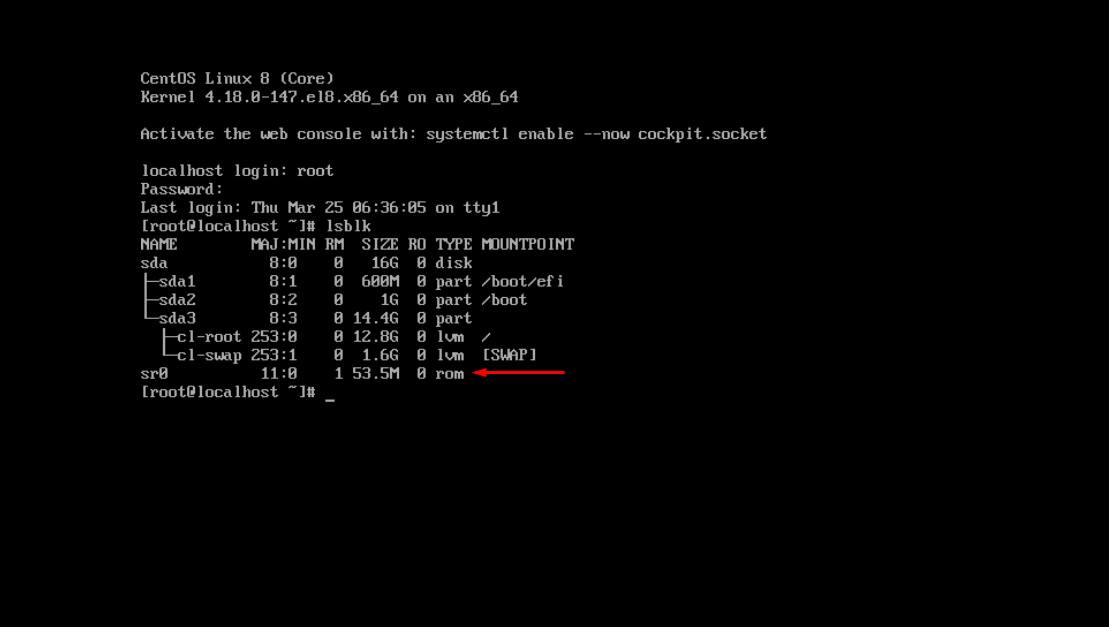

3. After confirmation, execute the following command:-
# mount /dev/sr0 /mnt
# lsblk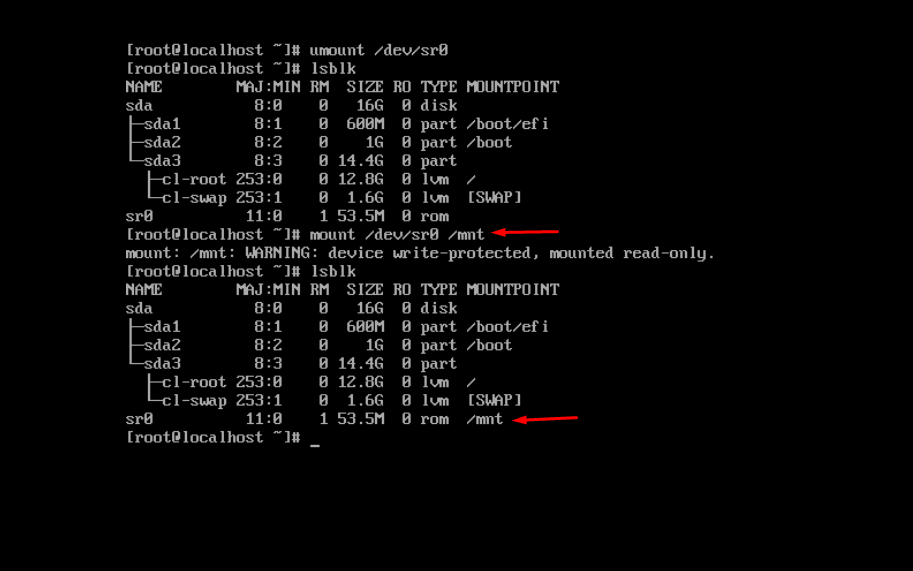

4. After the CD-Drive is mounted on /mnt directory, run the below command:-
# cp -rv /mnt/VMwareTools-10.3.23-17030940.tar.gz /tmp
# ls /tmp

5. Extract the VMwareTools-10.3.23-17030940.tar.gz file in /tmp directory.
Run the below command.
# cd /tmp
# tar -xvzf VMwareTools-10.3.23-17030940.tar.gz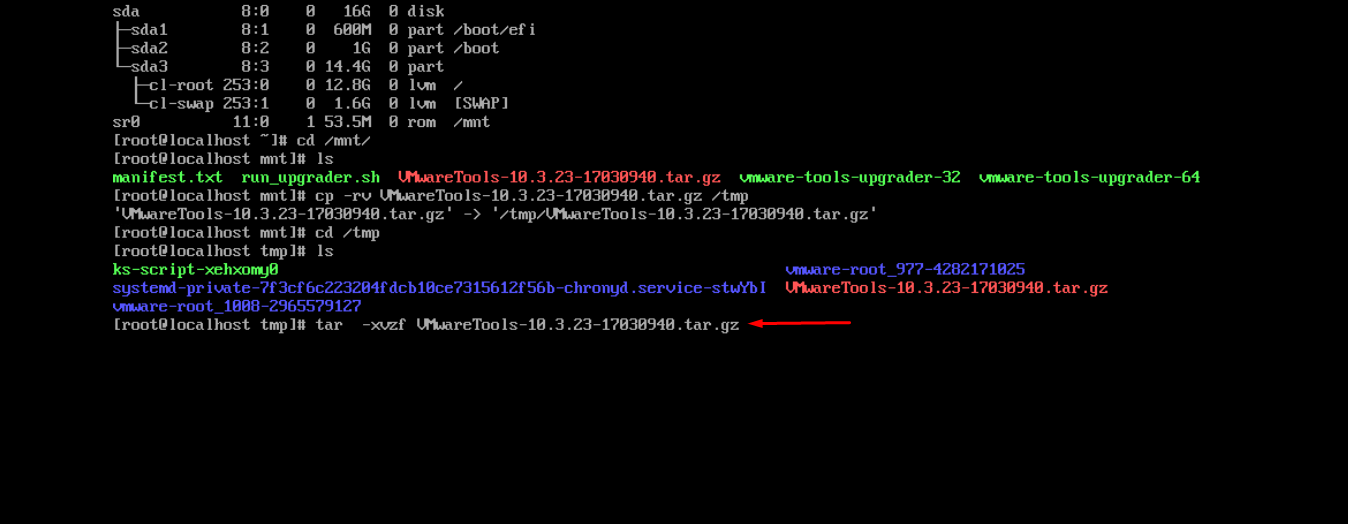

6. Once done with extracting the file, you need to run the script under /tmp/vmware-tools-distrib directory.
Execute the command that are mentioned below:-
# cd /tmp/vmware-tools-distrib
# ./vmware-install.pl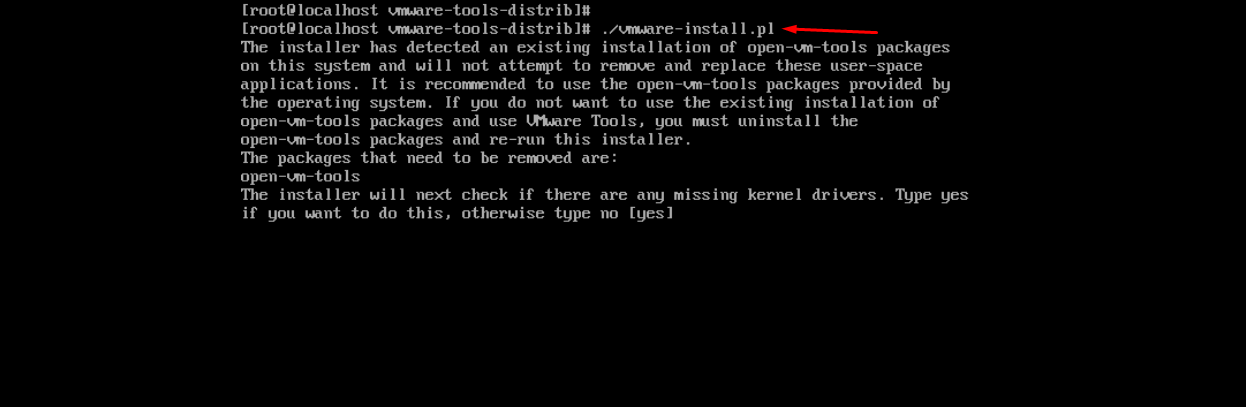

-
-
-
-
-
-
-
Step 7. Prepare the VM & Convert to Template
# systemctl status vmware-tools
OR
# systemctl status open-vm-tools
# systemctl start vmware-tools
# /etc/init.d/vmware-tools status
# /etc/init.d/vmware-tools start!!!!! Reboot the Virtual Machine by running the command > init 6 !!!!!
-
-
-
-
-
-
-
After the installation of the virtual machine and VMware tools on it. We are going to convert the virtual machine to a template.
1. Go to your Vcenter server.
2. After login you can see your virtual machine under the VMware-ESXi (host).
Right-click on the virtual machine, then go to the Template option and choose the Convert to Template.
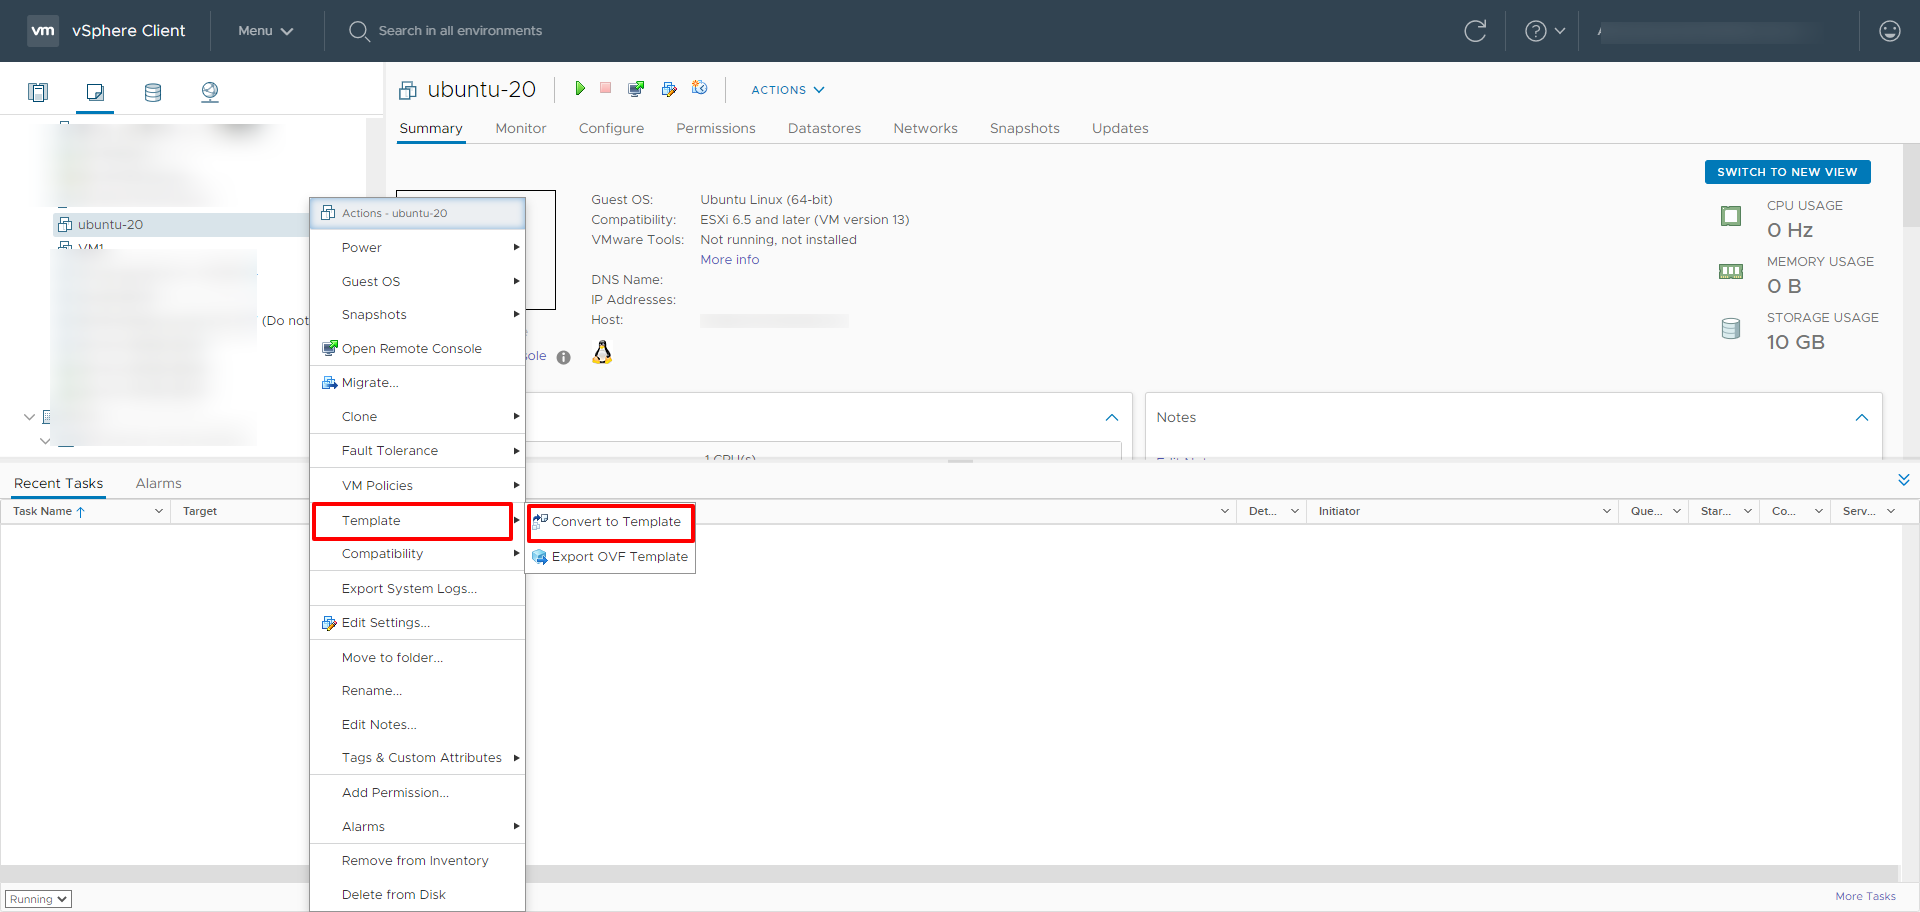

…And you are done!
-
-
-
How to Deploy a VM from This Template?
Locate Template: In the VMware vSphere Client, go to the VMs and Templates inventory and find the template you want to use.
Initiate Wizard: Right-click on the template and choose “New VM from This Template” to start the deployment wizard.
Name and Folder: Provide a unique name for the new virtual machine and select the destination folder or datacenter where it will be stored.
Compute Resource: Choose the host, cluster, or resource pool that will run the virtual machine.
Storage: Select an appropriate datastore and choose the virtual disk format (for example, Thin Provision to optimize storage usage).
Clone Options:
- Customize the operating system: Enable this option to configure settings such as hostname and network details.
- Power on virtual machine: Select this if you want the VM to start automatically after deployment.
Review and Finish: Go through the configuration summary, confirm the details, and click Finish to begin the cloning process.
What are the Common Issues and Troubleshooting?
- Ensure that the correct network adapter is selected in the VM settings.
- Verify that the IP address configuration is correct and matches your network settings.
- Check if the network services are running on the Ubuntu VM.
- If VMware Tools do not install correctly, ensure that the CD drive is properly connected and that you are using the correct version of VMware Tools for your version of Ubuntu.
- Check the logs for any errors during the installation process.
- If the VM does not boot from the virtual hard drive, ensure that the boot order is set correctly in the VM settings.
- Verify that the installation of Ubuntu was completed successfully.
- Ensure that the VM has adequate resources allocated (CPU, memory, disk space).
- Monitor the performance metrics in VMware to identify any bottlenecks
Conclusion
Creating an Ubuntu 20.04 VM template for VMware automation is more than just a one-time setup, it’s a strategic step toward building reliable, scalable, and repeatable infrastructure. By carefully installing Ubuntu 20.04 LTS, configuring cloud-init, and ensuring proper integration with VMware vSphere, you establish a solid foundation for automated deployments.
What truly differentiates a good template from a problematic one is the attention to detail during the preparation phase. Cleaning machine-specific data, enabling VMware customization, and validating networking behaviour ensures that every cloned VM behaves as expected, without manual fixes. Ultimately, investing effort into building a clean, automation-ready template pays off in every future deployment.