Creating an Ubuntu 20 VM template, but can’t get your network running? Here is what to do next.
Table of Contents
Canonical, the founder of Ubuntu, released Ubuntu 20 with an emphasis on security and high performance. However, building an Ubuntu 20 VM Template that is ready to be used in VMware automation is something that seems complex for admins.
Therefore, we have come up with this technical documentation and here we will show you how to create Ubuntu 20 VM Template in 7 simple steps.
What is a VM template?
A VM template is a master copy of a virtual machine (VM) that is used to create multiple identical VMs quickly and efficiently. It contains the operating system, applications, and configurations that are pre-installed and configured. By using a VM template, administrators can streamline the deployment process, ensure consistency across VMs, and save time when provisioning new virtual machines.
What are the Advantages of Using Ubuntu 20 VM Template for Automation?
Consistency: Using a VM template ensures that all deployed VMs have the same configuration, reducing discrepancies and configuration drift.
Time Efficiency: Templates allow for rapid deployment of new VMs, significantly reducing the time required to set up new environments.
Simplified Management: Templates can be updated and redeployed easily, making it simpler to manage and maintain multiple VMs.
Scalability: Organizations can quickly scale their infrastructure by deploying multiple VMs from a single template, accommodating growth and demand.
Cost-Effective: Reducing the time and effort required for VM deployment can lead to lower operational costs and improved resource utilization.
Prerequisites
-
- Download the ISO file of Ubuntu-20 on your local PC
- Go to your VMware ESXI Server

-
-
-
-
Create Ubuntu 20 VM Template
Follow the steps below to create the Ubuntu 20 VM Template for VMware automation:
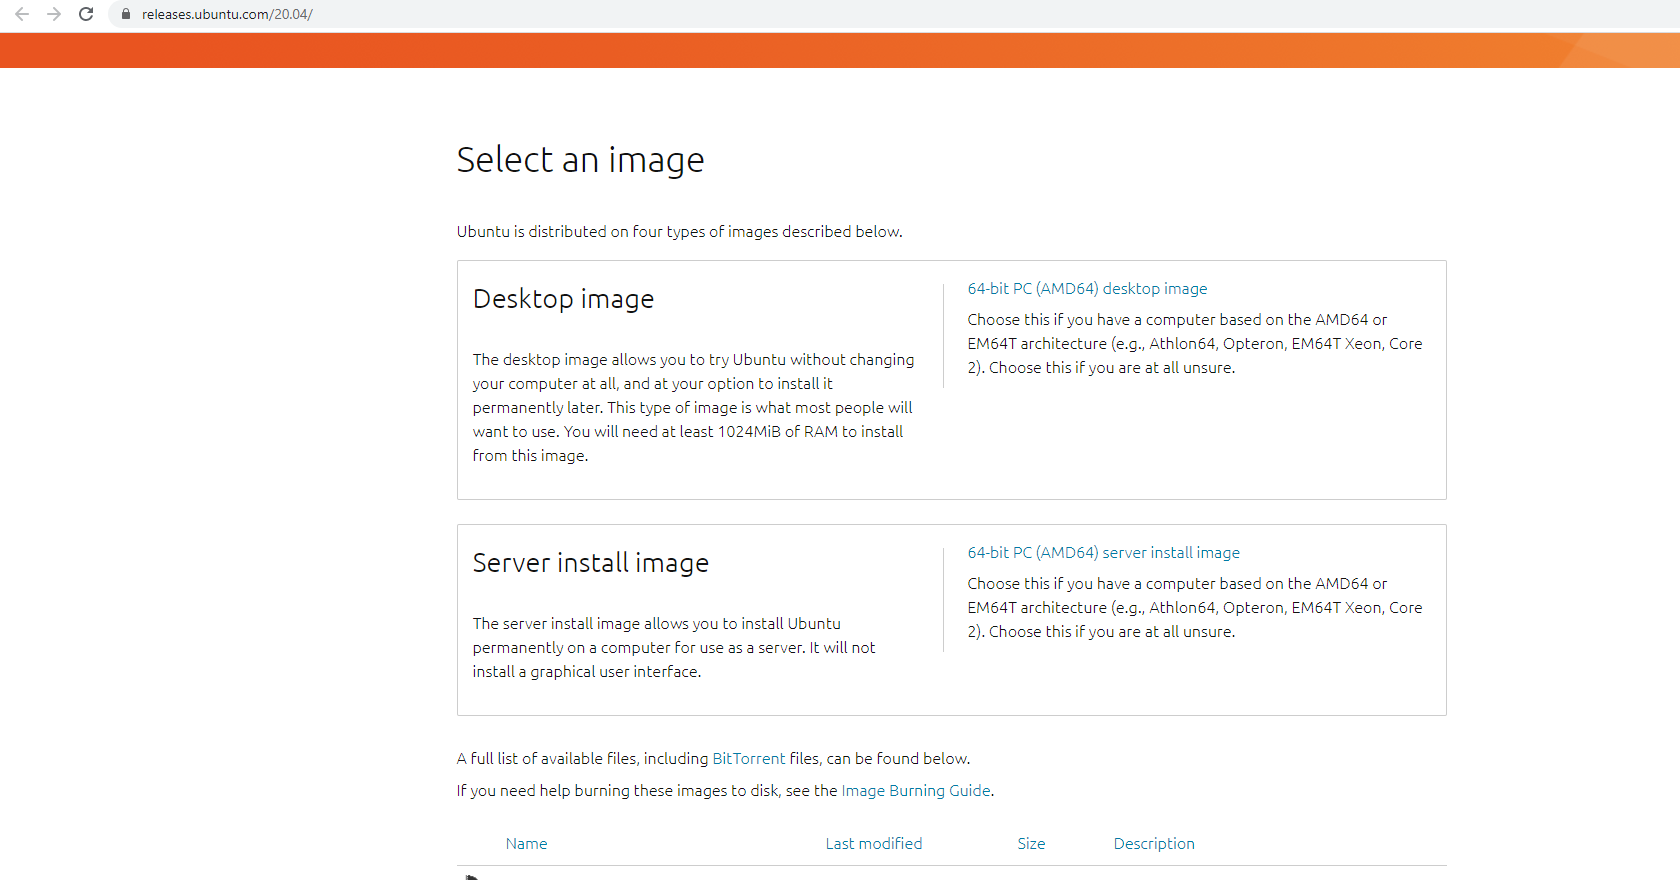
Step 1. Download The ISO File
1. Visit on the official website of Ubuntu. Click on the link below to download the Ubuntu 18.04 ISO
Link :-https://releases.ubuntu.com/20.04/

-
-
-
-
-
-
-
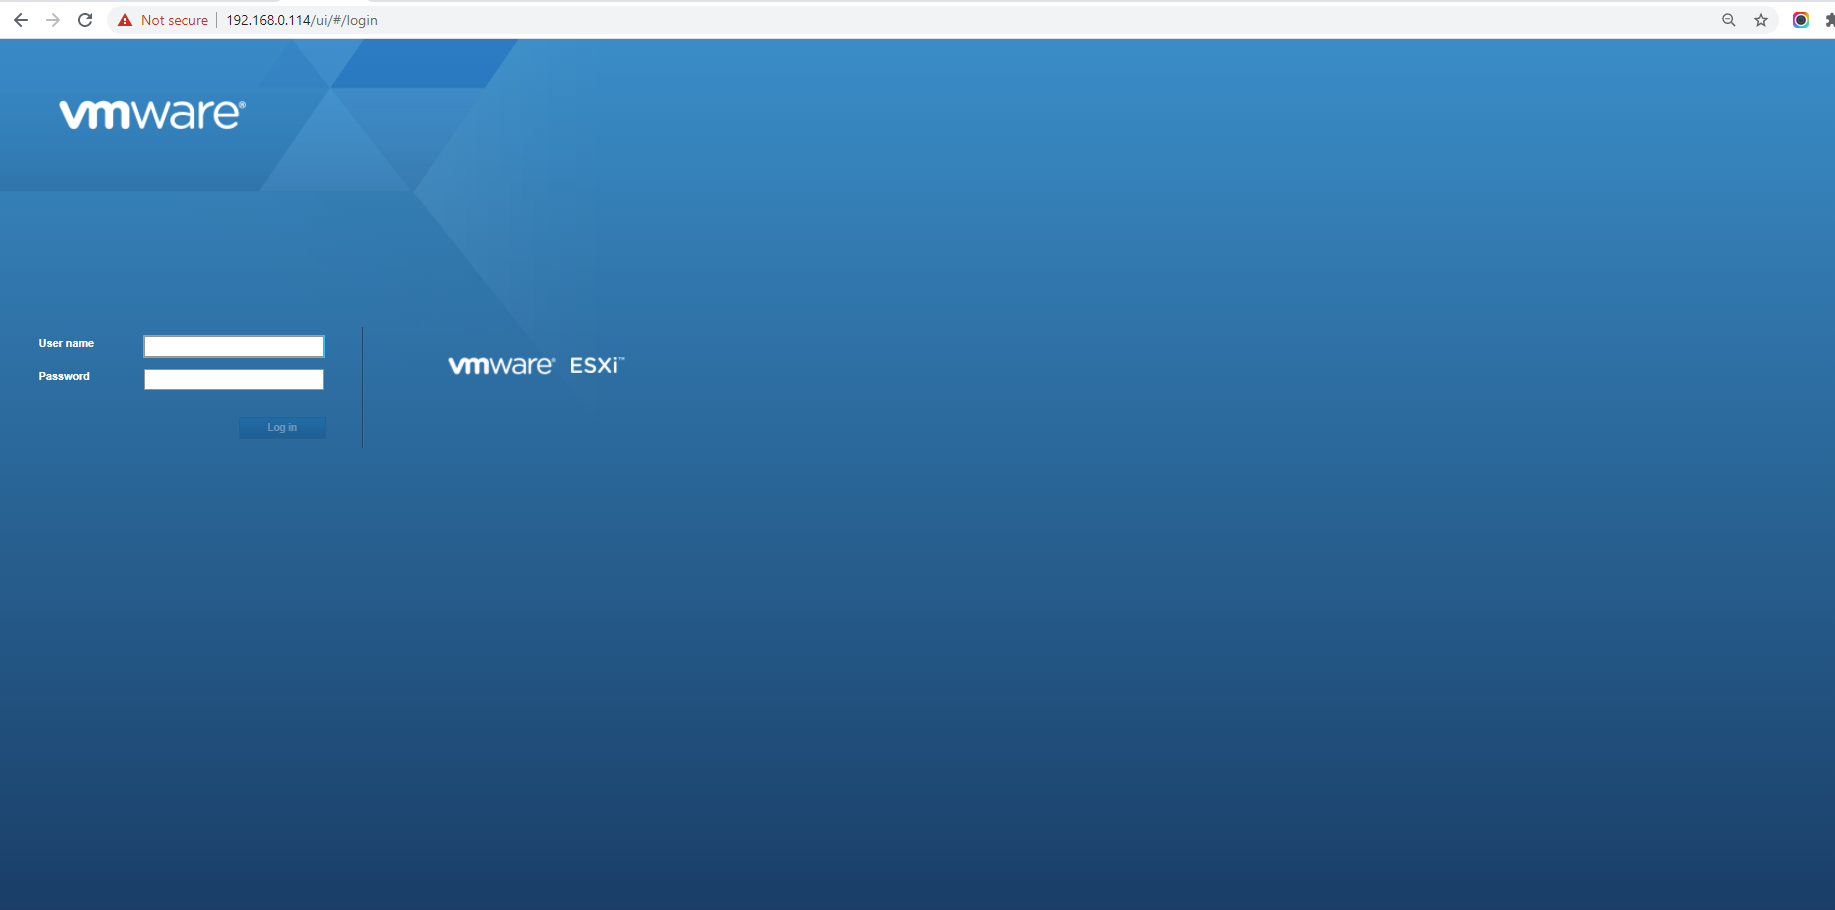
Step 2. Now, log in to your VMware ESXi

-
-
-
-
-
-
-
Step 3. Upload the ISO Image to VMware ESXi Datastore
1. Click on the Storage button, then select Datastore browser.

2. Click on the Create Directory and create the folder with the name of iso
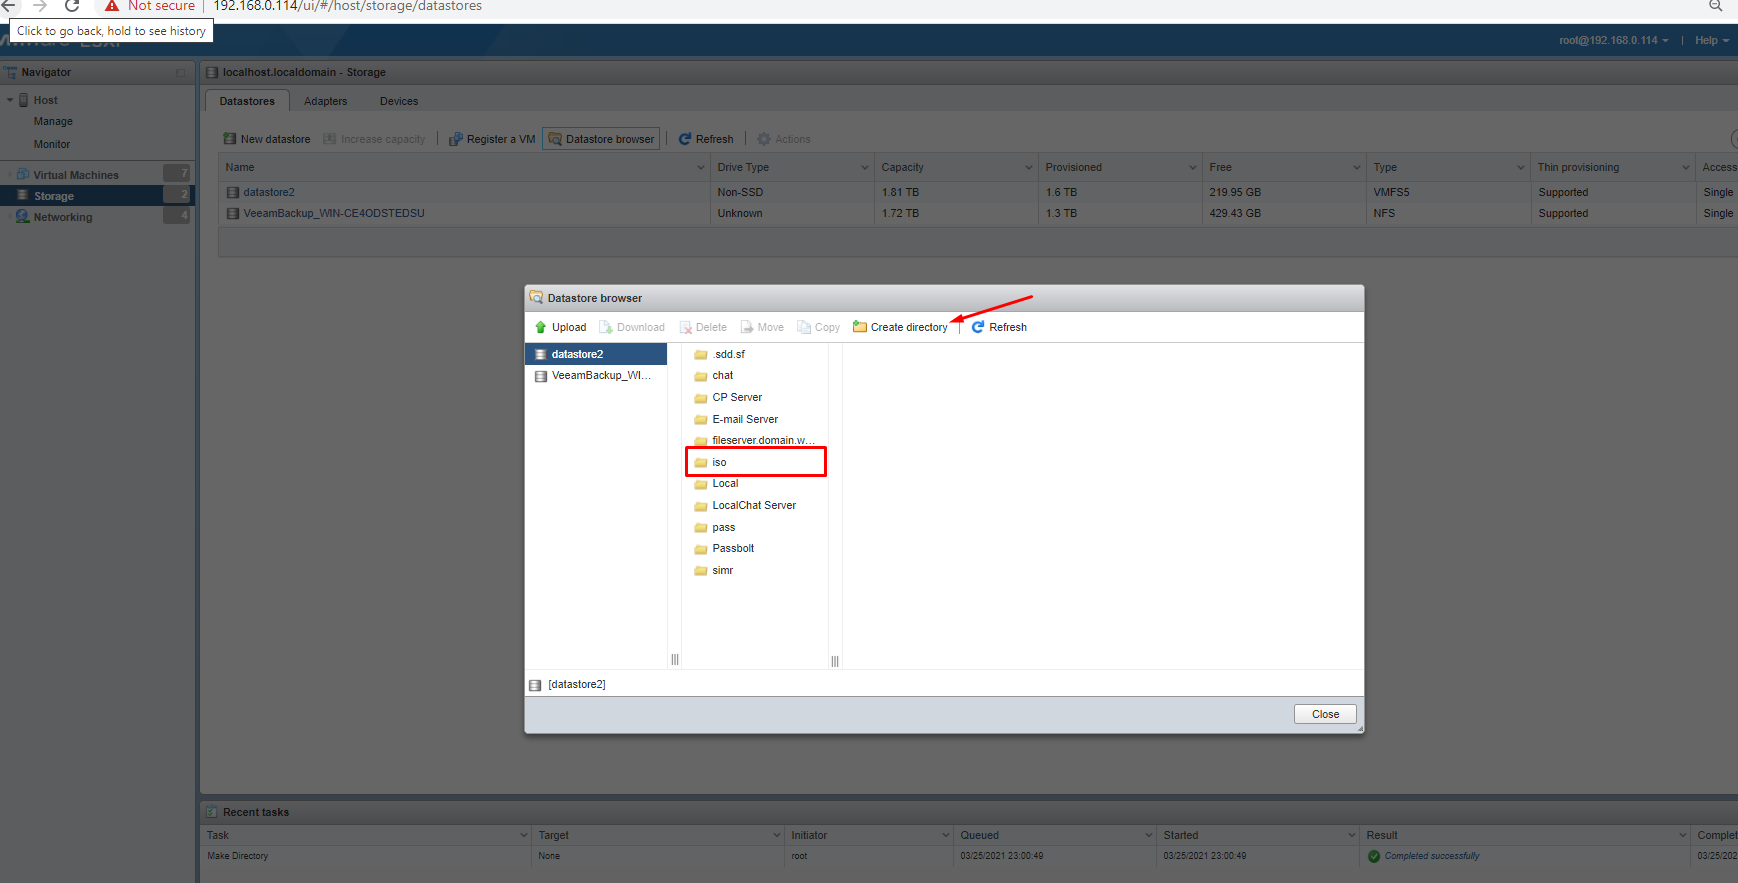

3. Hit the Upload button
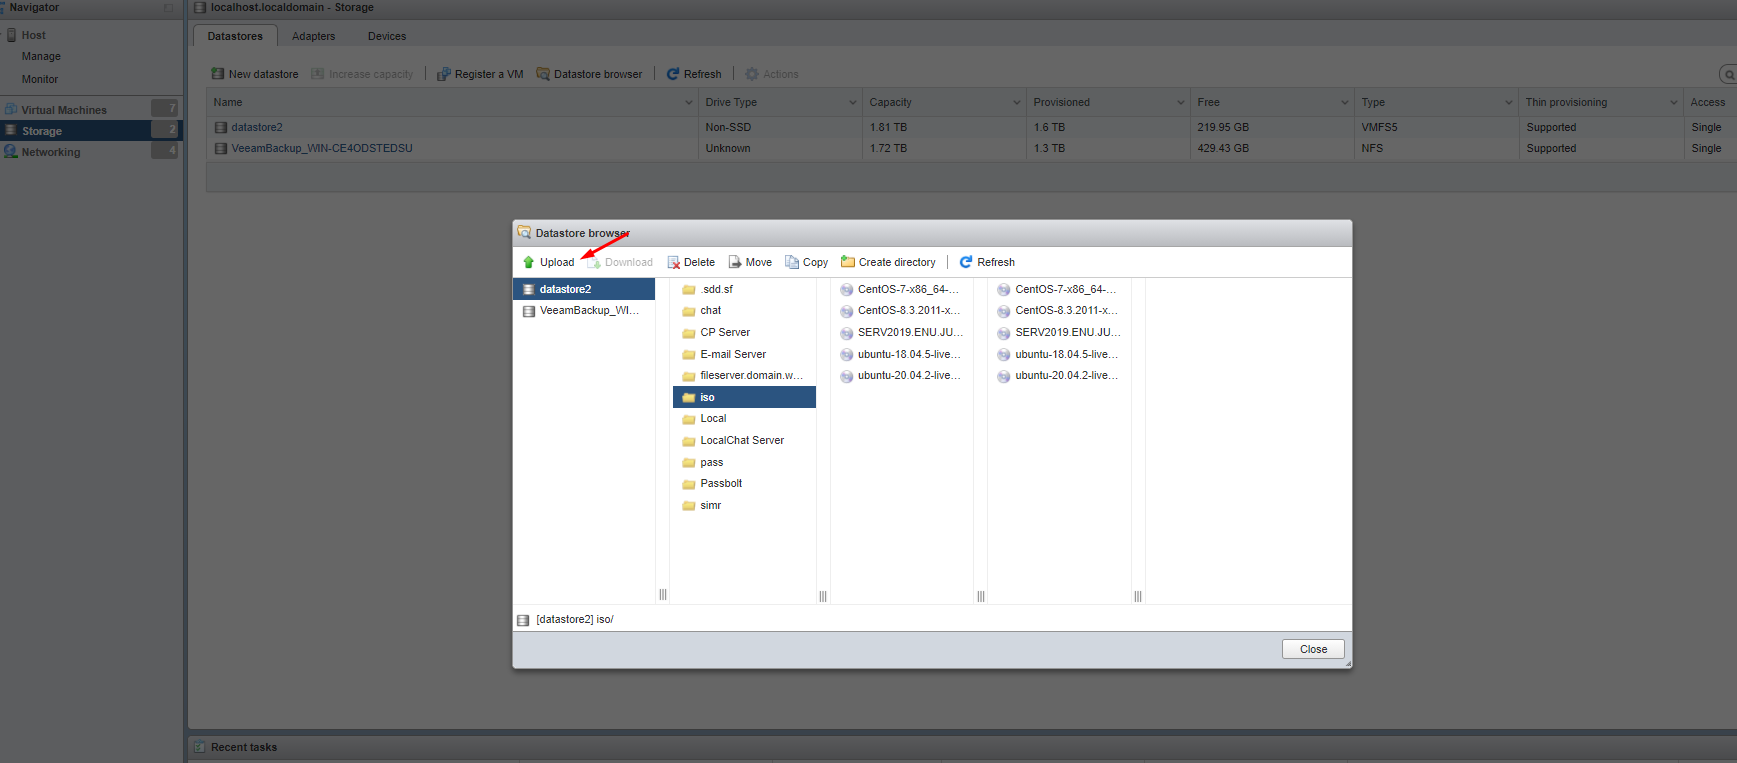

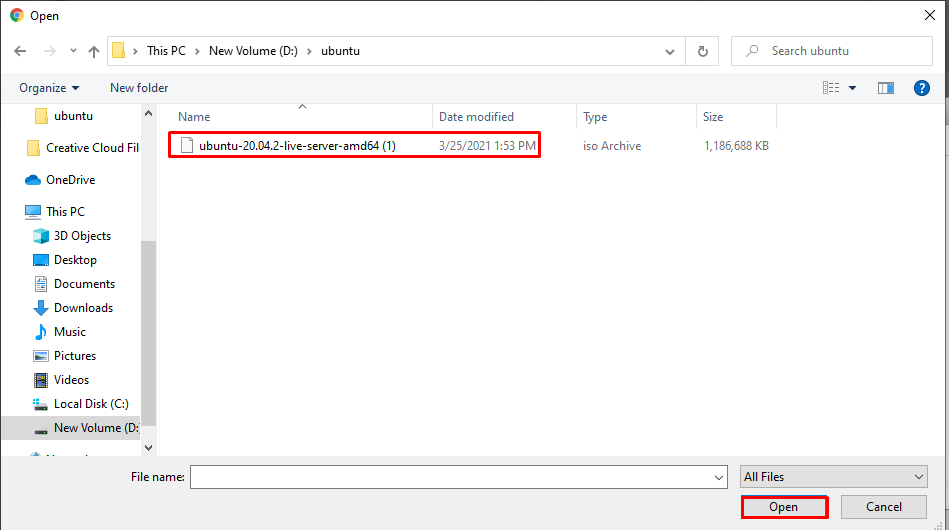
4. After that, choose the Ubuntu-20.04 ISO image from your local computer and click on the Open button.

-
-
-
-
-
-
-
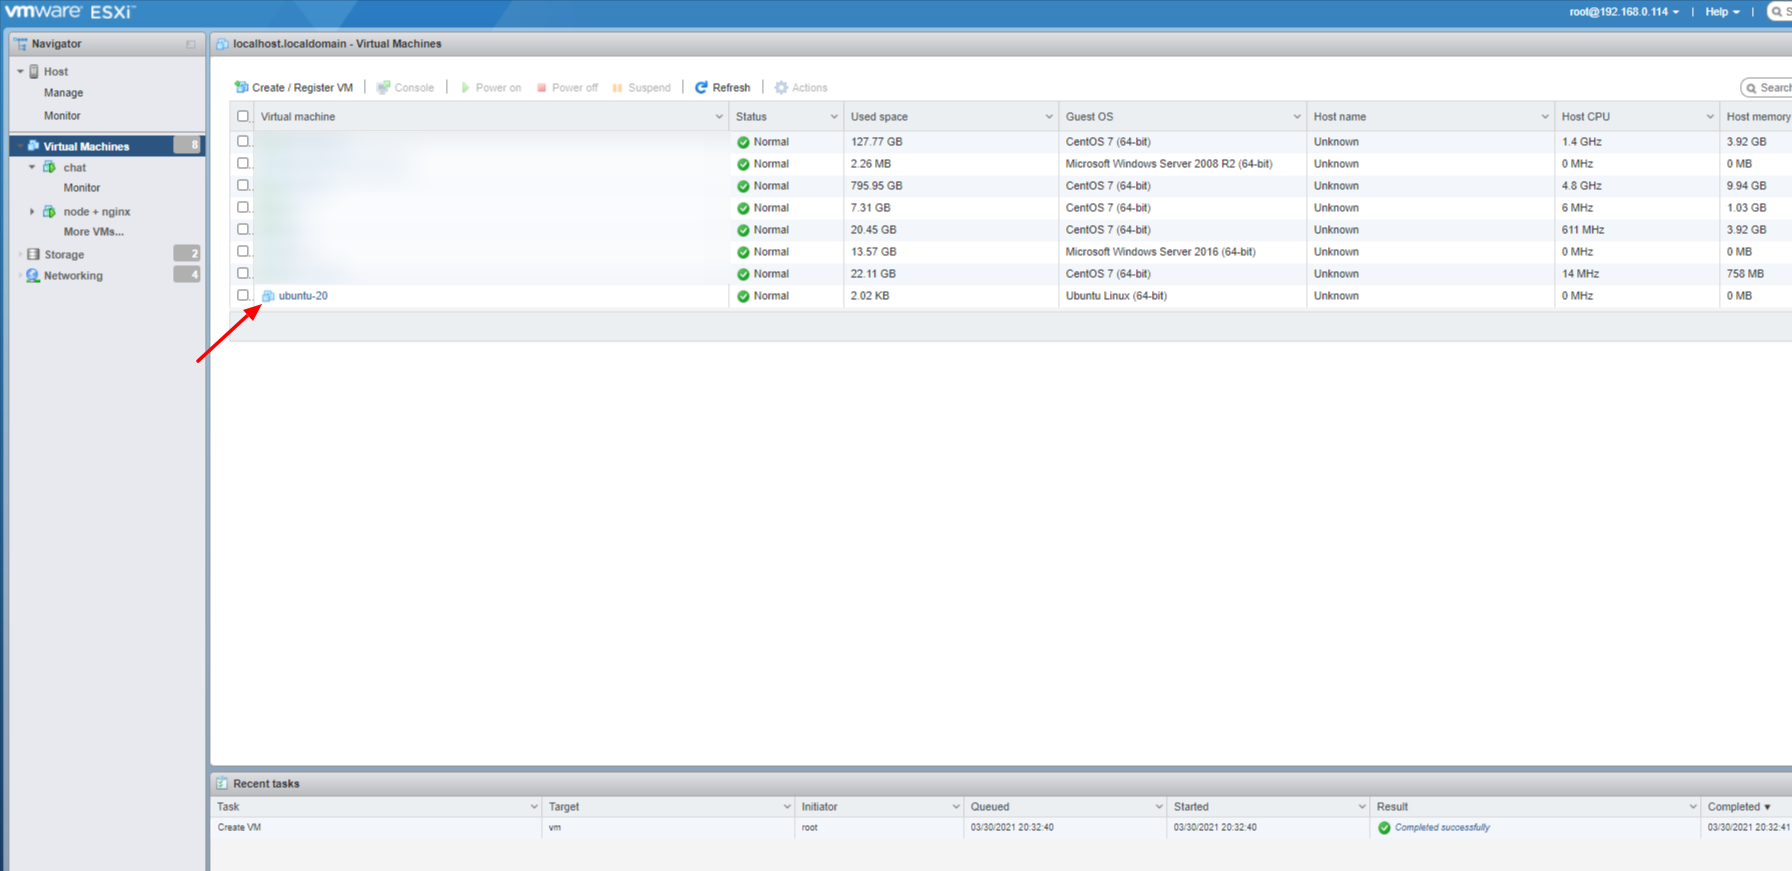
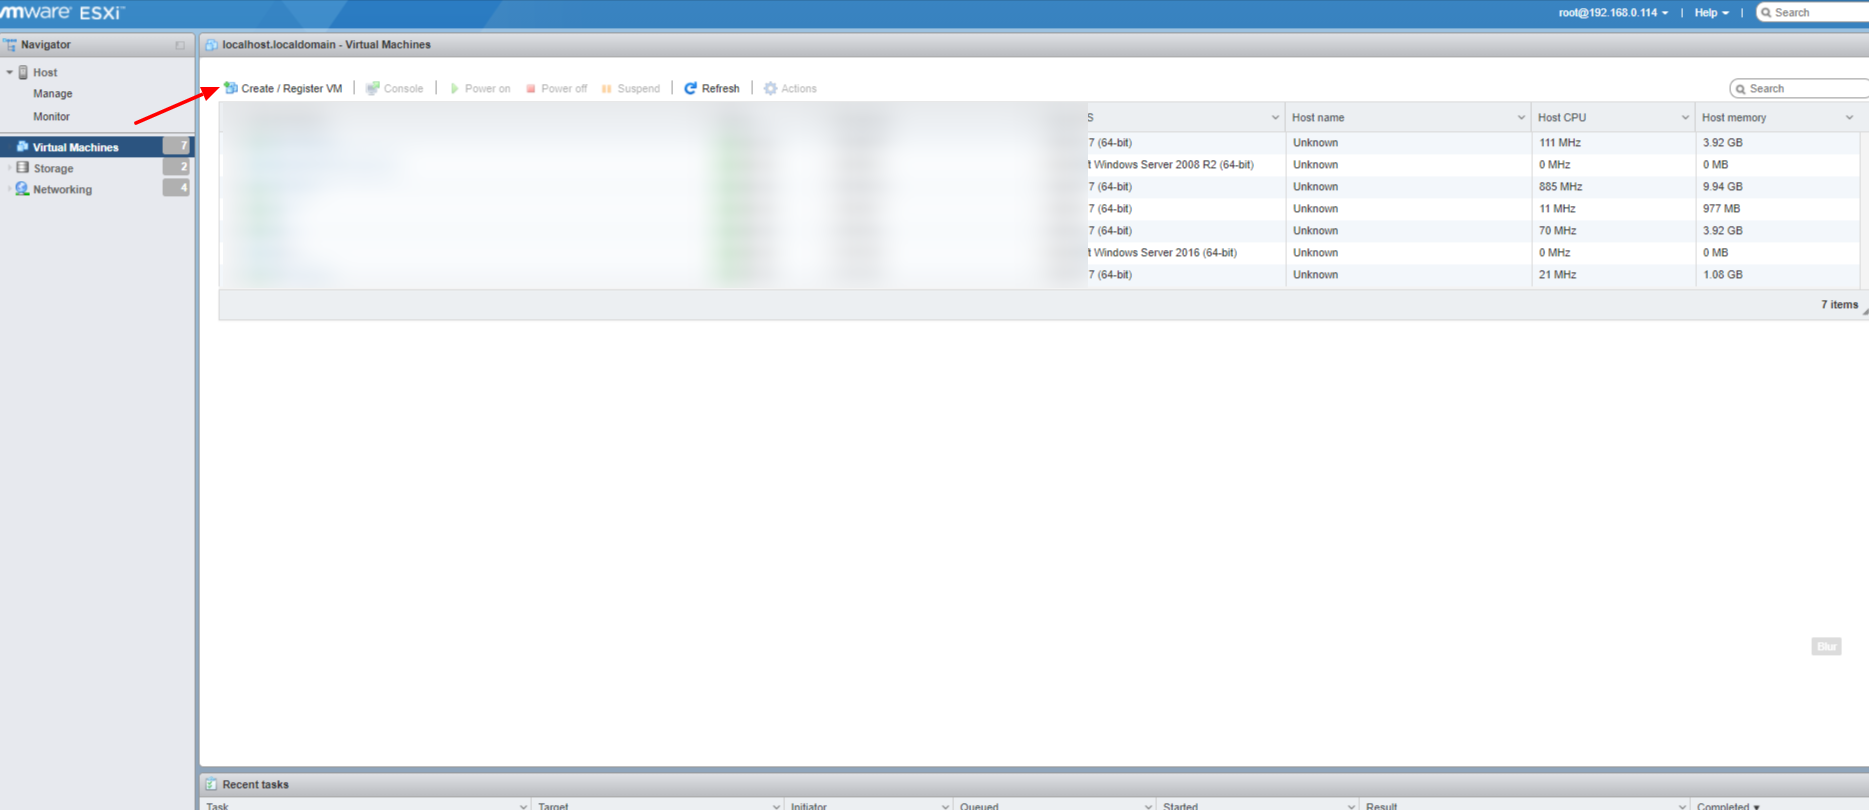
Step 4. Create a VMware ESXi Virtual Machine for Ubuntu-20.04 Installation
1. Click on the Create / Register VM

2. Then select the option to Create a new virtual machine and click on Next.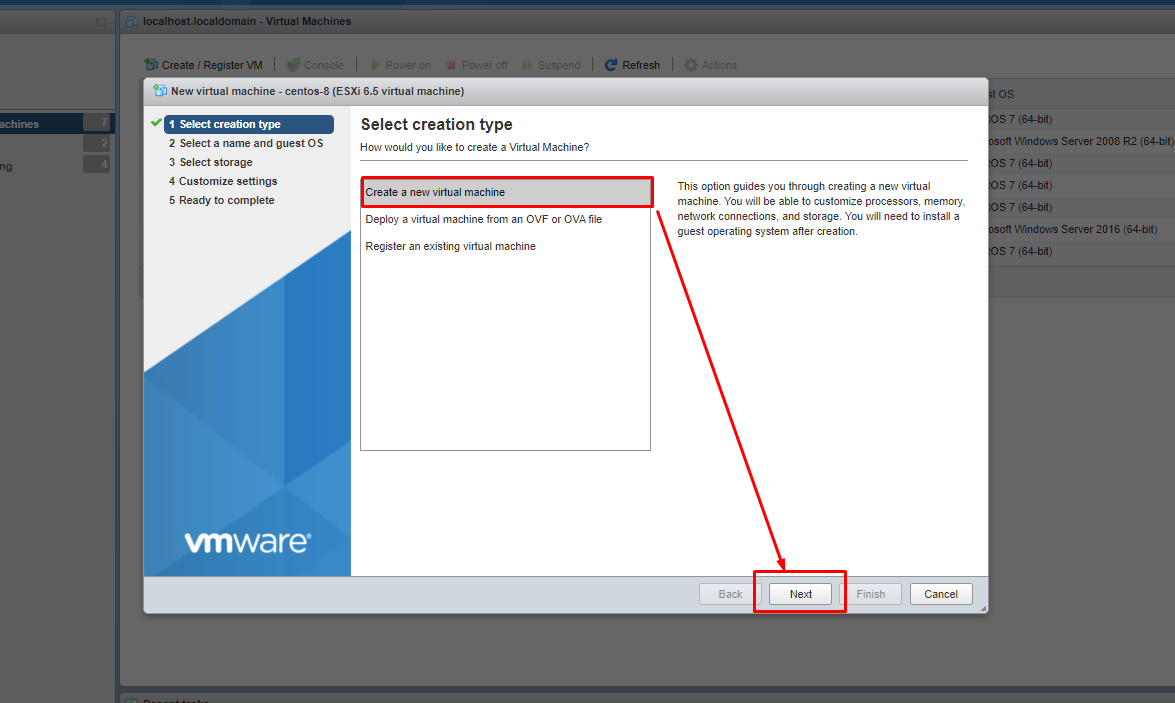

3. Enter VM name and select the Guest OS family to Linux and Guest OS version to Ubuntu Linux (64-bit). Then, click on Next.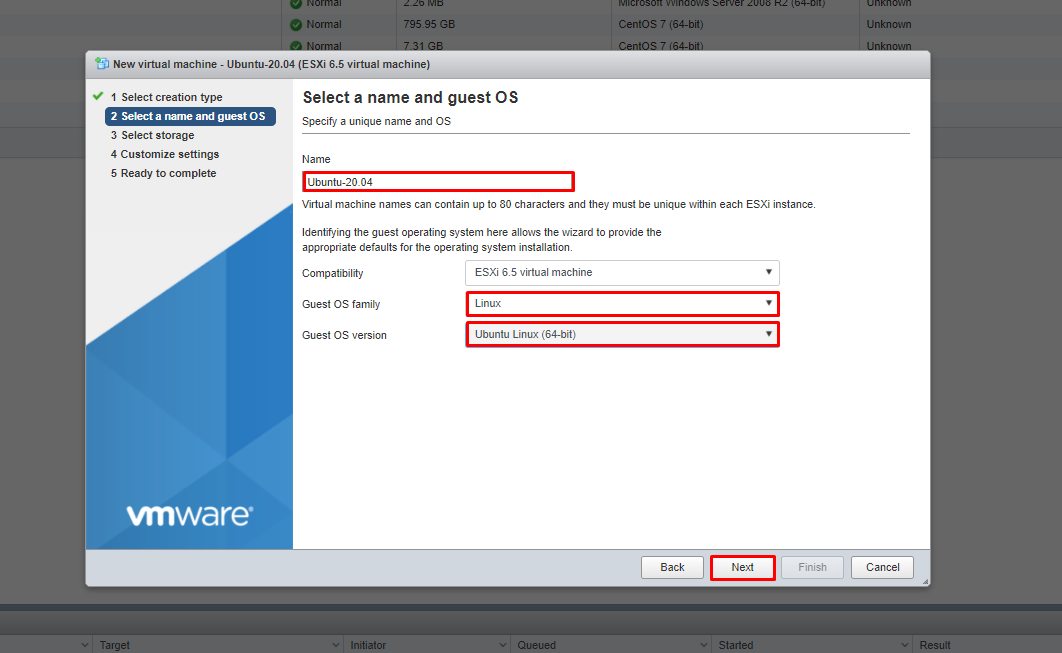

4. Select the datastore and click on Next.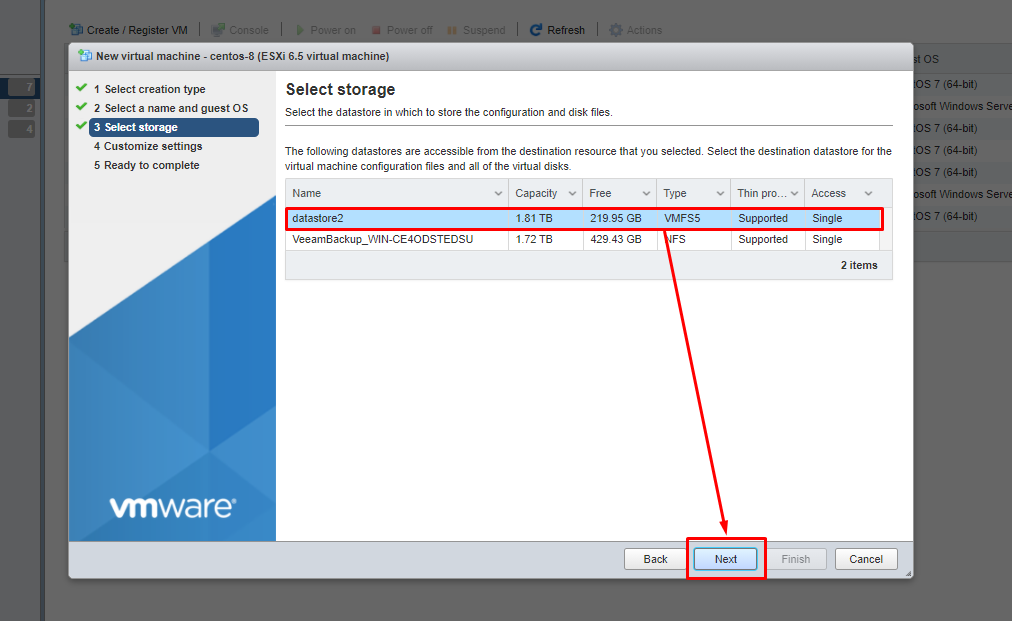

5. Configure the virtual machine hardware and click on CD/DVD Drive 1 and browse the Ubuntu-20.04 ISO file from the datastore. Click Next.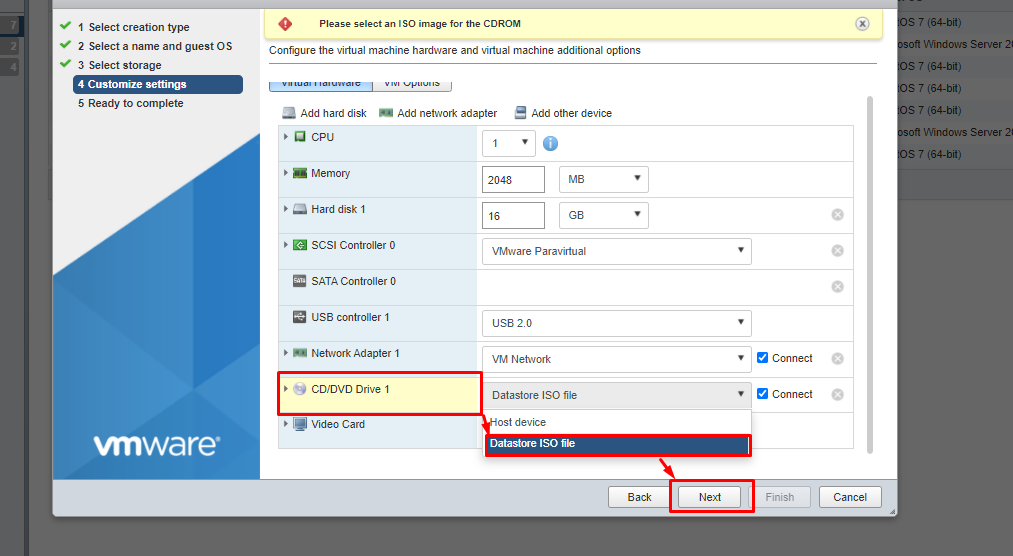

6. Then choose the ISO file.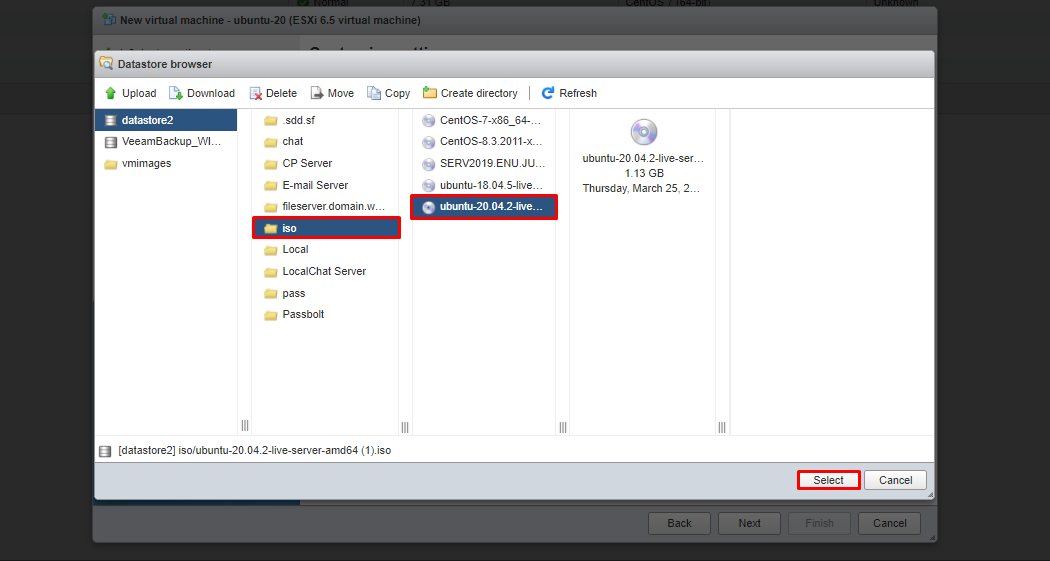

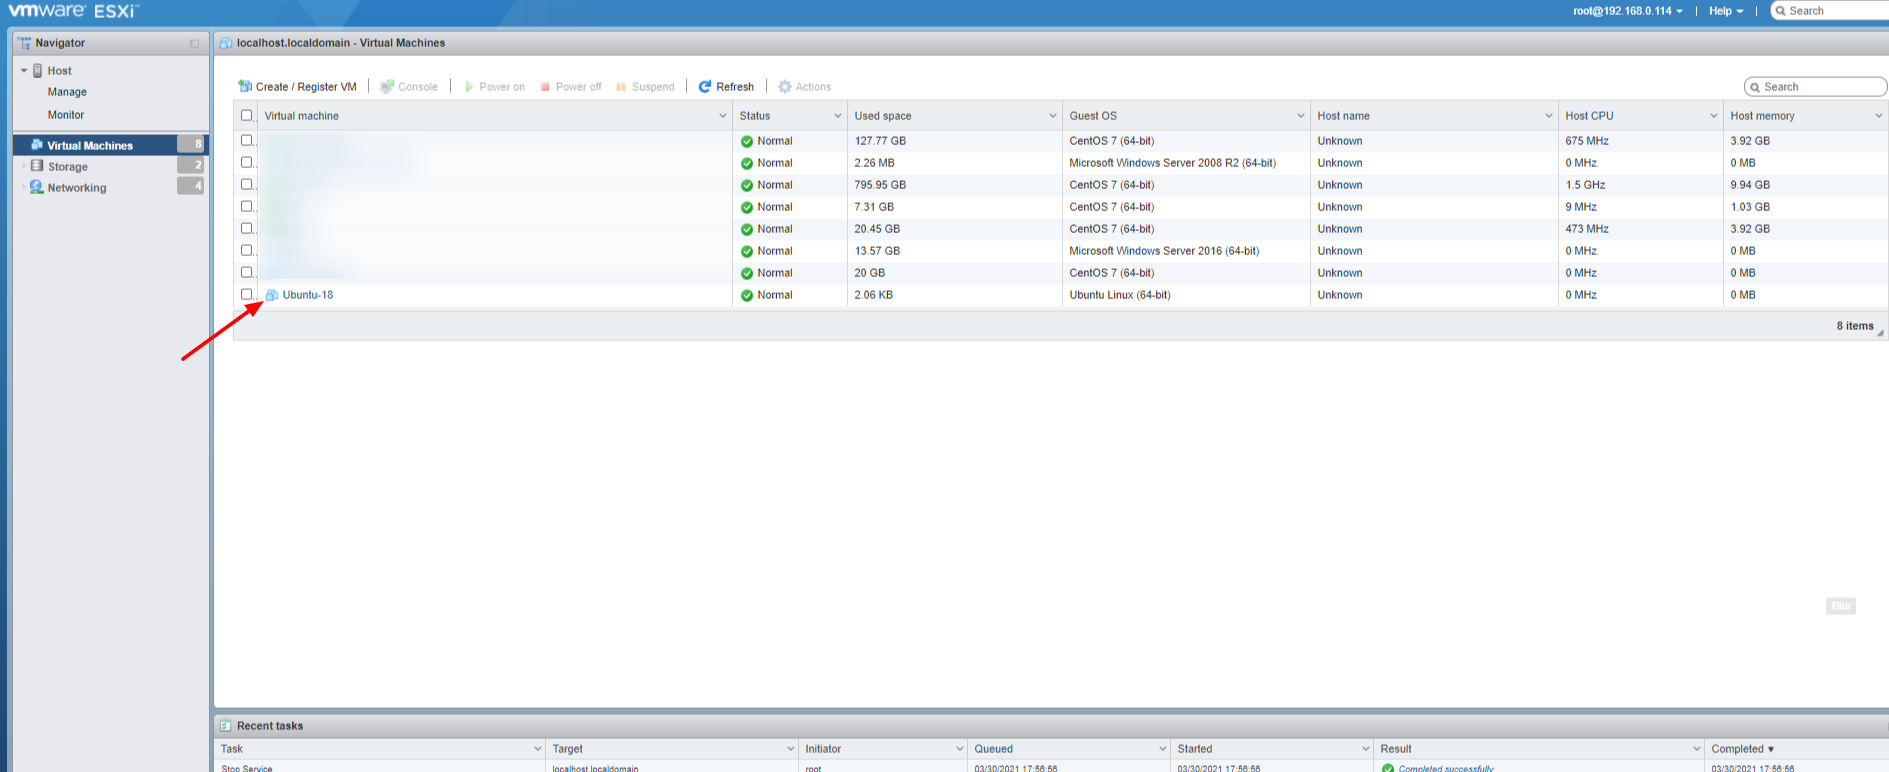
7. Once done with the above steps click on Next >> FinishNow the new VM should be created on your VMware-ESXI. Click on Virtual Machine

-
-
-
-
-
-
-
Step 5. Installation of Ubuntu-20.04 Operating System
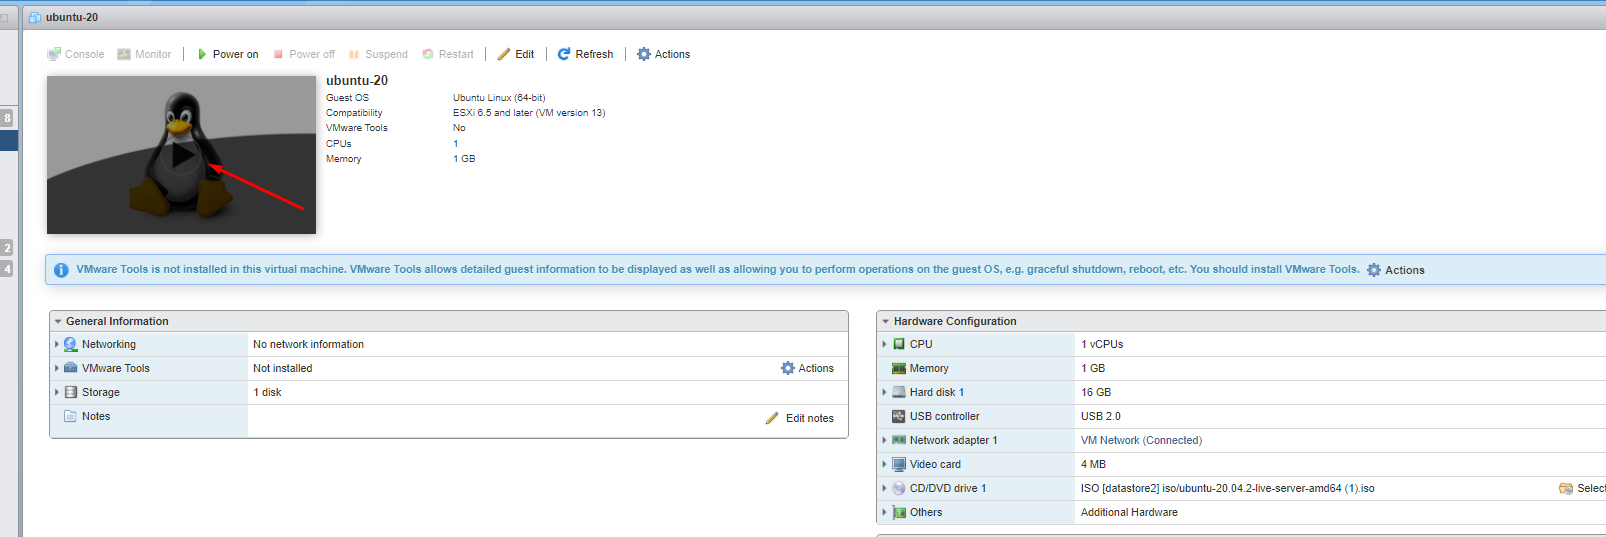
1. For the installation of OS, click on the VM or Power On button

2. Now installation is initialized, then only select language and press Enter.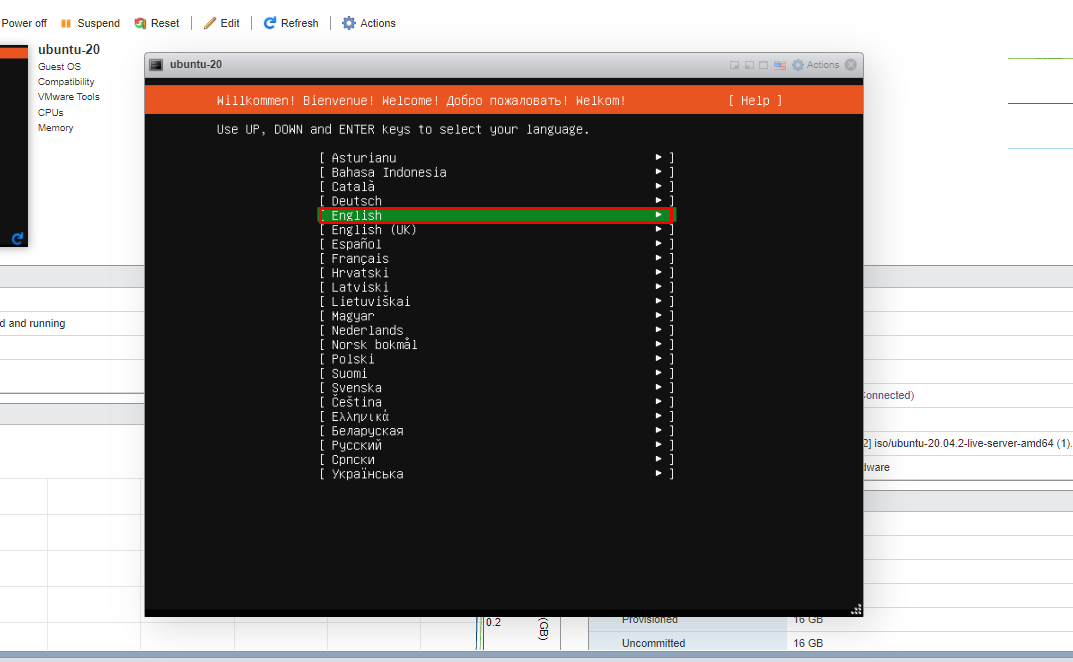

3. Press Enter on the interface ( ens160 ) to configure the IP address.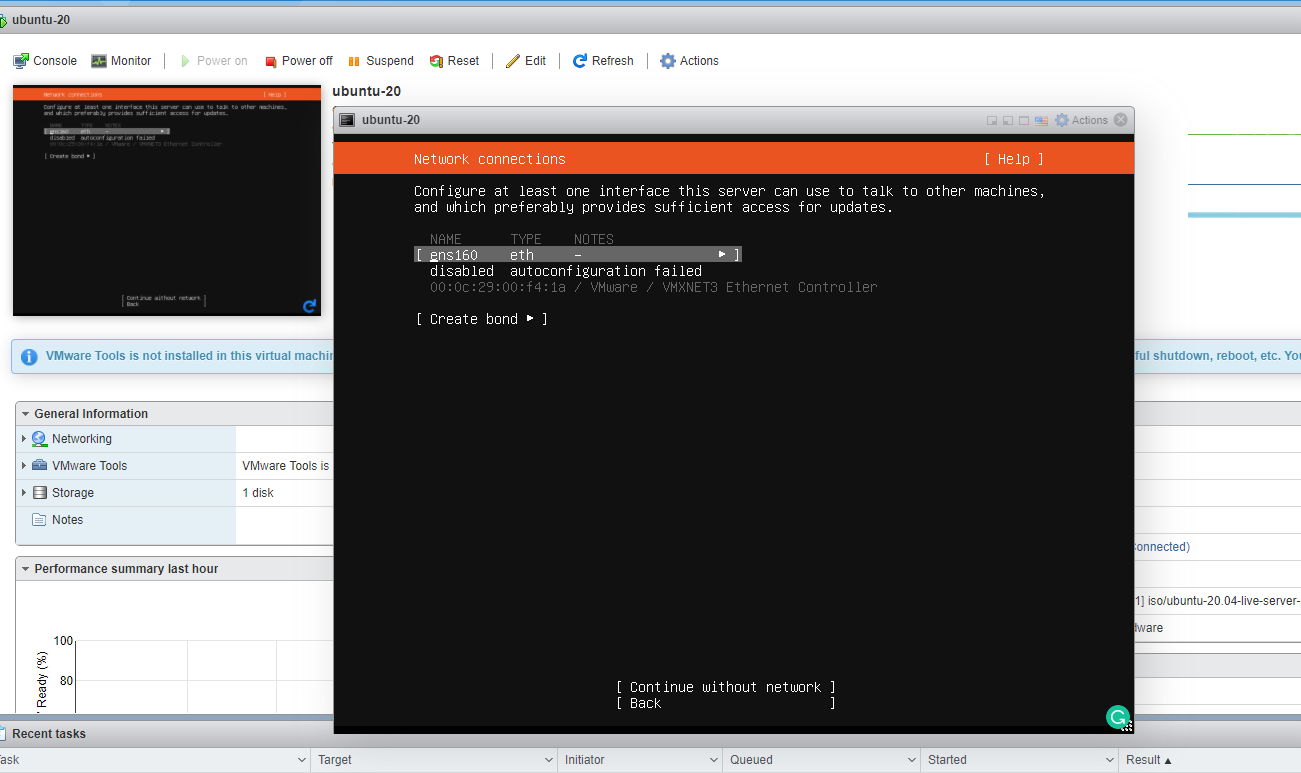

4. Then, click on the Edit IPv4 option.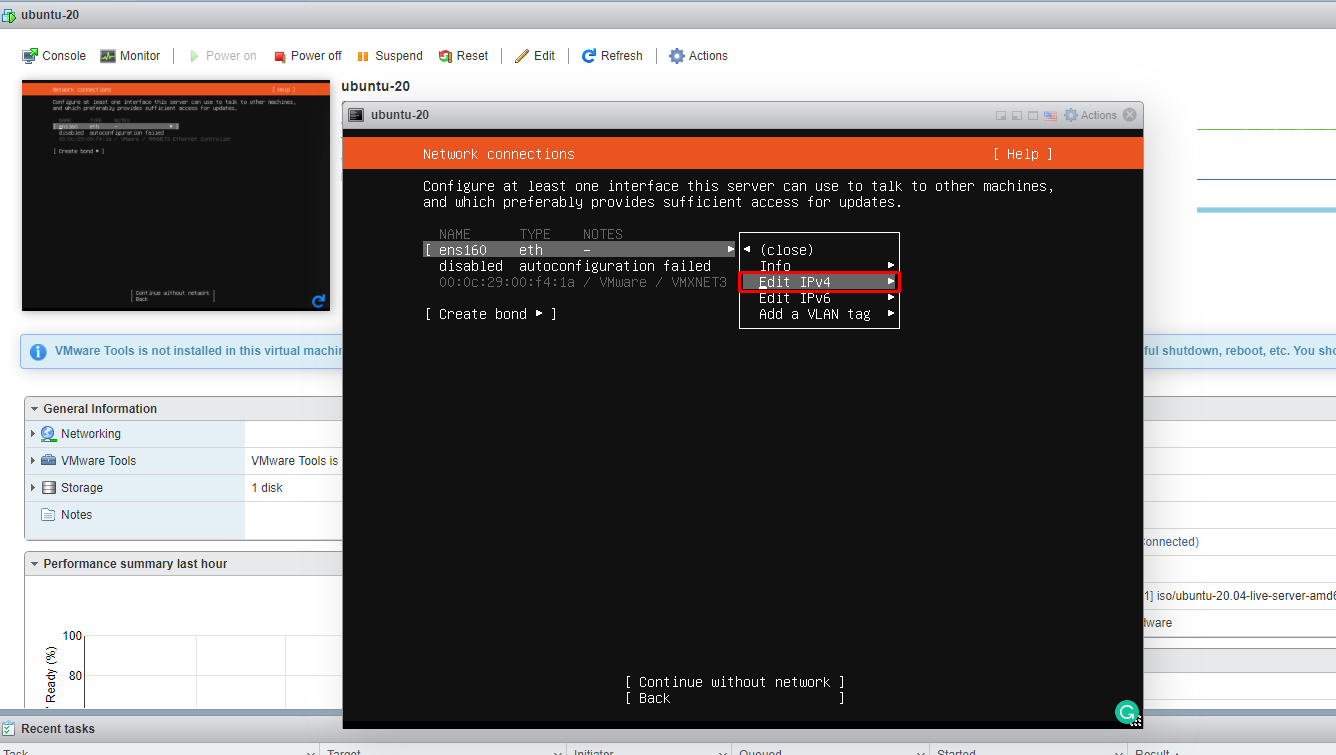

5. Choose the manual option under IPv4 Method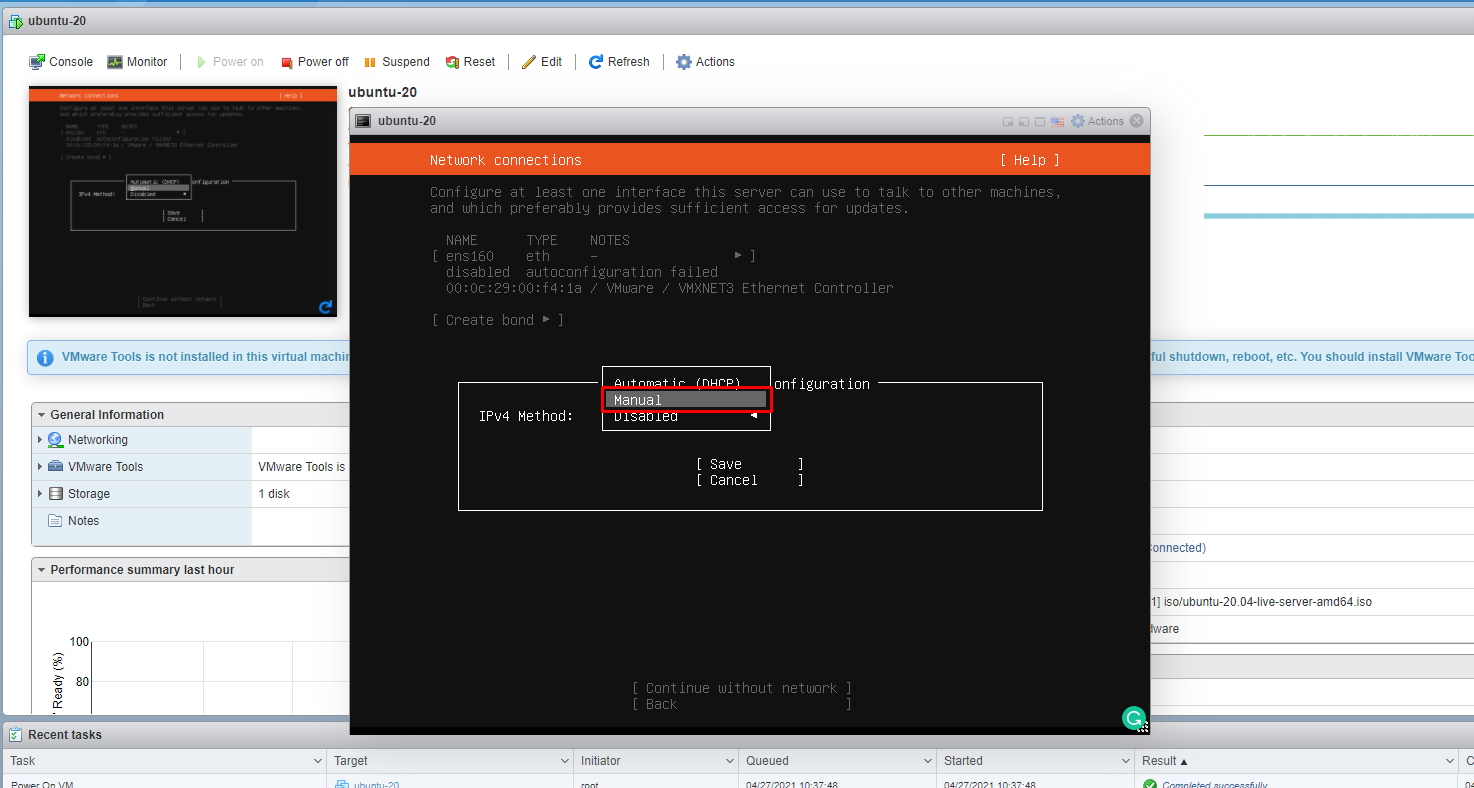

6. Now configure the IP addressing according to your network. Hit the Save button.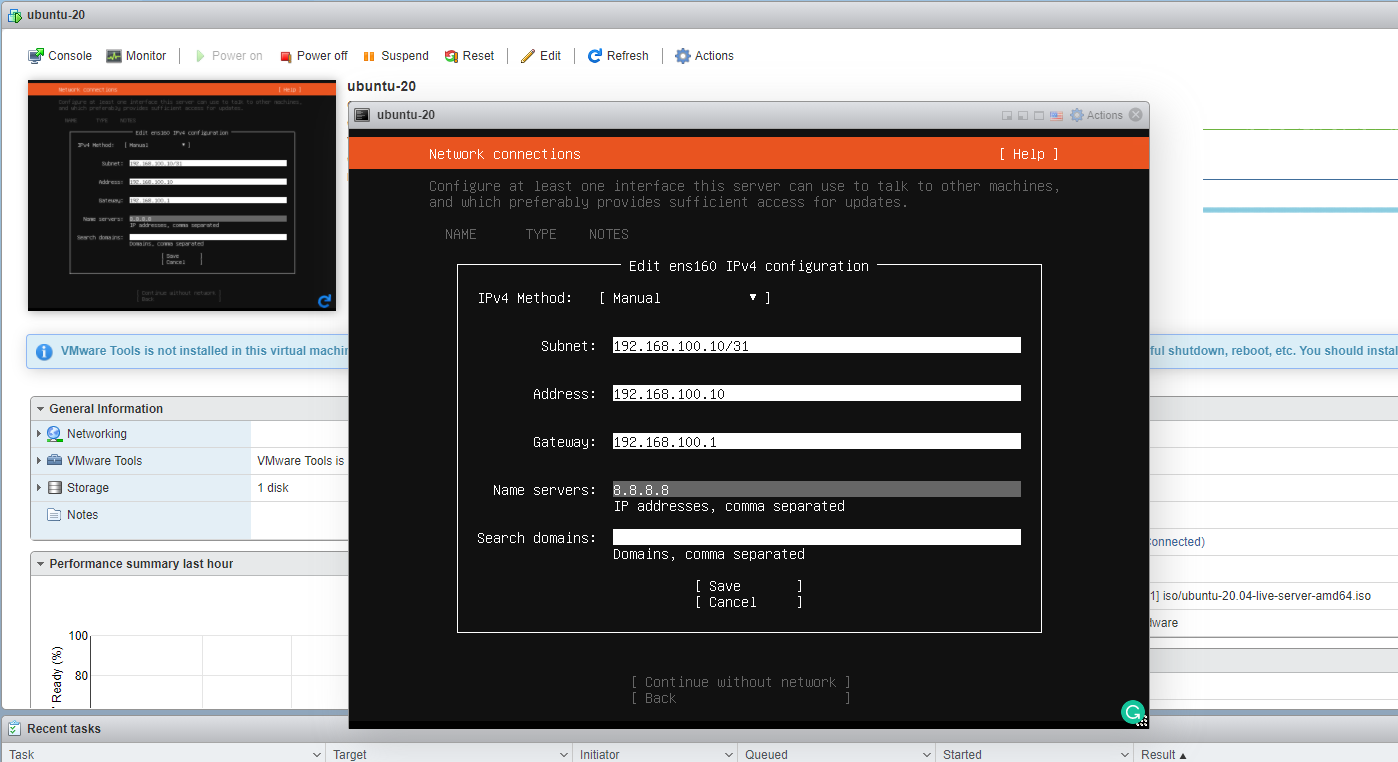

7. Enter the Continue button.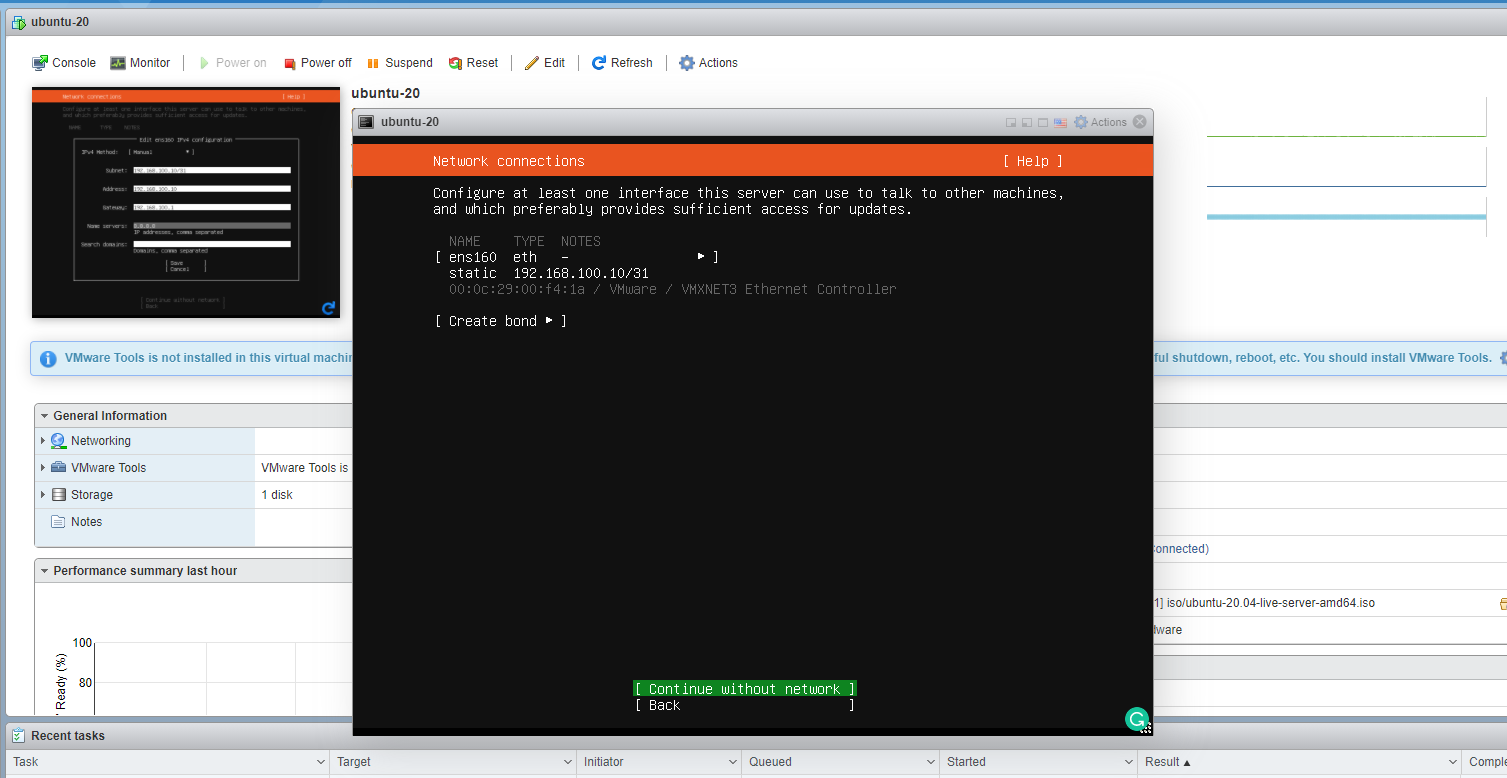

8. Now configure the Storage Configuration. Select the option Use an entire disk and
Click on Done

9. Again hit the Done button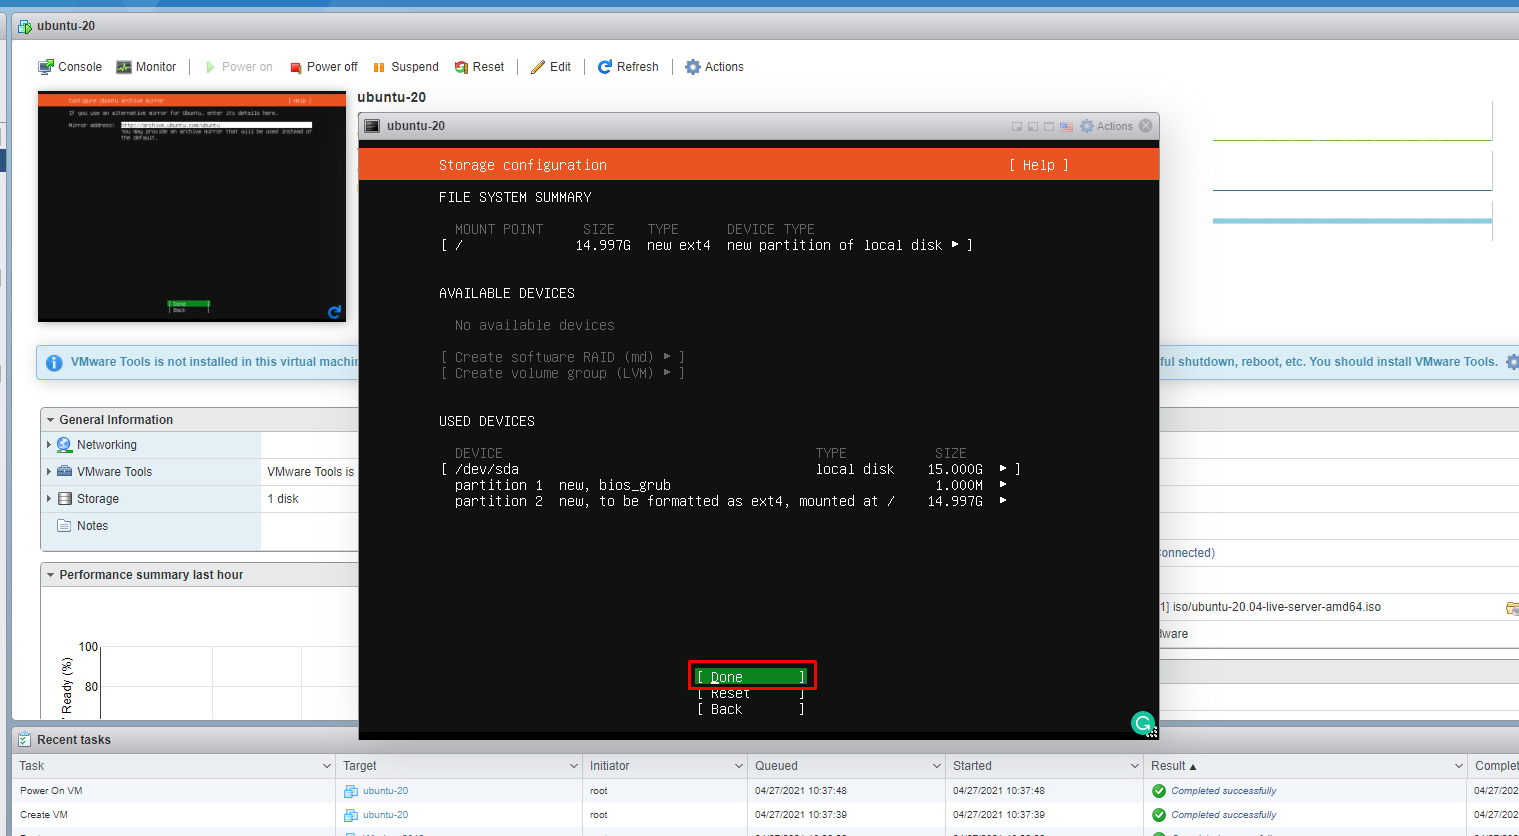

10. Select the username and password for Profile Setup and click the Done button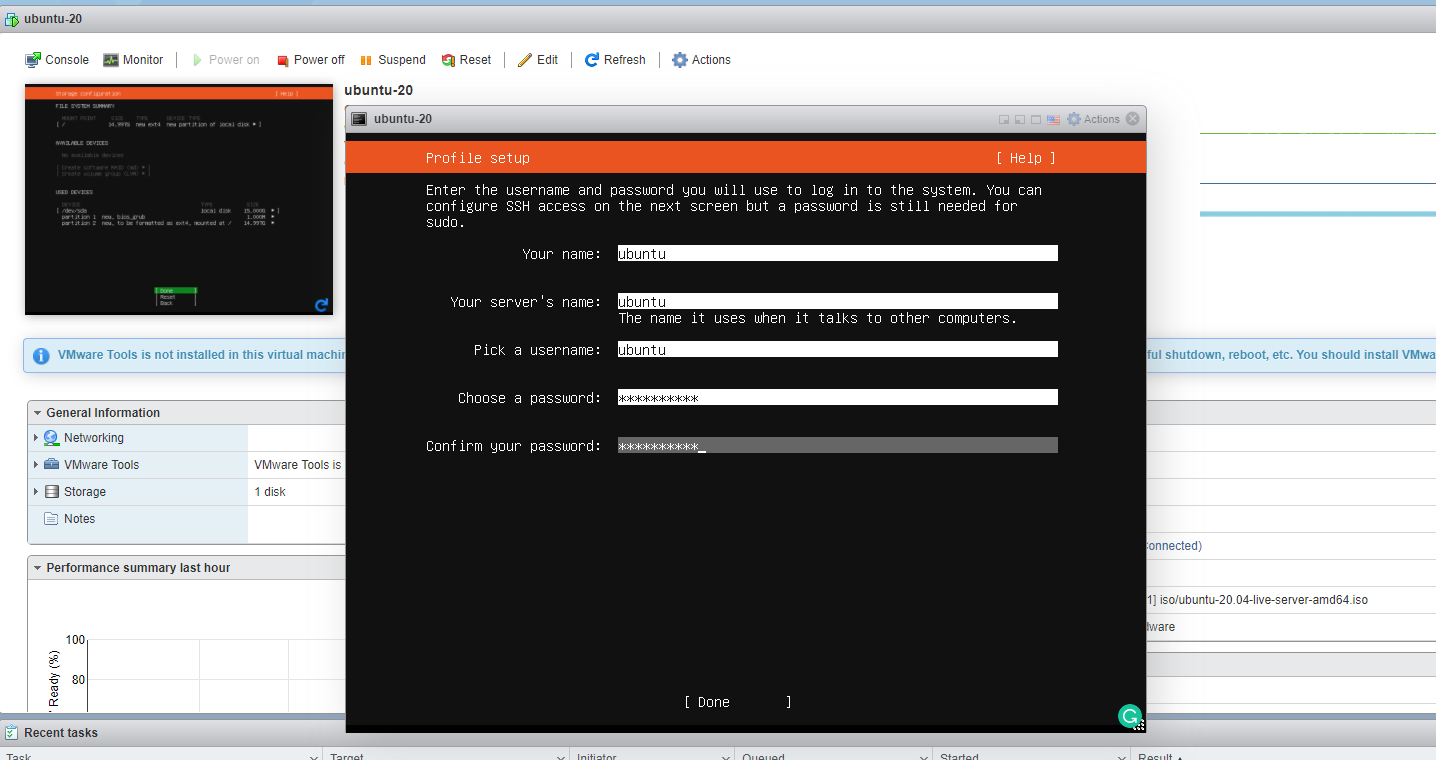

11. For SSH access, press the space button on the Install OpenSSH server and press Enter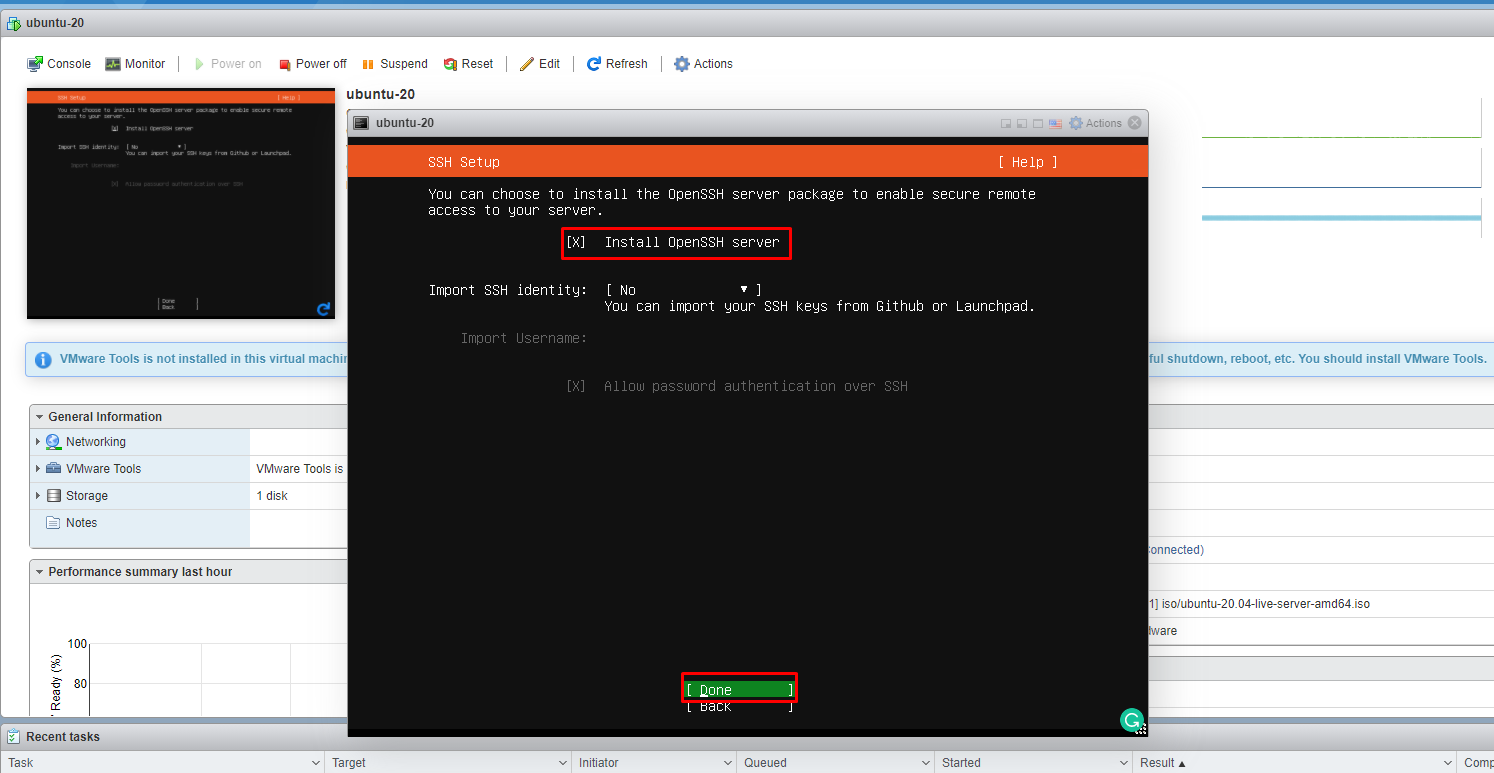

12. Now installation is complete, press the Reboot Now Button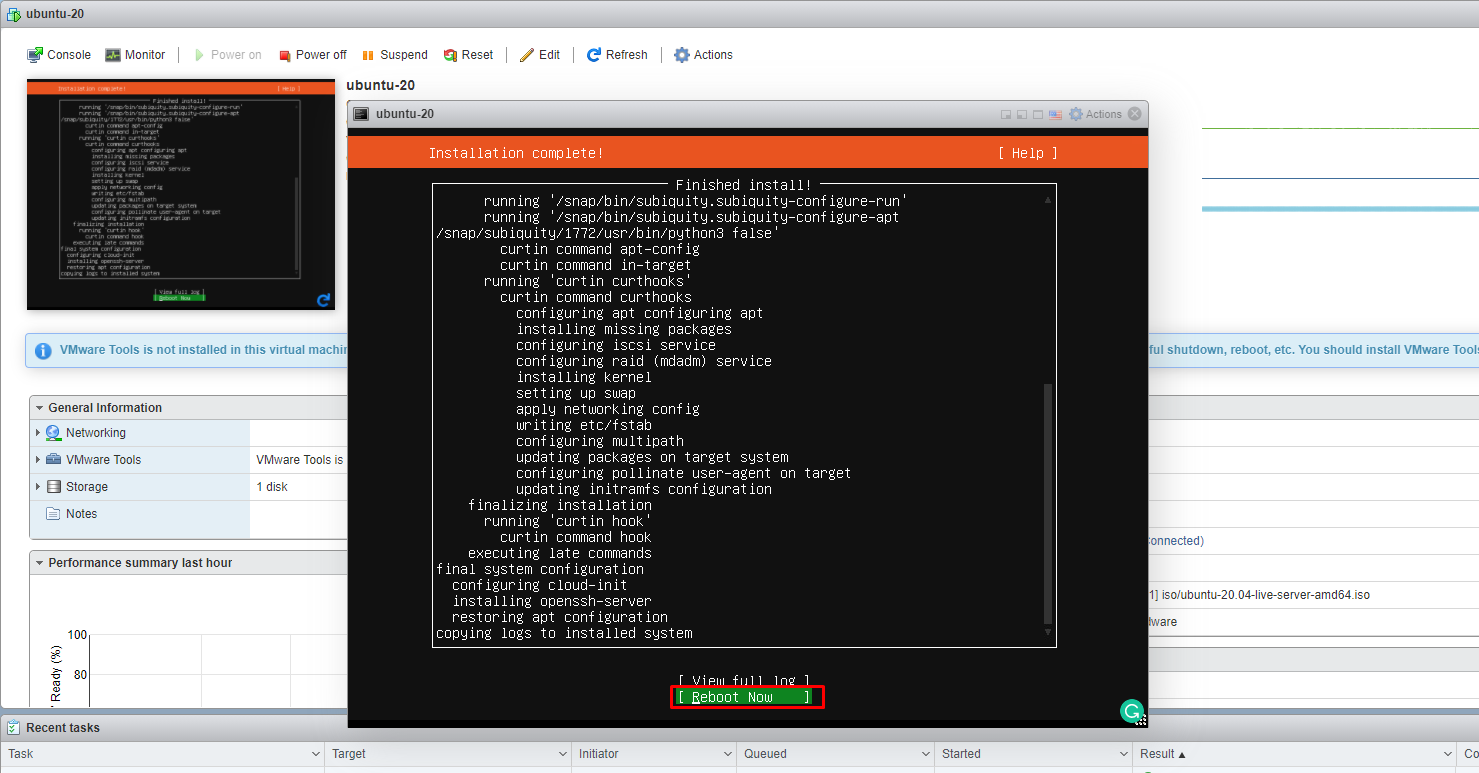

-
-
-
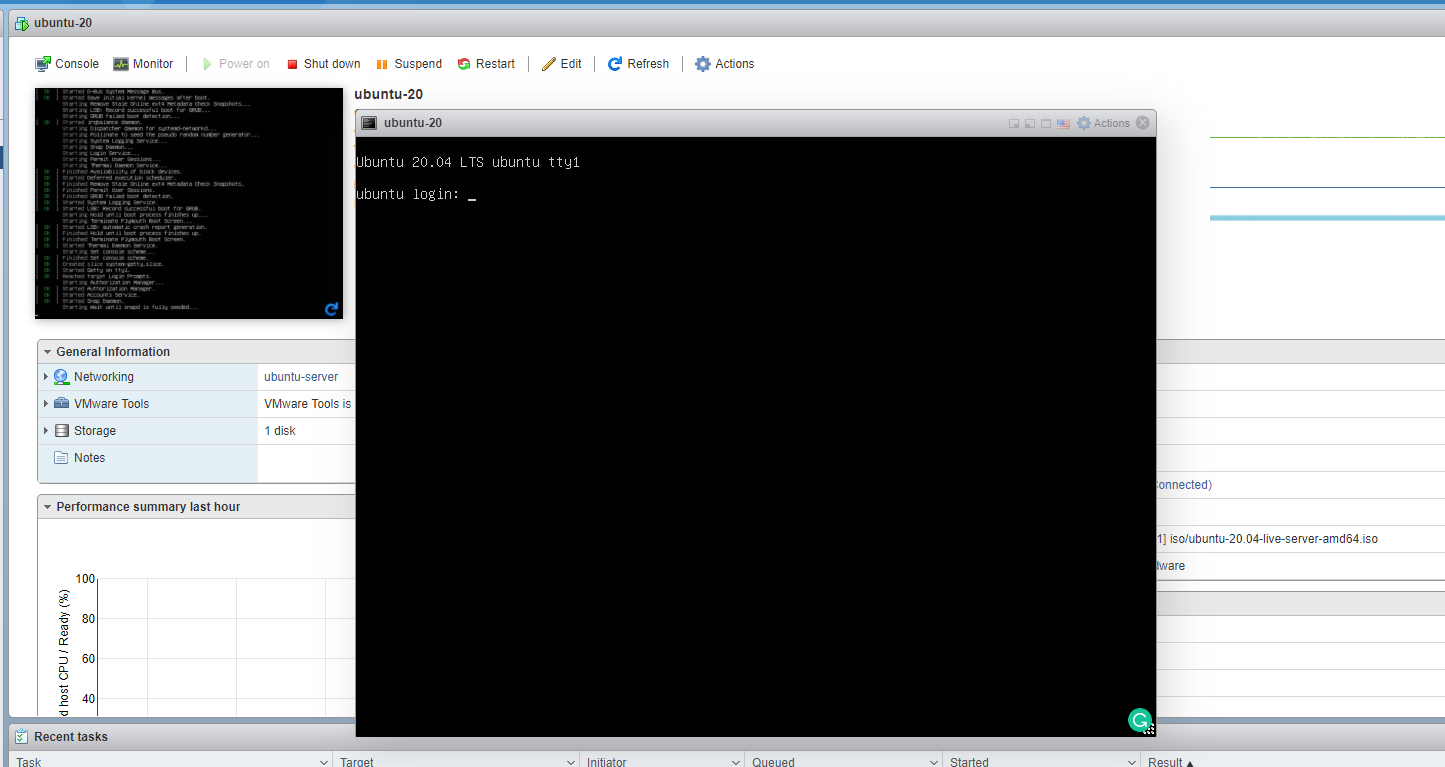
Note: After all the steps, the Virtual Machine is ready to boot Ubuntu-20 from the virtual hard drive. Here enter the username and password.
-
-
-
-
Step 6. Installation of VMware Tools on Ubuntu-20.04 VMware Virtual Machines
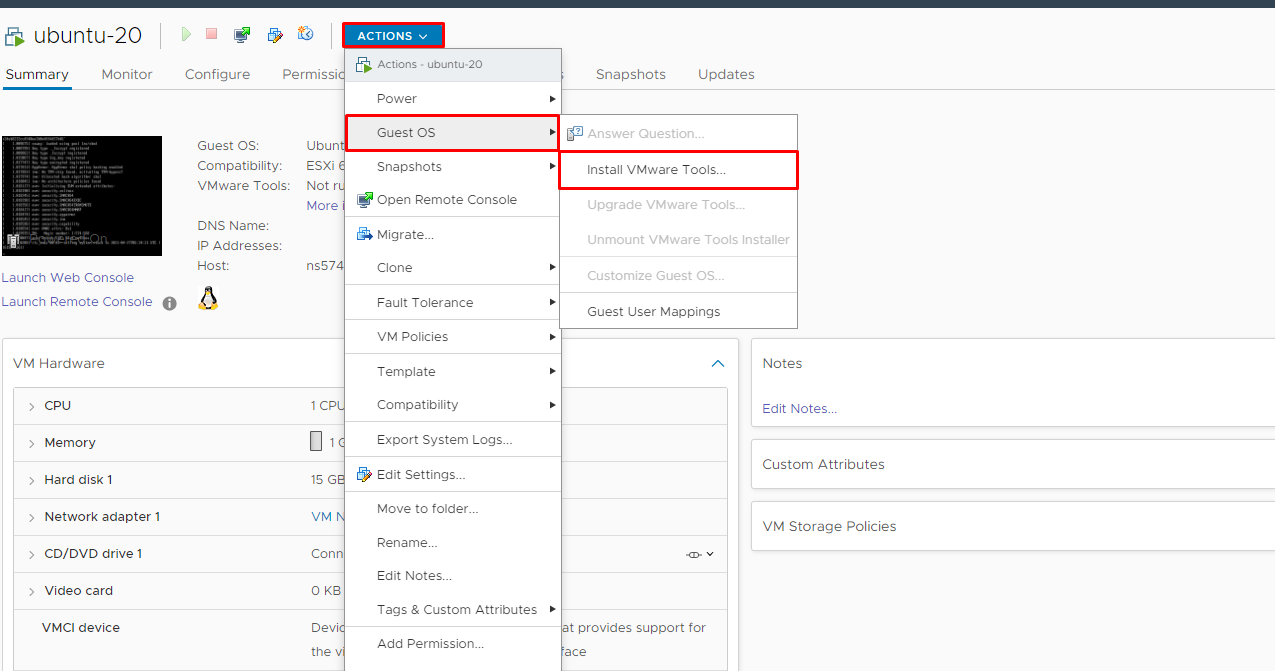
1. On VMware ESXI, click on the Action button > Guest OS > Install VMware Tools. After the Install VMware Tools option, CD-Drive is automatically connected with your OS.

2. Confirm the CD-Drive is connected properly. Run the below command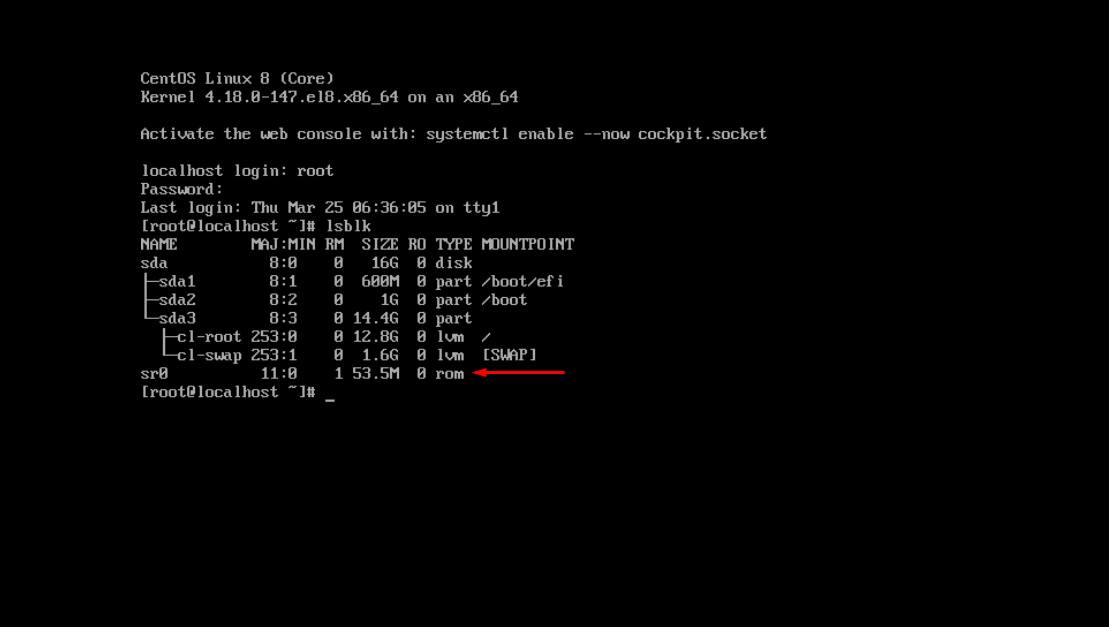

3. After confirmation, execute the following command:-
# mount /dev/sr0 /mnt
# lsblk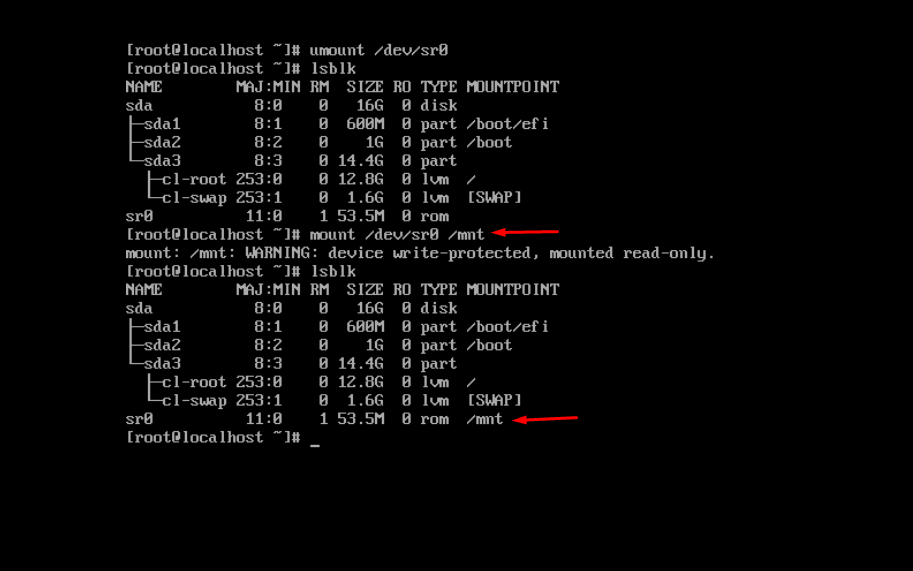

4. After the CD-Drive is mounted on /mnt directory, run the below command:-
# cp -rv /mnt/VMwareTools-10.3.23-17030940.tar.gz /tmp
# ls /tmp

5. Extract the VMwareTools-10.3.23-17030940.tar.gz file in /tmp directory.
Run the below command.
# cd /tmp
# tar -xvzf VMwareTools-10.3.23-17030940.tar.gz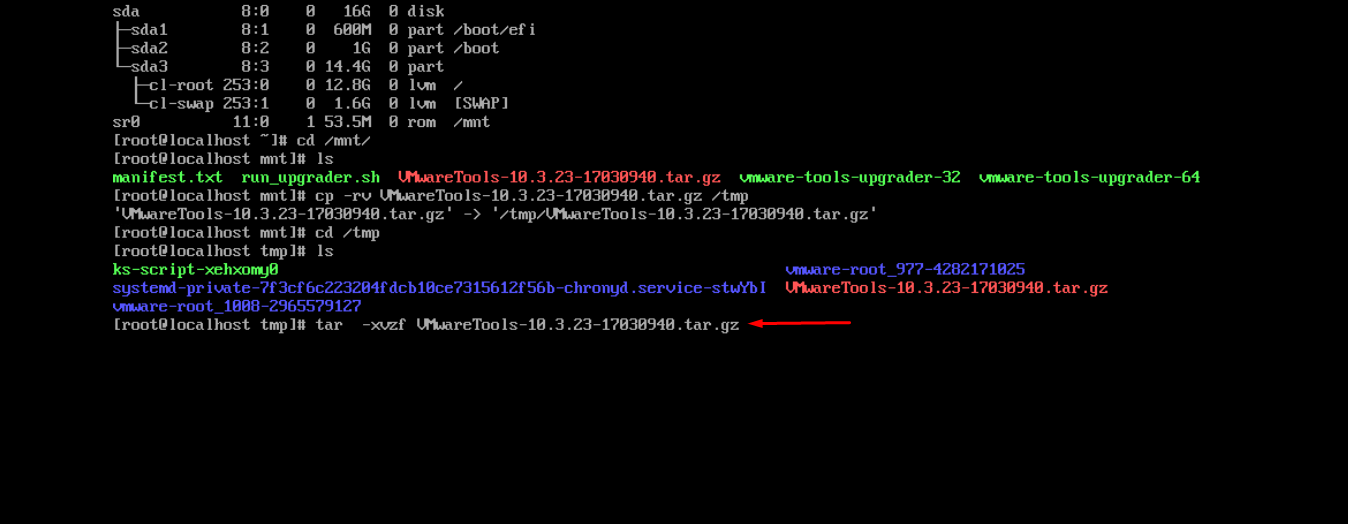

6. Once done with extracting the file, you need to run the script under /tmp/vmware-tools-distrib directory.
Execute the command that are mentioned below:-
# cd /tmp/vmware-tools-distrib
# ./vmware-install.pl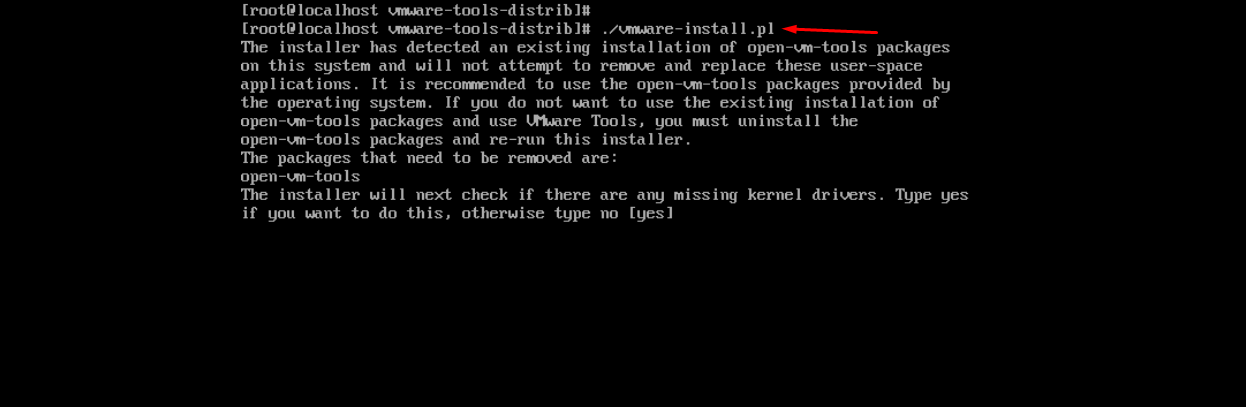

-
-
-
-
-
-
-
Step 7. Check whether VMware tools are installed or not. Run the below command
# systemctl status vmware-tools
OR
# systemctl status open-vm-tools
# systemctl start vmware-tools
# /etc/init.d/vmware-tools status
# /etc/init.d/vmware-tools start!!!!! Reboot the Virtual Machine by running the command > init 6 !!!!!
-
-
-
-
-
-
-
Step 7. Convert the Virtual Machine to Template
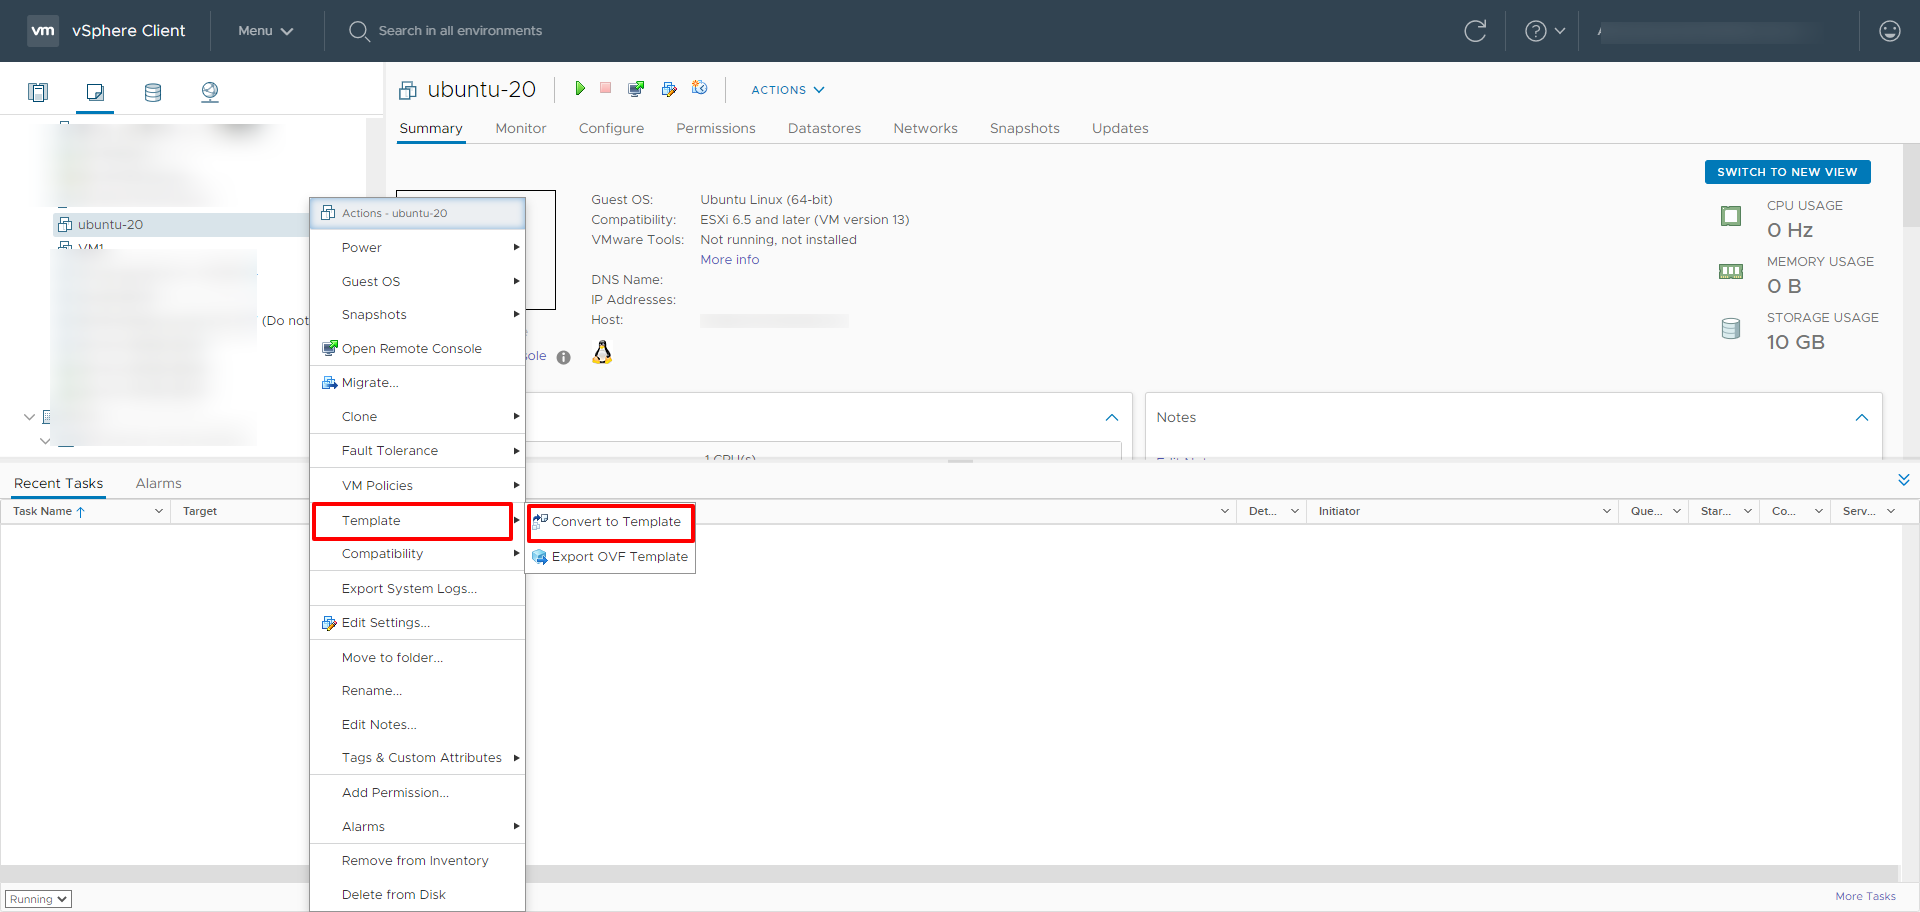
After the installation of the virtual machine and VMware tools on it. We are going to convert the virtual machine to a template.
1. Go to your Vcenter server.
2. After login you can see your virtual machine under the VMware-ESXi (host).
Right-click on the virtual machine, then go to the Template option and choose the Convert to Template.

…And you are done!
-
-
-
What are the Common Issues and Troubleshooting?
- Ensure that the correct network adapter is selected in the VM settings.
- Verify that the IP address configuration is correct and matches your network settings.
- Check if the network services are running on the Ubuntu VM.
- If VMware Tools do not install correctly, ensure that the CD drive is properly connected and that you are using the correct version of VMware Tools for your version of Ubuntu.
- Check the logs for any errors during the installation process.
- If the VM does not boot from the virtual hard drive, ensure that the boot order is set correctly in the VM settings.
- Verify that the installation of Ubuntu was completed successfully.
- Ensure that the VM has adequate resources allocated (CPU, memory, disk space).
- Monitor the performance metrics in VMware to identify any bottlenecks
Conclusion
In summary, creating a VM template using Ubuntu 20 offers a streamlined and efficient approach to deploying virtual machines. Utilizing templates ensures consistency, stability, and ease of management in virtual environments. Additionally, installing VMware Tools enhances performance and integration, making automation more effective.